


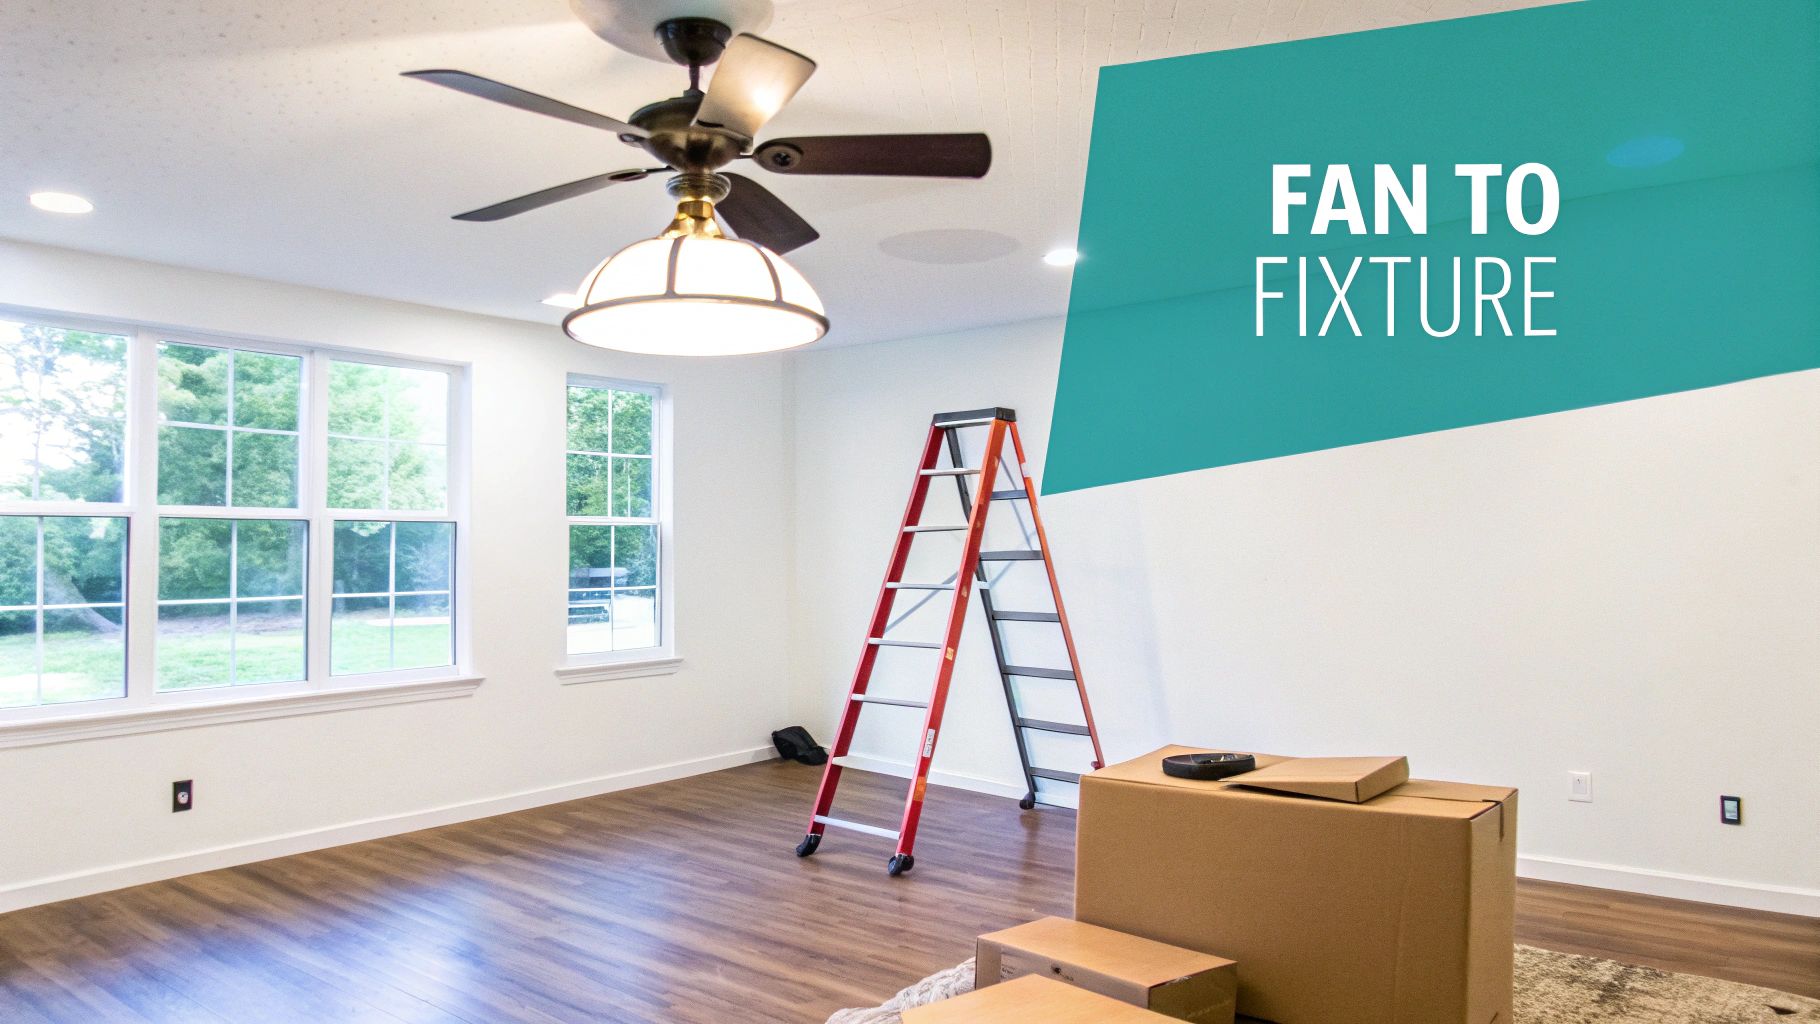
How to Change a Ceiling Fan to a Light Fixture: Your Ultimate DIY Guide
Ready to finally ditch that wobbly, dated ceiling fan for a light fixture that actually elevates your style? Let's be real, it’s one of the most satisfying DIY upgrades you can make, and it’s completely within your reach. The whole process boils down to a few key stages: killing the power (the most important step!), saying a final farewell to the old fan, making sure the electrical box is up to snuff, and then the grand finale of wiring and mounting your new, fabulous light.
From Dated Fan to Dazzling Fixture
Let's be clear: swapping a ceiling fan for a light fixture isn't just a simple exchange of hardware. You're completely changing the vibe of the room. It’s a move away from the broad, often dim light of a fan combo to focused, intentional lighting that can truly define a space. Think of it as a fundamental shift in your room’s atmosphere—like trading in a minivan for a sports car. Both get you there, but one does it with a lot more flair.
This guide is your roadmap. We’ll walk through every milestone, giving you the confidence to get this project done safely and without any headaches. Consider this your pre-game consultation before you even think about touching a wire.
Your Project At a Glance
Before you start pulling out tools, here’s a quick look at what you're getting into. This table gives you a ballpark idea of the time, money, and skill needed for this weekend project.
| Parameter | Estimate |
|---|---|
| Project Time | 2-4 hours |
| Estimated Cost | $300 - $1,000+ (depending on fixture) |
| Skill Level | Intermediate DIY |
Of course, these are just estimates. If you run into tricky wiring or need to replace the entire electrical box, your time and cost could go up. But for a straightforward swap, this is a pretty reliable forecast.
Why Make the Switch?
The reasons for wanting to replace a ceiling fan are almost always a mix of practical and aesthetic. Let's be honest, a lot of older fans are noisy, unbalanced, and just don't fit with a modern look. Plus, the light kits on them are notoriously bad, casting weird shadows and making a room feel gloomy.
-
Elevated Style: Replacing a clunky fan with a sleek pendant or a dramatic chandelier instantly upgrades a room's entire design. It becomes a focal point, not just a utility.
-
Better Illumination: A dedicated light fixture is built to do one thing well: light your room. You get to choose the exact type of lighting you need—ambient, task, or accent—which is something a fan-light combo almost never pulls off.
-
Modernizing Your Space: Swapping out fixtures is one of the fastest ways to make a home feel current. Today's ceiling fan design trends are all about minimalist profiles and smart features, a world away from the old pull-chain models.
This project is really about taking control of your home's ambiance. You’re moving from a one-size-fits-all appliance to a custom lighting environment that reflects your style and improves how you actually live in the room.
While fans are still incredibly common—they're found in over 70% of homes—more and more people are seeing the value in separating the jobs of air circulation and lighting. Getting the electrical basics right is the key to making this change happen smoothly, and that's exactly what we're here to help you do.
Choosing Your Tools and Your New Light
Before you even dream of flipping a breaker, we need to talk prep. I've seen it a hundred times: a successful weekend project is 90% prep and only 10% execution. Having the right tools laid out and a stunning new fixture ready to go is the secret to getting this done smoothly and without a headache. This is where you set yourself up for a win.
Getting your gear together is step one. You don't need a professional workshop, but a few items are absolutely non-negotiable for doing this job safely and getting it right the first time.
Assembling Your DIY Toolkit
Your basic toolkit for this job will cover both the electrical safety side and the mechanical bits of taking down the old fan. You probably have most of this stuff in your garage already, but there's one tool you absolutely cannot skip.
- Non-Contact Voltage Tester: This is your best friend for any electrical project. It’s the only way to be 100% certain the power is off before you touch a single wire. Never, ever trust just the wall switch.
- Sturdy Ladder: You're going to be working overhead with your arms up. A stable step ladder that lets you work comfortably at ceiling height is a must-have. No wobbly chairs!
- Screwdrivers: A good multi-bit screwdriver is perfect here. You'll need both Phillips and flathead tips for getting the old fan down and putting the new light's mounting bracket up.
- Wire Strippers/Cutters: These are essential for getting clean, new ends on your wires. A clean strip means a secure connection.
- Pliers: A pair of linesman's or needle-nose pliers will make twisting wires together a breeze before you cap them with wire nuts.
I can't stress this enough: a common mistake is just flipping the wall switch and assuming the power is off. Always use your voltage tester directly on the wires inside the ceiling box. It’s a five-second check that prevents a world of hurt.
Selecting a Fixture That Steals the Show
Okay, now for the fun part—picking out the light that will completely change the feel of your room. Moving from a clunky fan to a dedicated light fixture is your chance to make a real design statement. You're not just installing an appliance; you're hanging a piece of art that also happens to light up the space.
Forget the generic stuff you see everywhere. This is an opportunity to install a real centerpiece. For a touch of that wow factor, the Orion Nebula Chandelier ($950) throws an incredible, starry pattern of light that can turn a dining room or entryway into something truly special.
If your style is more clean and modern, something like the Copenhagen Pendant Light ($600) offers a beautiful, understated sophistication. Its minimalist design is perfect for focused, ambient light over a kitchen island or in a quiet bedroom without screaming for attention. You can explore tons of other premium lighting options for your home to find the perfect vibe.
Here’s a crucial pro tip: pay close attention to the fixture's weight. The electrical box in your ceiling has to be rated to hold it. A standard plastic box is often only rated for up to 50 pounds—and sometimes less. Heavier chandeliers and fixtures almost always need a fan-rated metal box that’s anchored directly to a ceiling joist for support. Always check the light's specifications and take a peek at your existing box before you buy. It's the key to a secure installation that will last for years.
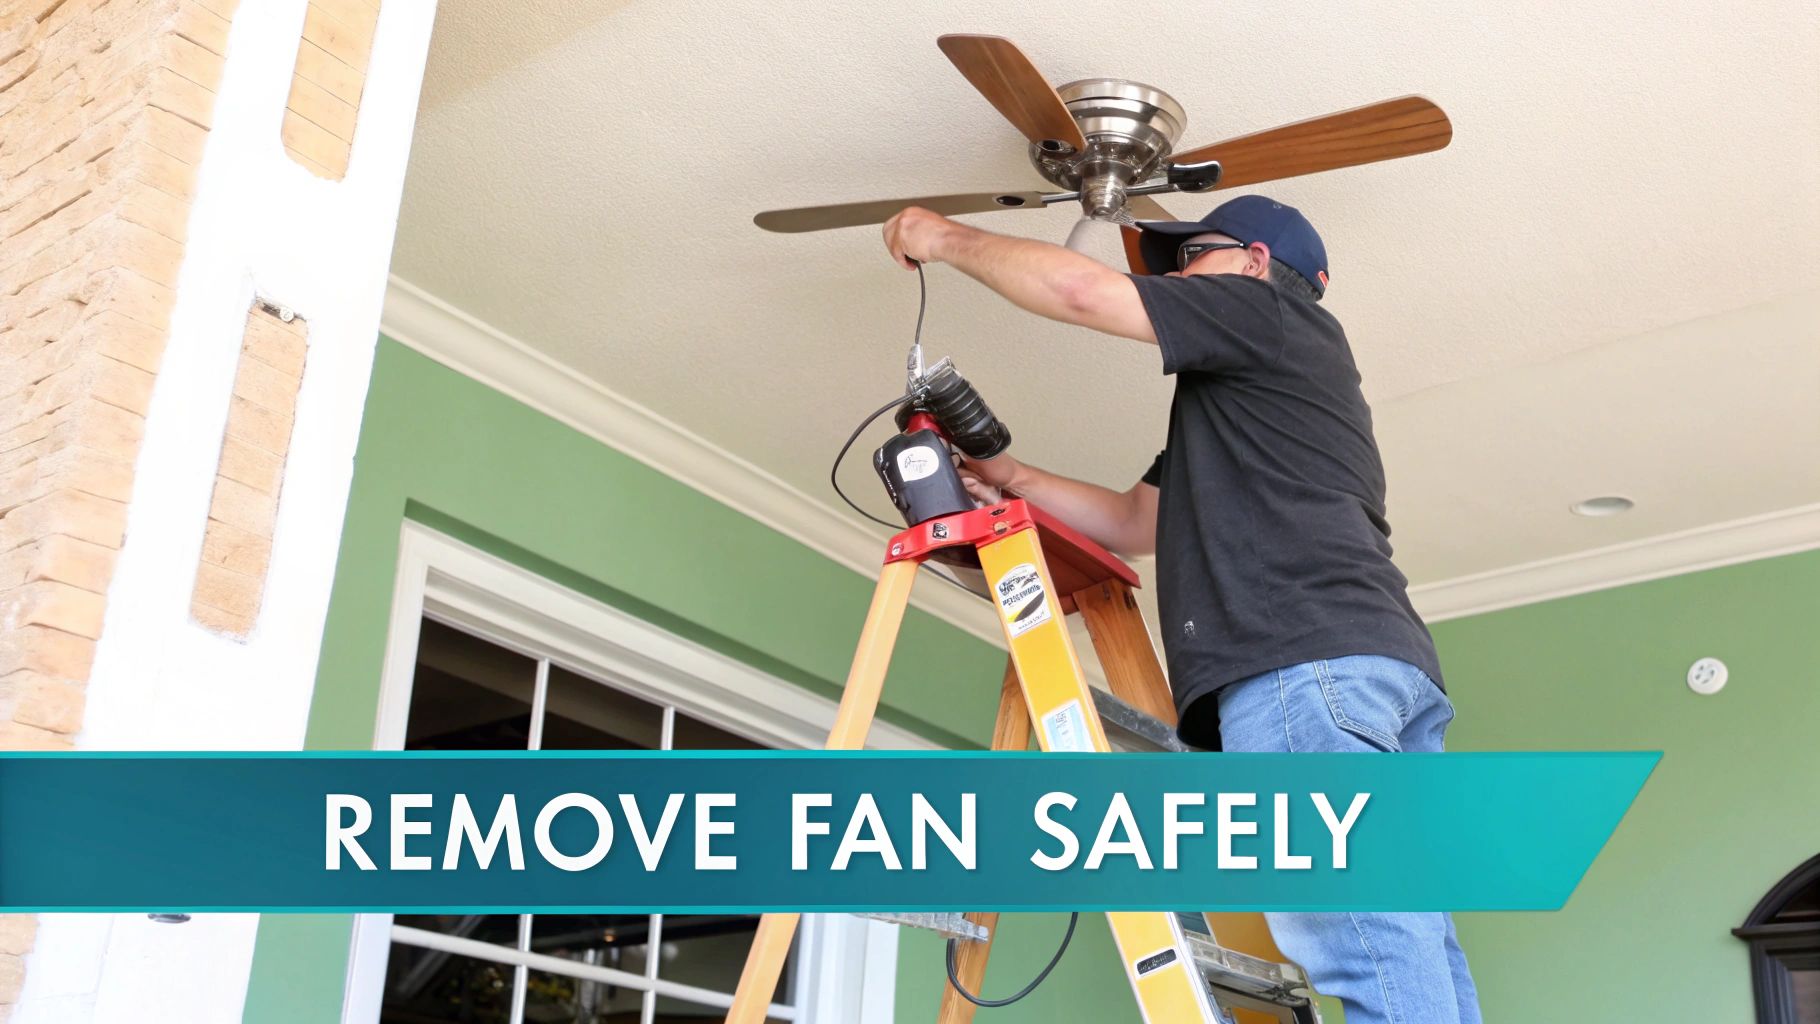
Safely Removing Your Old Ceiling Fan
Alright, it's time for the main event: getting that old, wobbly fan down for good. This part is less about raw strength and more about being methodical. Your absolute number one priority is safety, which means our first stop is the breaker box, not a ladder. Let's do this the right way so the only sparks flying are from your design inspiration.
Confirming the Power Is Off
First things first, head over to your home's circuit breaker panel. If you're lucky, the breakers are clearly labeled. Find the one for the room you're working in and flip it to the "OFF" position.
Now for the most important step of the entire project. Don't skip this. Go back to the room and try the wall switch for the fan. If nothing happens, that's a good sign, but we never assume it's dead. Grab your non-contact voltage tester and carefully bring its tip close to the wires at the ceiling canopy and then check the wall switch. If it stays quiet and doesn't light up, you've officially and safely killed the power.
Pro Safety Tip: I always put a small piece of electrical tape over the breaker I've just switched off. It’s a simple visual cue that stops a well-meaning family member from accidentally flipping it back on while you’re in the middle of things.
The Disassembly Dance
With the power confirmed off, you can start taking the fan apart. Think of it as a reverse puzzle. Working in the right order makes the fan lighter and far more manageable, which is a huge help if you're working alone.
Here’s the breakdown:
- Remove the Fragile Parts: Start by carefully unscrewing and removing any glass shades or light bulbs. Set them somewhere safe and out of the way.
- Unbolt the Blades: Next, use your screwdriver to take off the screws holding each fan blade to its bracket. Removing the blades instantly makes the unit less bulky and much lighter.
- Lower the Canopy: The canopy is the decorative cover hiding the bracket and wiring. Loosen its screws and slide it down the rod to get a clear view of the electrical connections.
At this point, you're left with the heaviest part: the motor assembly. It can be awkward. A lot of mounting brackets have a small hook specifically designed to hold the motor, letting it hang securely while you disconnect the wires. If yours has one, use it! It's like having a third hand. For a deeper dive, our guide on how to install a ceiling fan safely and easily goes into even more detail on these components.
Once the motor is supported, you can unscrew the wire nuts and separate the fan's wires from the ones in the ceiling. With everything disconnected, just lift the motor assembly off the mounting bracket and bring it down. Congratulations, that old fan is officially history.
Inspecting The Ceiling Electrical Box
With the old fan gone, you're left looking at the unsung hero of this whole operation: the ceiling electrical box. This little component is literally what holds your new light up, and making sure it’s the right one is absolutely non-negotiable. Getting this part right is the difference between a secure, professional-looking install and a disaster waiting to happen.
The main job here is to figure out if you've got a heavy-duty, fan-rated box or just a standard plastic one meant for lightweight fixtures. This is a big deal, especially if you’re planning to hang a substantial chandelier that has some real heft to it.
Is Your Box Strong Enough?
So, how do you tell what you're working with? Thankfully, it’s usually pretty straightforward.
- Fan-Rated Boxes: These are almost always metal. You'll want to look for markings stamped inside that say something like "Acceptable for Fan Support." Even more important, they are mounted directly to a ceiling joist or an adjustable brace that runs between two joists. They’re built for business.
- Standard Boxes: These are often blue or gray plastic. The red flag is that they might only be attached to the drywall or a flimsy metal bar. They were never designed to support the weight and constant vibration of a fan, and while they might hold a simple light, they're not the right choice for anything heavy.
Give the box a gentle but firm wiggle. If it feels rock-solid with absolutely no give, you’re probably in good shape. But if there’s any movement at all—any wobble or sign that it's just clipped to the drywall—it has to be replaced.
This is hands-down the most important safety check in this project. A standard box is typically only rated for up to 50 pounds, but a proper fan-rated box can handle 70 pounds or more. That's the kind of security you want for a heavier statement piece.
Upgrading to a Secure Foundation
If you’ve discovered a wobbly plastic box, don't sweat it. This is a super common find in older homes and it's a relatively easy fix.
The best solution is to install an expandable ceiling fan brace. This clever device is just a metal bar that you can adjust to fit snugly between two ceiling joists. The new, fan-rated electrical box then screws directly onto this sturdy brace, giving you a rock-solid anchor point.
This simple upgrade ensures your new fixture—whether it’s a sleek pendant or a dramatic piece like the Artistic Branching Bubble Chandelier ($780)—is securely anchored to your home's structure. You’ll be able to mount that new light with total confidence, knowing it’s not going anywhere. As homeowners continue to seek more stylish and efficient solutions, getting the foundation right is key. You can find more insights into the growing lighting fixture market and its trends here.
Wiring and Mounting Your New Fixture
Alright, this is where the magic happens. We're about to turn that mess of wires dangling from the ceiling into a functional, beautiful light source. Wiring can look a little scary if you haven't done it before, but it's really just a simple color-matching exercise. The goal is to make three solid connections, setting the stage for your room's new centerpiece.
When you look up into the ceiling box, you should see a few wires. Typically, there's a black wire (hot), a white wire (neutral), and a bare copper or green wire (ground). Your new light fixture will have a matching set. The job is as straightforward as it sounds: connect black to black, white to white, and ground to ground using wire nuts.
Making the Right Connections
First, take the bare ends of the matching wires and twist them together clockwise. Once they're hand-tight, screw a wire nut over them, also twisting clockwise until it's good and snug. Give each wire a gentle tug to make sure it’s secure. If anything feels loose, undo the connection and start over. A tight connection is a safe connection—no shortcuts here.
But what about that leftover red or blue wire from the old fan? That was likely the power for the fan's motor, and you won't need it for a simple light fixture. Just put a wire nut on the end of it, tuck it back into the box, and you can forget it ever existed.
The single most important part of this step is getting those connections tight and making sure no bare copper is exposed. Loose wires are one of the biggest culprits behind electrical problems down the road. Take your time and double-check everything before you move on.
For a quick reference, here's how standard home wiring and fixture wires connect.
Standard Wiring Color Connections
| Wire Color | Function | Connection Point |
|---|---|---|
| Black | Hot | Connects to the fixture's black wire |
| White | Neutral | Connects to the fixture's white wire |
| Copper/Green | Ground | Connects to the fixture's ground wire & the box's ground screw |
This chart covers the vast majority of setups you'll encounter in a modern home.
Mounting Your Masterpiece
With the wiring done, it's time to get that beautiful new light fixture up on the ceiling. If you're wrestling with something substantial like the Art Deco Crystal Pendant ($1,100), this is absolutely a two-person job. Don't be a hero—an extra set of hands makes all the difference and prevents a costly (and heartbreaking) drop.
This infographic gives you a great visual rundown of what to check for with your ceiling box before you hang anything.
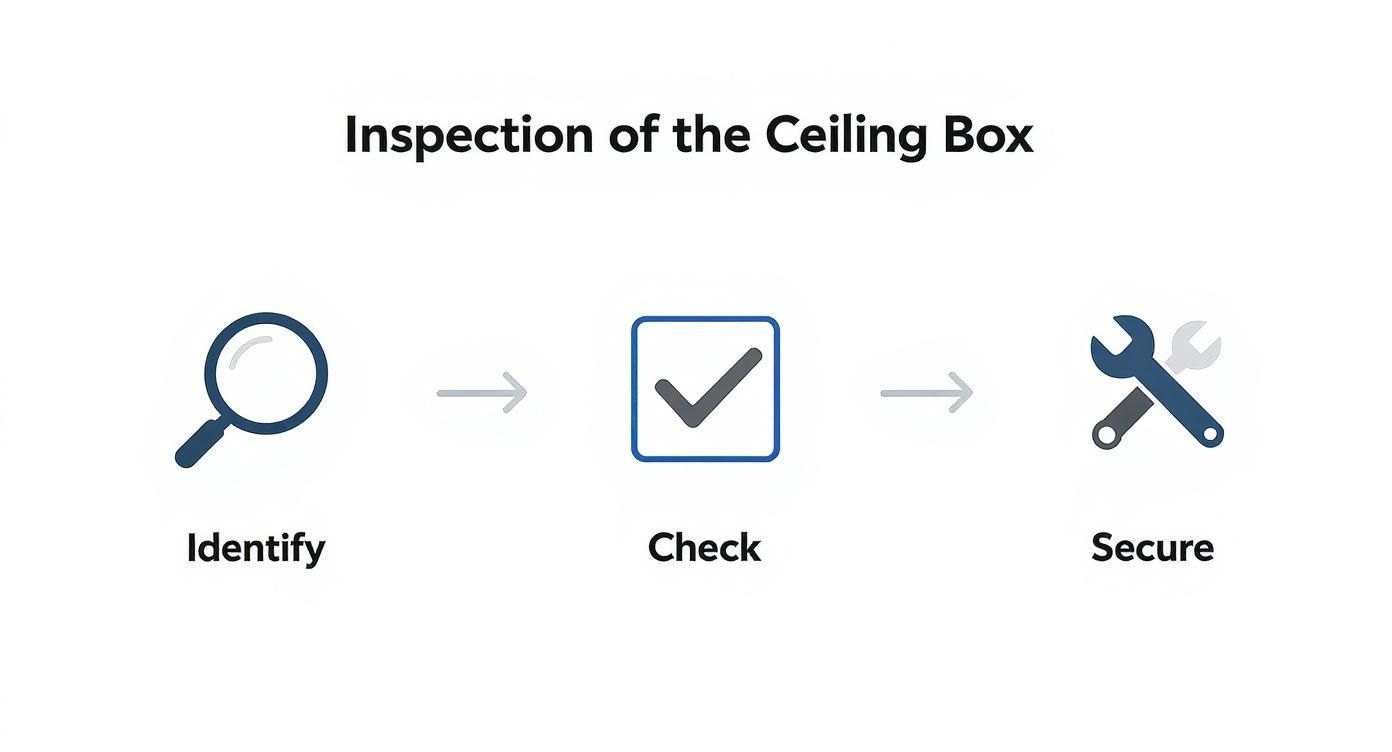
As the graphic shows, a solid foundation is non-negotiable.
Here’s a pro tip: many higher-end fixtures come with a small support cable or hook on the mounting bracket. This little feature is a game-changer. It lets you hang the fixture from the bracket temporarily, freeing up both of your hands to make the wiring connections without juggling the weight of the light.
Once it's wired and securely attached to the bracket, carefully push all the wires back up into the electrical box. Slide the fixture’s canopy up until it sits flush against the ceiling, completely hiding the box and hardware. A couple of mounting screws later, and you're left with a clean, professional finish that looks like it was always meant to be there.
Got a Few Lingering Questions?
It happens to the best of us. You're halfway through a project, tools in hand, staring up at the ceiling, and a question pops into your head. Don't worry, you're not alone. Let's tackle some of the most common things people ask when swapping out a fan for a light fixture so you can finish the job with confidence.
Can I Just Reuse The Fan's Electrical Box?
More often than not, yes! This is one of the convenient parts of this project. Ceiling fan electrical boxes are built tough—they have to be, to handle the weight and wobble of a spinning motor. That extra strength makes them perfectly suitable for almost any light fixture you'll hang.
Just give it a quick check. If the box is metal and anchored solidly to a ceiling joist (give it a gentle push—it shouldn't budge), you're in great shape. The only time you'd need to reconsider is if you're installing a truly massive chandelier, say something over 50 lbs. In that scenario, it's wise to double-check the weight rating stamped inside the box itself, just to be safe.
What Do I Do With This Extra Wire?
After taking down the old fan, you'll probably see an extra wire hanging out of the box, usually red or maybe blue. That wire was there to power the fan's motor independently, and your new light fixture simply doesn't need it.
The fix is easy. Just take a wire nut and twist it onto the end of that unused wire until it's snug and secure. This safely caps it off. Then, you can gently push it back into the electrical box, out of the way. Your new light will work perfectly off the single wall switch.
Any Tips for Installing a Heavy Fixture by Myself?
Honestly, my best tip here is: don't. Trying to wrangle a heavy, expensive, or delicate fixture on your own is a recipe for disaster. For your own safety—and the safety of your new light—this is a two-person job. One person can support the fixture's weight while the other has both hands free to focus on making clean, secure wire connections.
Thankfully, many higher-end fixtures, like the gorgeous Vista Grande Tiered Chandelier ($1,800), include a brilliant little support cable. You can hook the fixture directly to the mounting bracket, which holds the weight for you while you do the wiring. It’s a game-changer that makes the process much smoother and safer.
Know when to fold 'em. Your safety is always worth more than finishing a project a little faster. If you open that box and find aluminum wiring, see any scorch marks, or just get a bad feeling, stop. Calling a licensed electrician is the smartest and safest move you can make.
Ready to find that perfect statement piece to finish your room's new look? We carry a curated collection of high-end lighting that elevates any space. Explore our stunning chandeliers and pendant lights today.
Article created using Outrank


