


A Homeowner's Guide to Ceiling Fan Light Replacement
A dated ceiling fan light can cast a dim, tired glow over an entire room, making the space feel old and uninviting. The good news? You don't always have to replace the entire fan to fix the problem. A simple ceiling fan light replacement is often the perfect—and easiest—solution.
Giving Your Ceiling Fan a Modern Lighting Upgrade
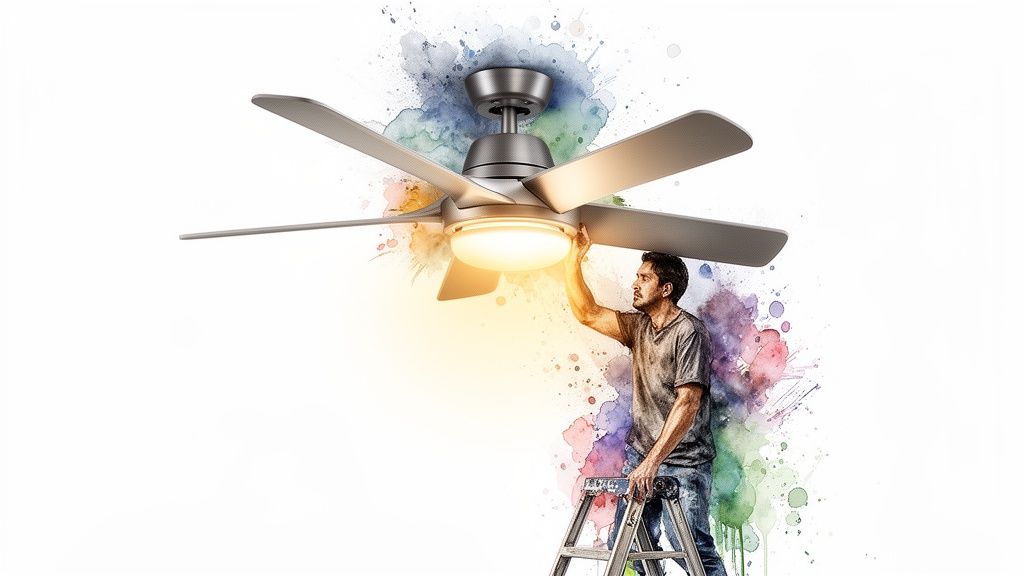
This guide is your complete roadmap for turning that dim fixture into a bright, stylish centerpiece. Whether you’re a seasoned DIY pro or just getting started with home improvement, we’ll walk you through everything you need to know. It’s time to have some fun and give your room the glow-up it deserves!
Why Upgrade Your Fan's Light
Let's be real—the benefits go way beyond just getting more light. A fresh light kit can completely redefine a room’s aesthetic, turning it from drab to fab in an afternoon.
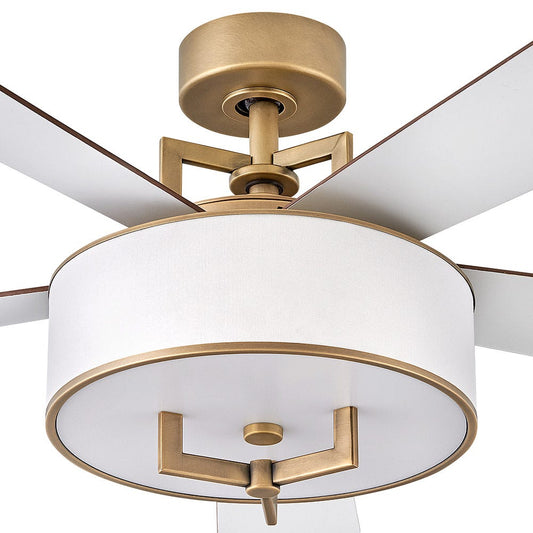
Imagine how a sleek, integrated LED light could complement a high-end fan like the stunning Artemis IV, which retails for over $700. That single upgrade turns a functional appliance into a true statement piece. Or think about how a minimalist fixture can enhance the clean, modern lines of a fan like the Bola. It's not just an update; it's an upgrade to your entire home experience.
But it’s not just about looks. Modernizing your fan’s light brings some serious practical advantages:
- Improved Energy Efficiency: Swapping out old incandescent bulbs for modern LEDs can slash your lighting energy consumption by up to 80%. That's a difference you'll see on your power bill, leaving more cash for the fun stuff.
- Enhanced Ambiance: Today's lighting tech lets you choose specific color temperatures (measured in Kelvin) to create the perfect mood, from warm and cozy to bright and energizing.
- Increased Home Value: Small, stylish upgrades like this really add up, contributing to your home's overall appeal and perceived value.
A well-lit room just feels larger, cleaner, and more welcoming. Upgrading your fan’s light is one of the most cost-effective ways to make a huge impact on your living space without diving into a major renovation. For a deeper dive, you can learn more about how to choose the right light kit for a ceiling fan in our detailed article.
This project is more than just a quick fix; it’s an opportunity to inject new life and personality into your room. We'll cover everything from a simple bulb swap to installing a brand-new light assembly, making sure you have the confidence and know-how to get it done right.
Prepping For A Safe And Successful Installation
Before you even think about touching a wire, a little prep work can make all the difference. Honestly, taking a few minutes to get organized is what separates a frustrating afternoon from a smooth, successful project. Think of this as your pre-flight checklist for a journey to better lighting.
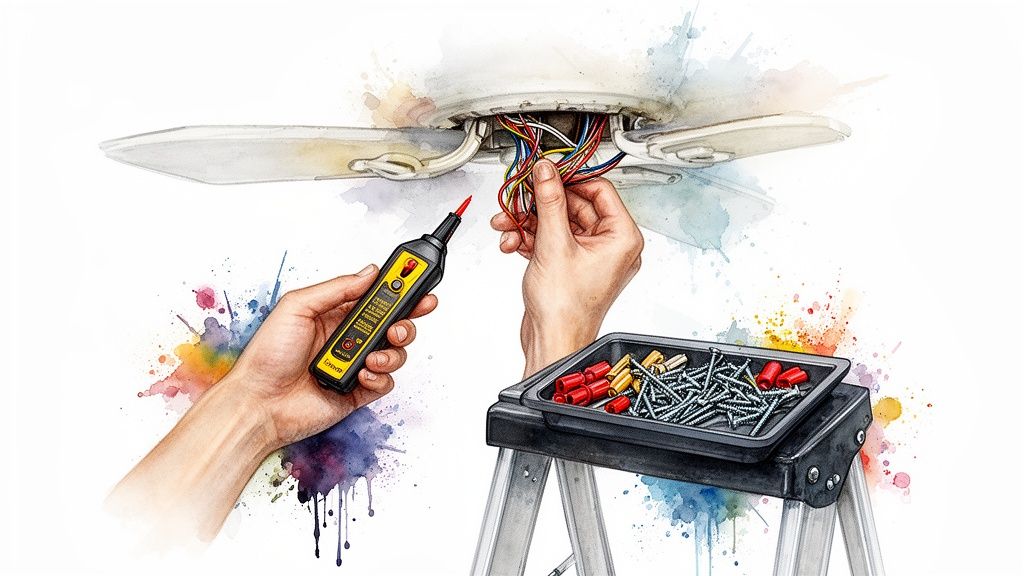
First thing's first, and this is non-negotiable: kill the power at the source. Go to your home's circuit breaker panel and flip the breaker that controls the fan. Don't just trust the wall switch! After you flip the breaker, go back and flick the wall switch on and off a few times just to be absolutely certain the power is off.
For that extra layer of confidence, a non-contact voltage tester is your best friend. Just hold the tip near the fan's wiring—if it doesn't light up or beep, you're clear for takeoff. This tiny step takes literally five seconds and gives you total peace of mind.
Your Essential Tools And Safety Gear Checklist
Having everything you need within arm's reach prevents those annoying trips back to the garage mid-project. You don't need a professional workshop, but a few key items will make the job much cleaner and safer.
Gather these items before you begin your ceiling fan light replacement to ensure a safe and efficient project.
| Tool or Gear | Primary Use | Pro Tip |
|---|---|---|
| Multi-Bit Screwdriver | Removing screws from the housing and mounting bracket. | A magnetic tip is a lifesaver for preventing dropped screws. |
| Pliers/Wire Strippers | Handling, bending, and stripping wires for clean connections. | Needle-nose pliers are perfect for tight spaces inside the switch housing. |
| Voltage Tester | Safely confirming that the power is completely off. | Test it on a known live outlet first to make sure it's working properly. |
| Sturdy Stepladder | Reaching the fan safely and comfortably. | Make sure it's on a level, stable surface and never stand on the top step. |
| Headlamp or Flashlight | Illuminating the dark workspace inside the fan housing. | A headlamp is fantastic because it frees up both of your hands. |
Properly preparing for tasks that have you off the ground is critical. It's always a good idea to refresh yourself on best practices for safe working at heights to prevent any accidents.
Inspecting Your Current Fan
Next up, it’s time to play detective and figure out what you’re working with. Take a look on top of the fan’s motor housing for a manufacturer's label. It usually has a model number you can punch into a search engine, which is gold when you're trying to find a compatible light kit.
Now, unscrew the switch housing cap at the very bottom of the fan—this is where a light would attach. You're looking for a small bundle of capped-off wires inside. Typically, you'll find a blue or black-and-white striped wire (this is the "hot" for the light) and a white wire (the neutral). If you see those, your fan is almost certainly "light kit adaptable."
Pro Tip: Before you disconnect a single wire, pull out your phone and snap a quick photo of the setup. This simple trick has saved me from major headaches more times than I can count. It’s your get-out-of-jail-free card if you forget what goes where.
Taking these prep steps seriously sets you up for a project that's not just successful, but safe. If you want an even deeper dive, our guide on how to install a ceiling fan safely and easily has a ton of other useful tips.
Installing Your New Ceiling Fan Light Kit
Alright, you’ve done the prep work, and now it’s time for the main event—getting that new light installed. This is where your vision for a brighter, more stylish room starts to become a reality. We’ll walk through it together so you feel confident at every turn.
First things first, let’s say goodbye to the old fixture. Carefully take off the glass shade or cover, then unscrew the light bulbs. Next, you'll need to remove the screws holding the existing light kit to the fan's switch housing. As you gently lower it, you’ll see the wiring. This is an important moment.
Detaching The Old And Photographing The Wires
Once inside, you'll typically find three wires connecting the light to the fan motor: a black wire (hot), a white wire (neutral), and often a blue or black-and-white striped wire just for the light.
Before you touch a single wire, pull out your phone and snap a clear photo of the connections. Seriously, don't skip this. This picture is your personal cheat sheet and can be a real lifesaver if you get turned around later.
With the photo saved, you can carefully unscrew the wire nuts—those little plastic caps—to disconnect the old light kit. Now you're ready for the upgrade. It's no surprise this is a favorite DIY project. The residential ceiling fan market shows the highest demand globally, with homeowners like you actively investing in upgrades. In fact, the residential sector accounted for 75.77% of global ceiling fan demand, blowing commercial use out of the water. It just goes to show how much people value improving their home's comfort and style.
This diagram breaks down the essential safety process before you start handling any wires.
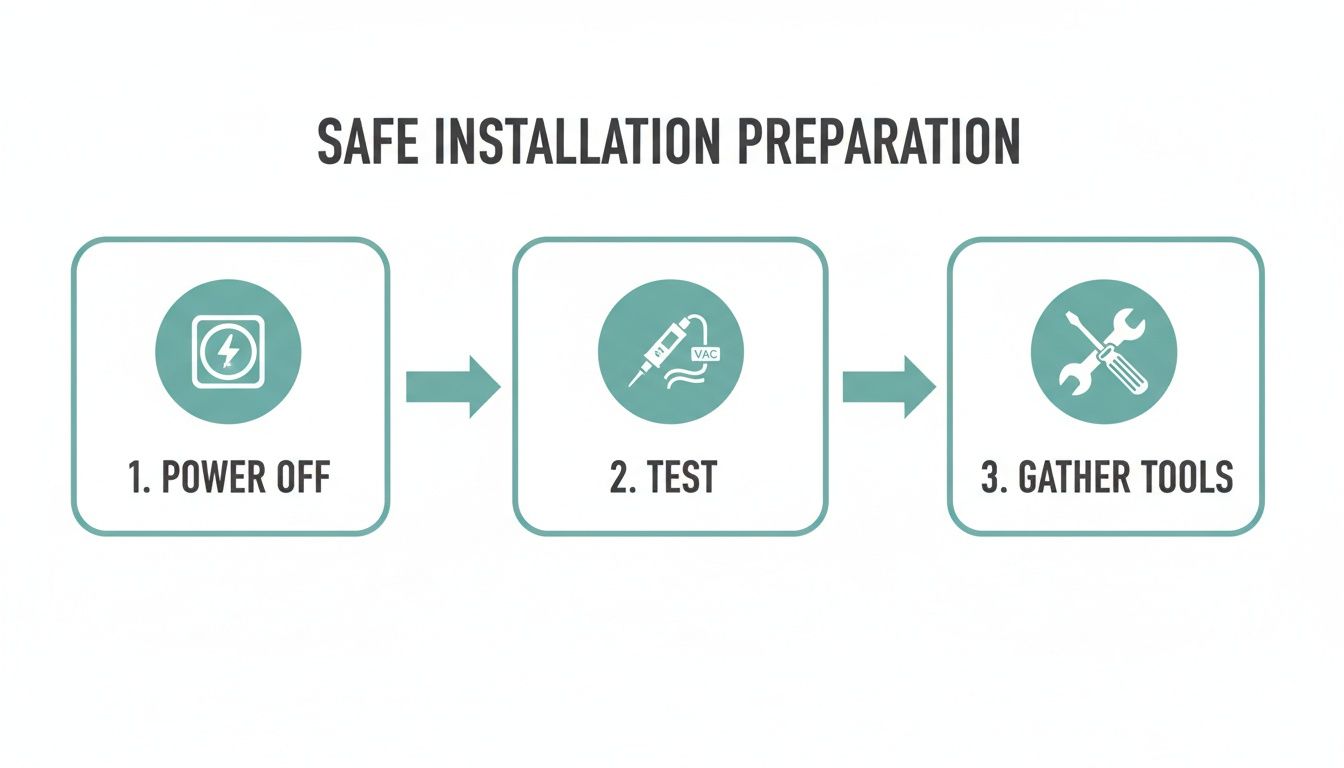
Following this simple three-step sequence—Power Off, Test, Gather Tools—is the blueprint for a safe and hassle-free installation.
Connecting And Mounting The New Light Kit
Now, grab your shiny new light kit. It's time to connect the wires by matching their colors to the wires coming from the fan motor—black to black, white to white, and the dedicated light wire (usually blue or striped) to its match on the new kit. Twist the bare copper ends together clockwise and screw the wire nuts on until they're good and tight. Give each wire a gentle tug to make sure the connection is solid.
Pro Tip: Use a small magnetic parts tray to hold all your screws. It’ll save you the frustration of a tiny, crucial screw rolling off your ladder and vanishing into the carpet.
Once the wiring is secure, gently tuck the wires and wire nuts up into the switch housing, making sure nothing gets pinched. Position the new light kit against the housing and line up the screw holes. As you install your new kit, you'll be working with various fasteners. Knowing the different self-tapping screw types and uses can help you pick the right ones for a secure fit.
Fasten the mounting screws securely so the kit sits flush and stable against the fan body. A wobbly light fixture isn’t just distracting; it’s a safety issue. This final step is where you really see the upgrade pay off, especially if you’re installing a premium kit meant to complement a high-end fan like the elegant Aerovon, a model that often sells for over $300 and deserves a flawless installation.
For more in-depth instructions, check out our guide on how to install a ceiling fan with a light for some extra tips.
Choosing the Right Bulbs and Upgrading to LED
Once your new light kit is installed, the last piece of the puzzle is picking the right bulbs. This is about more than just making light; it’s your chance to set the room's mood and rein in your energy costs. Honestly, the single most impactful move you can make during a ceiling fan light replacement is to upgrade to LED technology.
The advantages of switching to LEDs are pretty hard to ignore. They use up to 80% less energy than those old-school incandescent bulbs and can last an incredible 25,000 hours. That means way fewer trips up the ladder to change bulbs and a little more money left in your wallet at the end of the month.
This move toward efficiency isn't just a niche trend; it's a huge driver in the home improvement world. The global ceiling fan market is now valued somewhere between USD 12.9 billion and USD 14.6 billion, and a big part of that growth comes from homeowners demanding smarter, more cost-effective solutions.
Decoding Light Bulb Language
To nail the perfect LED choice, you just need to get familiar with two key terms: lumens and Kelvin. Think of it as learning the secret language of light. It’s easy, we promise!
- Lumens (lm): This is all about brightness. The higher the lumens, the brighter the light. Forget thinking in "watts"—that's old-school. With LEDs, lumens are what really count.
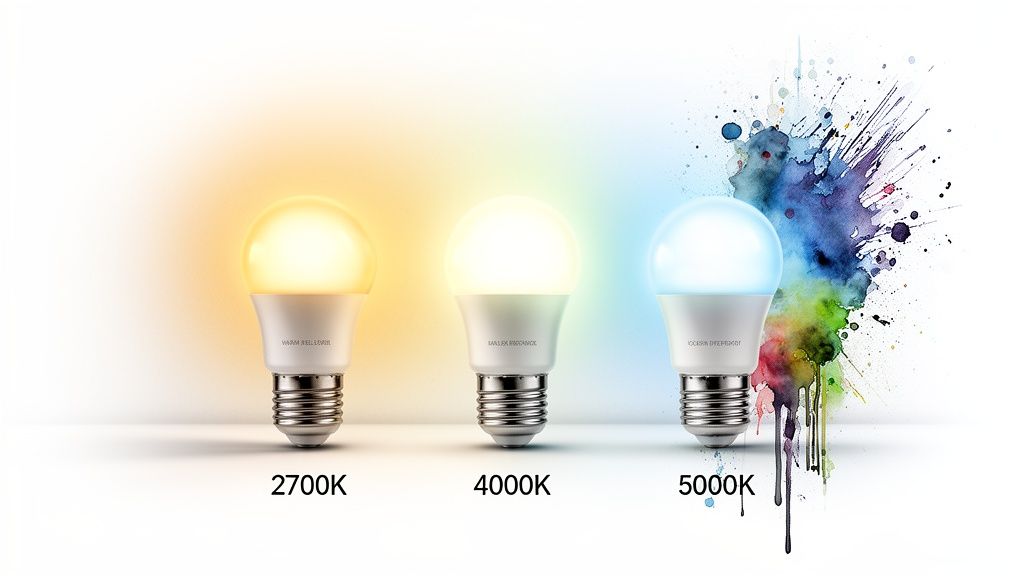
- Kelvin (K): This tells you the color temperature of the light, from a warm, cozy glow to a crisp, cool white. A lower Kelvin number gives you that yellowish, inviting light, while a higher number produces something closer to daylight.
Here’s a quick cheat sheet to get the ambiance just right:
- 2700K (Warm White): This is your go-to for creating a relaxing, intimate vibe in bedrooms and living rooms. Think cozy movie night.
- 3000K-4000K (Neutral/Bright White): A fantastic all-around choice for kitchens, home offices, and bathrooms where you need clear, clean light.
- 5000K+ (Daylight): Delivers an energetic, almost blue-toned light that’s perfect for task-heavy spaces like a workshop or garage.
The Critical Role of Dimmer Compatibility
One of the most common hiccups people run into when upgrading to LEDs is an issue with their dimmer switch. If your fan is hooked up to an older dimmer that was made for incandescent bulbs, your new LEDs might flicker, buzz, or just refuse to dim properly. This happens because LEDs use so little power that the old switches can't figure out how to regulate them.
The fix is straightforward: swap out the old switch for a modern, LED-compatible dimmer. You'll usually see them labeled as "CFL/LED" or "CL-rated." This one simple change ensures you get that smooth, silent dimming experience, letting you fine-tune your room's lighting perfectly.
Making sure your new bulbs and dimmer switch play nicely together is the final step to a successful upgrade. If you're thinking about swapping out the entire fixture, you might want to check out our guide on which local stores carry ceiling fans with integrated LED lights. Getting this last detail right ensures your fan doesn't just look great—it works flawlessly, too.
Troubleshooting Common Installation Hiccups
So, you’ve installed the new light kit, flipped the switch, and… nothing. Or maybe you're dealing with that annoying flicker that turns a relaxing evening into a disco nightmare. Don't panic!
Even the most straightforward ceiling fan light replacement can hit a snag. But these issues are usually caused by just a few common culprits that are surprisingly easy to fix. Let's walk through the most frequent problems and get your project back on track. A little logic is all you need.
The New Light Refuses To Turn On
This is the most common—and frustrating—issue, but the fix is usually simple. Before you start questioning your DIY skills, run through this quick mental checklist.
- Check the Power First: It happens. Did the circuit breaker get bumped? Head to your panel and make sure the breaker is firmly in the "on" position.
- Inspect Your Connections: A loose wire is the number one cause of a light that won't turn on. Kill the power again, lower the light kit, and give each wire nut a gentle tug. You want to feel a secure connection.
- Test the Bulb: It sounds almost too obvious, but it's worth a shot. Unscrew the bulb and test it in another working lamp to make sure you didn't get a dud straight out of the package.
If you’ve tried these steps and are still in the dark, it's time to re-examine the wiring. If you need a clearer visual, this guide on ceiling fan wiring diagram with remote control can offer some valuable insights, even if your fan doesn't have a remote.
Flickering or Buzzing Lights
That incessant flickering or a low buzzing sound is a classic sign of an incompatibility issue, especially if you've just upgraded to LED bulbs. The problem almost always points back to your wall switch.
Older dimmer switches just weren't designed for the low-wattage draw of modern LEDs. This mismatch is what creates that annoying flicker or hum. The solution is pretty straightforward: replace your old dimmer with an LED-compatible one (often marked as CL-rated). This small upgrade will ensure smooth, silent operation.
When a simple fix doesn’t solve a persistent electrical issue, it’s time to put safety first. If you’ve double-checked your wiring and ruled out dimmer problems but the issue continues, it’s best to call a licensed electrician.
The Light Kit Doesn't Fit Flush
A gap between your new light kit and the fan's switch housing doesn't just look sloppy—it can also mean an unsafe installation. The most common reason for this is pinched or bunched-up wiring.
Turn the power off one more time and carefully detach the light kit. Take a moment to neatly arrange the wires and tuck the wire nuts as flatly as possible into the housing. This simple adjustment often frees up the space needed for a snug, secure fit, making sure your fan looks as good as it works.
Common Questions About Swapping Your Fan's Lights
Even the most straightforward home project can throw a few curveballs your way. When it comes to a ceiling fan light replacement, you’re definitely not alone with your questions. Getting the right answers can mean the difference between a quick, satisfying upgrade and a weekend of frustration.
Let's walk through some of the most common questions we hear from homeowners tackling this exact project.
Can I Add a Light Kit to Any Ceiling Fan?
The short answer is no, but it's usually pretty easy to figure out. For a fan to be "light kit adaptable," it needs to have the wiring and mounting points already built-in by the manufacturer.
The best way to check is to look at the very bottom of your fan’s motor housing. You're looking for a removable metal plate or cap. If you can pop that off and see a little bundle of unused, capped-off wires (they’re usually blue or have a black-and-white stripe), you're good to go. Trying to force a kit onto a fan that wasn't designed for it isn't just a headache—it’s a real safety hazard.
Why Are My New LED Lights Flickering?
Ah, the dreaded flicker. This is almost always a classic case of new technology clashing with old. Flickering LEDs are basically telling you they don't get along with your old dimmer switch. Most older dimmers were built for power-hungry incandescent bulbs and just can't properly manage the low wattage of modern LEDs.
The fix is to swap out the wall switch for a new, LED-compatible dimmer, which is often labeled as CL-rated. If you don't need a dimmer, you can also just use non-dimmable LED bulbs with a standard on/off switch. And of course, always give your wire connections a quick check to make sure they’re snug—a loose wire can cause flickering, too.
How Do I Know Which Replacement Light Kit to Buy?
The simplest, most surefire path is to buy a kit directly from your fan's manufacturer, one that's designed specifically for your fan model. If that’s not an option, you’ll be looking for a "universal" light kit. The trick here is making sure its mounting system and wiring setup match what you found inside your fan's switch housing.
Before you commit to a universal kit, read the product specs carefully and double-check the store's return policy. A little bit of homework upfront can save you a ton of time and a return trip to the store if it’s not a perfect fit.
Should I Replace the Light Kit or Just Buy a New Fan?
This is a great question, and it really comes down to cost versus overall value. If your fan's motor is still running quietly and you're happy with the general style, just replacing the light kit is a fantastic, budget-friendly update.
But if your fan has gotten noisy, wobbly, or just feels outdated, it’s a much better long-term investment to replace the whole thing. A modern, premium fan like the sleek Axis model, which retails for over $300, delivers whisper-quiet performance, incredible energy efficiency, and beautifully integrated lighting that can completely change the feel of a room. It's an investment in your home's comfort and style that pays off every single day.
At Fan Connection, we believe the right fan does more than just move air—it completes a room. Explore our curated collections of high-end, stylish ceiling fans to find the perfect centerpiece for your space. Visit us at https://www.fanandlights.com to see what's new.


