


How to Clean Ceiling Fan Blades The Right Way
That layer of dust caked onto your ceiling fan blades isn't just an eyesore—it's a collection of allergens just waiting for a joyride into your living space every time you flip the switch. Cleaning your fan is a surprisingly simple chore that pays off big time by improving your home's air quality, boosting the fan's performance, and even preventing extra wear and tear on the motor. Who knew a little dusting could be so heroic?
It's one of those quick jobs with lasting benefits for a healthier, more comfortable home. So let's turn this mundane task into a triumphant victory over dust!
Why Cleaning Your Ceiling Fan Actually Matters
Think of your fan as the quiet, stylish workhorse of your home. It moves air, creates that perfect gentle breeze, and adds a touch of personality. But when its blades get coated in a thick, fuzzy blanket of dust, that workhorse starts working against you. It transforms from a helpful appliance into a pollen-launching, dust-slinging villain.

Every time you turn on a dirty fan, it flings a delightful cocktail of dust, pollen, pet dander, and other tiny particles into the air you breathe. For anyone with allergies or asthma, this can be a real party-crasher, triggering symptoms and making your home feel less like a sanctuary. A clean fan, on the other hand, just moves air, not allergens. Pure, simple, and sneeze-free.
Before we jump into the "how-to," let's quickly break down the cleaning methods we'll cover. This will help you decide which battle plan is right for you, depending on how dusty your fan is and how much time you have.
Choosing Your Cleaning Method
| Cleaning Method | Best For | Time Required | Mess Level |
|---|---|---|---|
| Quick Dusting | Light, routine maintenance between deep cleans. | 5-10 minutes | Low |
| Pillowcase Trick | Capturing heavy dust buildup without a mess. | 10-15 minutes | Very Low |
| Deep Clean | Tackling greasy or stubborn grime (e.g., kitchen fans). | 20-30 minutes | Medium |
Each method has its place, but the pillowcase trick is a fan-favorite for its sheer genius in trapping all that dust in one go.
The Hidden Costs of a Dusty Fan
Beyond the air quality issue, a neglected fan can actually hit your wallet. That layer of grime doesn't just sit there—it creates drag. The extra weight and uneven surface force the motor to work harder to spin the blades, which can lead to a couple of significant problems:
- Less Airflow: A fan struggling against dust buildup isn't moving as much air. In fact, heavy accumulation can slash airflow efficiency by as much as 20-30%. You'll end up running the fan on a higher speed just to feel the same cooling effect.
- Higher Energy Bills: When the motor has to work overtime, it pulls more electricity. One fan might not break the bank, but if you have several running all summer, that wasted energy starts to add up. You can learn more about how a clean fan contributes to energy efficiency and cost savings in our guide.
Take Your Home's Air Quality to the Next Level
If you're serious about creating the healthiest indoor environment possible, here’s a pro tip: pair your freshly cleaned ceiling fan with a high-quality air purifier. Your fan circulates the air, and a great purifier will snatch up any lingering airborne irritants that even the cleanest homes have.
A fantastic option is the Dyson Purifier Cool™ Formaldehyde TP09 ($749.99). It's a marvel of engineering, built for large rooms and using an advanced filtration system that not only captures 99.97% of particles but also destroys formaldehyde. This one-two punch ensures the air moving through your home isn't just circulating—it's actively being scrubbed clean.
Gathering Your Fan Cleaning Toolkit
Before you even think about climbing up to tackle those dusty ceiling fan blades, let’s talk about a golden rule I’ve learned over years of home maintenance: preparation is everything. Going into this without the right gear is a recipe for frustration and, frankly, a bigger mess than when you started.
Having everything you need within arm's reach is what turns a dreaded chore into a surprisingly satisfying 15-minute job. Let's get your toolkit assembled. Think of it as your fan-cleaning arsenal, ready for anything from a light dusting to a serious grime takedown. The best part? You probably have most of this stuff already.

The Bare Essentials for a Quick Dust-Up
For your regular, everyday maintenance clean, you don’t need to go overboard. This is all about speed and efficiency—catching that light layer of dust before it turns into a fuzzy, gray blanket.
- An Old Pillowcase: This is the absolute star of the show for a mess-free clean. It’s a genius-level hack that traps all the dust inside.
- Microfiber Cloths: Grab at least two. One for a quick damp wipe-down and another for drying and polishing. Microfiber is brilliant at actually trapping dust particles, not just flinging them around the room.
- A Drop Cloth or Old Sheet: A non-negotiable for protecting your furniture and floors from any dust bunnies that manage to escape.
- All-Purpose Cleaner or a DIY Solution: Honestly, a simple spray bottle with water and a few drops of dish soap works perfectly for most situations.
Tools for the Deep-Cleaning Mission
Now, for those fans in tougher spots—like a kitchen, where grease and dust team up to create a sticky, stubborn film—you’ll need to bring in the heavy hitters.
This is where you’ll want to add a good degreasing cleaner and maybe a few soft-bristled brushes for gentle scrubbing. The goal is to cut through the grime without scratching or damaging the blade’s finish. It also helps to know your fan's construction. If you're ever doing more intensive maintenance, our guide on how to install a ceiling fan can give you great insight into its assembly.
The most overlooked yet absolutely crucial tool in this entire process is your ladder. Wobbling on a rickety chair or an unstable stool is a recipe for disaster. This is one area where investing in quality pays off in safety and peace of mind.
Why Your Ladder is Your Most Important Tool
Let's be honest, nobody loves climbing a ladder. But the right one makes you feel secure and confident, which makes the job go a whole lot faster. For any homeowner, a multi-position ladder is an incredible asset that adapts to all sorts of tasks around the house.
Consider a premium option like the Little Giant Leveler M26 (starting around $539.99). This isn't just a ladder; it’s a versatile and incredibly stable work platform. You can set it up as a standard A-frame, an extension ladder, or even scaffolding, and its patented Ratchet™ Levelers adjust to uneven ground. Its wide-flared legs provide a feeling of rock-solid stability that a basic stepladder just can't compete with.
Investing in a high-quality ladder means you’ll be safer and more efficient—not just when cleaning your fan, but for every other hard-to-reach job, from changing lightbulbs to painting ceilings. It turns what could be a precarious balancing act into a secure, straightforward task.
The Pillowcase Trick: Your Secret Weapon for a Mess-Free Clean
If the thought of a dust storm erupting in your living room has you procrastinating on cleaning your ceiling fan, I've got a hack for you. Seriously, this will change the game. Forget about fancy dusters or complicated attachments—the best tool for the job is probably sitting in your linen closet right now.
The beauty of the pillowcase trick is its brilliant simplicity. Instead of just pushing dust off the blades and into the air (and onto your furniture), you trap it all inside. It’s quick, super effective, and turns a messy chore into a surprisingly clean one. This is the perfect method for regular upkeep, stopping that thick, fuzzy layer of dust from ever building up.
How It Works (and Why It’s So Good)
The idea is simple: an old pillowcase acts as a sleeve that slides right over each fan blade. As you pull it back, the fabric wipes both the top and bottom of the blade at the same time, and all that dust, dander, and grime gets trapped inside. The result? Gleaming fan blades and clean floors, with zero need to pull out the vacuum afterward.
This is more than just a clever trick; it’s a genuinely practical way to save time and hassle. You can skip draping your entire room in drop cloths and you won't be breathing in a cloud of airborne dust.
It's worth remembering what's in that dust. One study found that indoor dust is a lovely cocktail of dead skin cells, pollen, pet dander, and other tiny particles. The pillowcase trick neatly contains all of that, so you’re not just flinging it around the room.
Nailing the Pillowcase Technique
Ready to give it a shot? It’s as easy as it sounds, but a few quick tips will guarantee a perfect result every time.
First, grab an old pillowcase you don’t mind getting dirty. A cotton or flannel one works especially well because the fabric’s texture is great at grabbing onto dust.
- Set up a sturdy step ladder so you’re at a comfortable height, right level with the blades. You should never have to stretch or overreach.
- Open the pillowcase and carefully slide it over one blade, covering it completely.
- Gently press the fabric against the top and bottom of the blade with your hands.
- Now, just pull the pillowcase slowly back toward you. You’ll feel it wiping the surface clean as it comes off. All that gunk is now safely inside the bag.
- Repeat for the other blades, and you’re done!
Taking It Up a Notch
Got some blades that are a little extra grimy or have some sticky spots? You can easily upgrade this method. Just lightly dampen the inside of the pillowcase with a bit of water or your favorite all-purpose cleaner before you start. The moisture helps cut through stubborn buildup and leaves the blades with a nice polish.
A word of caution: don't soak the fabric, especially if you have wooden blades. A light mist is all you need to get that extra cleaning power without any risk of damage. It’s a small tweak that turns a quick dusting into a more thorough clean, all while staying completely mess-free.
Once all the blades are clean, take the pillowcase straight outside, turn it inside out, and give it a good shake to get rid of the dust. From there, just toss it in the wash. I’d recommend washing it by itself so you don't transfer all that dust to your clothes.
When It’s Time for an Upgrade
The pillowcase trick is great for keeping your fan in top shape, but sometimes, a fan is just past its prime. If you’re constantly dealing with a noisy motor, a persistent wobble, or a style that just feels dated, it might be time to think about a replacement. A new, modern fan can make a huge difference in both airflow and your room’s overall look.
For example, a model like the Kichler Volos 52 Inch Fan (around $479) is a perfect blend of style and performance. Its sleek, modern design and powerful motor move air quietly and efficiently. An investment in a quality fan like this often means less maintenance, better comfort, and a more stylish home for years to come.
Deep Cleaning Grimy or Greasy Fan Blades
Sometimes, a quick swipe with a pillowcase just won't cut it. We're talking about the ceiling fans that live in the toughest environments—kitchens exposed to cooking grease, workshops collecting fine dust, or fans that have simply been forgotten for a little too long. This is where we graduate from dusting to deep cleaning.
When fan blades get that sticky, stubborn film, they require a more hands-on approach to get their shine back. It might seem like a chore, but with the right technique, you can make even the grimiest fan look brand new. This isn't just about looks; it's about keeping the fan balanced and protecting the motor's health.
Safety First, Always
Before a single drop of cleaner touches a blade, your number one priority is safety. It's not enough to just flip the wall switch off. For any deep clean that involves liquid cleaners and getting up close with the fan's components, you have to go a step further.
Head to your home's circuit breaker and find the switch that powers the room you're working in. Flip it to the OFF position. This completely cuts the electrical current, eliminating any risk of shock or the fan accidentally turning on. It’s a simple step that makes the whole job worry-free.
DIY Solutions That Actually Work
You don’t need harsh, expensive chemicals to cut through tough grime. In fact, some of the most effective cleaners can be mixed right in your kitchen sink. The secret is using ingredients that break down grease without wrecking the fan's finish.
A go-to solution for greasy blades is a simple mixture:
- One part white vinegar
- One part warm water
- A few drops of dish soap
Combine these in a spray bottle. The vinegar acts as a natural degreaser, and the dish soap helps lift and wash away the grime. This mix is gentle enough for most fan blade materials but powerful enough for that sticky buildup.
For an even simpler approach, a good all-purpose cleaner works wonders. Just be sure to spray the cleaner onto your microfiber cloth, not directly onto the fan blades. This gives you more control and prevents drips from getting into the motor housing.
Matching the Cleaner to the Blade Material
Not all fan blades are created equal, and using the wrong cleaner can lead to discoloration, warping, or other permanent damage. Knowing what your fan blades are made of is the key to a successful deep clean.
For instance, solid wood or wood veneer blades are sensitive to too much moisture. A soaked cloth can cause the wood to swell or the finish to peel. Metal and plastic blades, on the other hand, are far more resilient and can handle a bit more moisture and scrubbing.
This infographic shows a great technique for a mess-free clean, which can be adapted by dampening the pillowcase with your cleaning solution for a deeper scrub.
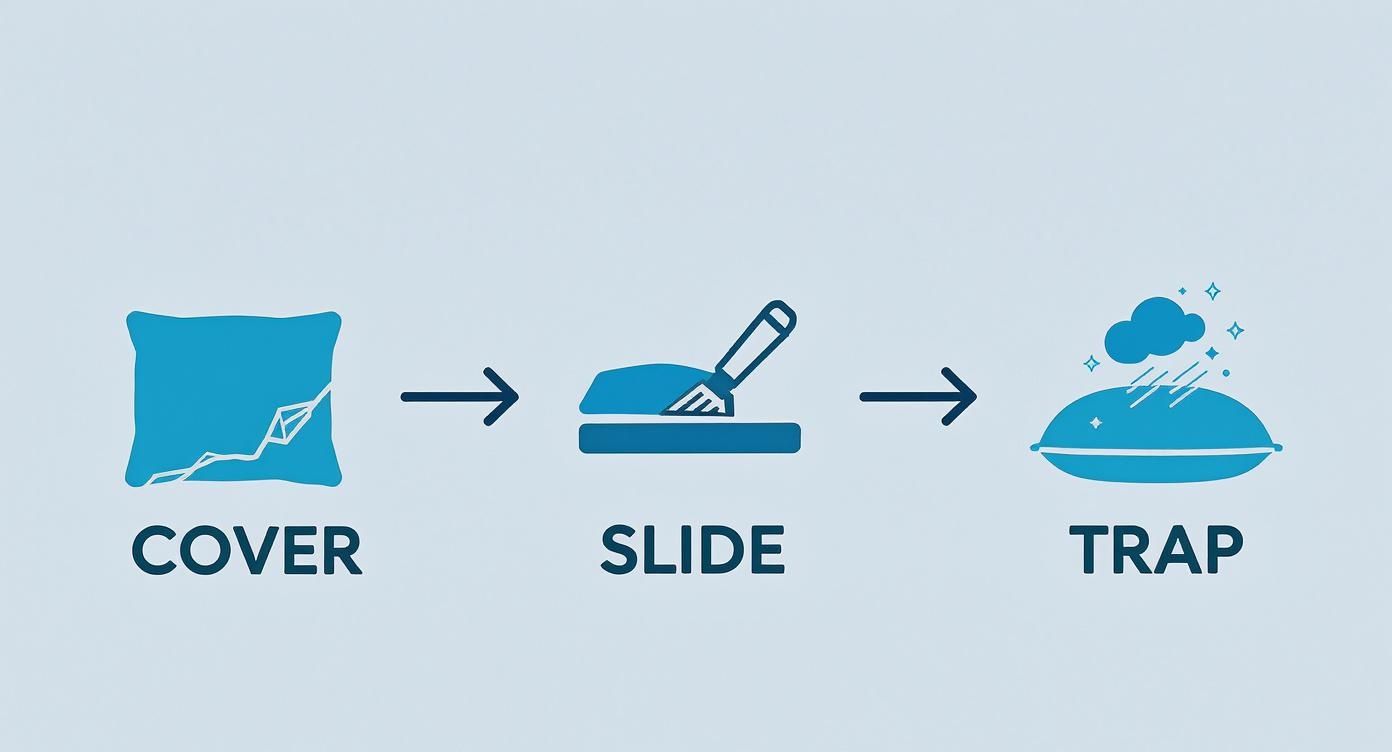
This simple process shows how to contain dust, a principle that also applies when using a damp cloth or pillowcase to prevent dirty drips.
Regular maintenance is crucial. The global ceiling fan repair and maintenance services market, valued at around USD 0.33 billion, is expected to more than double by 2033. This growth shows just how much people value keeping their appliances in good shape. Manufacturers generally recommend cleaning fan blades every 3 to 6 months to maintain performance.
To help you choose the right cleaner and avoid costly mistakes, here's a quick guide.
Safe Cleaning Solutions For Different Blade Materials
| Blade Material | Recommended Cleaner | Avoid Using | Pro Tip |
|---|---|---|---|
| Solid Wood / Wood Veneer | Mild wood cleaner or a slightly damp cloth with a drop of Murphy Oil Soap. | Harsh chemicals, vinegar solutions, and excessive water. | Always dry immediately and thoroughly with a soft, dry cloth to prevent water spots or warping. |
| Metal (Steel, Aluminum) | All-purpose cleaner or a vinegar-water solution. | Abrasive scrubbers or bleach, which can scratch or discolor the finish. | For a streak-free shine on polished metal, finish by wiping with a dry microfiber cloth. |
| Plastic / ABS | A mild solution of dish soap and water or an all-purpose cleaner. | Solvents or abrasive cleaners that can dull or damage the plastic. | These blades are very durable, but rinsing with a clean, damp cloth removes any soapy residue. |
| MDF / Plywood | A lightly dampened cloth with a mild all-purpose cleaner. | Soaking the blades with water, which can cause them to swell and delaminate. | Spray the cleaner onto the cloth, not the blade, to control the amount of moisture. |
Choosing the right cleaner ensures your fan will not only be clean but will also look great for years to come.
When Style and Function Demand an Upgrade
Sometimes, a deep clean reveals that a fan just isn't right for the space anymore. A kitchen fan that’s always caked in grease might be a sign you need a model with easier-to-clean materials. This is where thoughtful design really matters. You can explore a variety of modern ceiling fan design trends that prioritize both looks and practical maintenance.
If you're thinking about a replacement, look for fans with sleek, simple blades. A fan like the Minka-Aire F844-DK Light Wave (around $370) is a perfect example. Its unique, single-piece blade design not only looks stunning but also eliminates the nooks and crannies where dust and grease love to hide.
Cleaning isn’t just a chore; it’s an investment in your fan’s lifespan and your home’s air quality. A fan that is regularly deep cleaned will run more efficiently, look better, and last longer.
After you've wiped the blades down with your cleaning solution, go over each one with a second cloth dampened with just water. This "rinsing" step removes any leftover residue that could attract new dust. Finally, dry each blade thoroughly with a clean microfiber cloth to prevent water spots and get a streak-free, polished finish. This final touch makes all the difference.
Beyond Cleaning: Fan Maintenance for Longevity
So, you’ve done it. The dust is gone, the blades are gleaming, and your ceiling fan looks fantastic. But a truly great fan doesn't just look good—it runs smoothly, quietly, and efficiently for years to come. This is where we go beyond cleaning and get into the simple, yet crucial, world of fan maintenance.
A few minutes of preventative care now can save you from annoying noises and costly repairs down the road. It’s the secret to keeping that fan spinning perfectly for the long haul.
Taming the Dreaded Fan Wobble
One of the most common complaints I hear after a good cleaning session is a newly developed wobble. It’s frustrating, but it’s usually an easy fix. The wobble often just means a blade is slightly out of balance, something that can happen if you accidentally apply a bit too much pressure while scrubbing.
Before you get worked up, take a deep breath. A wobbly fan is rarely a serious issue. Your first step is always the simplest one: check for loose screws. With the power off at the breaker, get back on your stable ladder and inspect where each blade connects to the fan's motor housing.
Give each screw a gentle turn with a screwdriver to make sure it's snug. You’d be surprised how often a single loose screw is the culprit behind that rhythmic thump-thump-thump.
If tightening the screws doesn't solve it, it’s time to check the blade alignment.
- Grab a yardstick or a tape measure.
- Measure the distance from the tip of one blade straight up to the ceiling.
- Rotate the fan by hand and measure the other blades from the exact same spot.
If you find a blade that's higher or lower than the others by more than a quarter of an inch, gently bend the blade bracket (the metal arm holding the blade) up or down to bring it back into alignment. This tiny adjustment is often all it takes to restore perfect balance.
Prioritizing Preventative Upkeep
Routine maintenance isn't just about fixing problems; it's about stopping them before they start. Making a quick inspection part of your cleaning routine is a smart habit to get into.
As you wipe down the blades, take a second to check the screws on the motor housing and the light fixture. Vibrations over time can loosen these connections, leading to rattles and instability.
This focus on longevity is more important than ever. The global ceiling fan market was valued at around USD 14.6 billion and is projected to surge to over USD 31.6 billion by 2035. This growth is driven by a demand for energy-efficient cooling, which is exactly why keeping your current fan in top shape is such a wise move. You can discover more insights about this market trend and its drivers.
A well-maintained fan not only lasts longer but also operates more efficiently. By ensuring the blades are balanced and all components are secure, you're helping the motor run with less strain, which can contribute to lower energy use over time.
Knowing When to Upgrade for Modern Convenience
While maintenance can significantly extend your fan's life, there comes a point when an upgrade just makes more sense. Older fans can become perpetually noisy, inefficient, or simply outdated.
Modern ceiling fans offer a lot more than just a fresh look. They're engineered for quieter operation, better energy efficiency, and often, much lower maintenance. If you're tired of the upkeep or want a fan that integrates into a smart home, it might be time for a change.
A model like the Minka-Aire Wave Smart Ceiling Fan (around $370) is a perfect example of modern innovation. It features a sleek, aerodynamic design that's easy to clean, a whisper-quiet DC motor, and smart capabilities that let you control it from your phone or voice assistant.
Investing in a high-quality, low-maintenance fan can free you from the cycle of constant adjustments and repairs. It turns a functional appliance into a stylish, convenient, and long-lasting part of your home's comfort system.
Got Questions About Cleaning Your Ceiling Fan?
Even the most thorough guide can leave you with a few lingering questions. When it comes to cleaning ceiling fan blades, a few pop up more than others. Let's wrap up by tackling some of the most common ones to give you quick, clear answers so you can clean with total confidence.
Think of this as your go-to reference for those little "what if" moments. From how often you really need to clean to dealing with ridiculously high ceilings, these are the details that turn a good cleaning job into a great one.
How Often Should I Really Clean My Ceiling Fan Blades?
Honestly, the ideal schedule really depends on your home. For most households, a quick dusting or a pass with the pillowcase trick every 2-3 months is perfectly fine to keep things from getting out of hand.
But some homes are just dust magnets. If you have pets that shed, family members with allergies, or live in a place that just seems to generate dust out of thin air, you'll probably want to clean your fan blades monthly. Kitchen fans are their own special beast—they collect a greasy film from cooking, so they often need more frequent wipe-downs.
The simplest rule of thumb? Just look up. If you can see a fuzzy layer of dust clinging to the edges of the blades, it’s time for a clean.
Can I Use a Vacuum Cleaner on My Fan Blades?
Absolutely! Grabbing a vacuum with a soft brush attachment is a fantastic and super-efficient way to get rid of loose dust and those annoying cobwebs. It’s my go-to for quick, in-between maintenance cleanings.
Just make sure you’re safely planted on a sturdy ladder and can comfortably reach the blades without overextending yourself. While a vacuum is a champ for dry dust, remember it won't do much against sticky, greasy buildup. For that, you’ll still need to follow up with a damp cloth and a good cleaner, but vacuuming first makes that next step so much easier.
My Fan Wobbles After I Cleaned It. What Did I Do Wrong?
Don't panic—this happens all the time, and it's usually an easy fix. A fan that starts wobbling right after a cleaning is almost always a sign that one of the blades is slightly out of balance. It's not something you did wrong; it's just a side effect of applying a bit of pressure while scrubbing.
First, kill the power at the circuit breaker. Then, double-check that all the screws holding the blades to their brackets are tightened down securely—this is the culprit more often than not. If it still wobbles, grab a yardstick and measure the distance from the tip of each blade to the ceiling. If one is a little off, you can gently bend the metal blade bracket (not the blade itself!) up or down to bring it back into alignment.
What Is the Best Way to Clean Very High Vaulted Ceiling Fans?
Cleaning fans on vaulted ceilings is all about a safety-first approach. Your best friend for this job is an extendable duster with a pivoting head. This lets you do a pretty effective job right from the ground, no ladder required.
Look for a model with a long pole and a microfiber or chenille duster head; those materials are great at trapping dust instead of just pushing it around. If you need a deeper clean that requires getting up close, it's essential to use a tall, stable A-frame ladder and always have a spotter. Seriously, never try to reach a high fan by standing on a chair or some wobbly piece of furniture.
For homes with high ceilings, investing in a fan designed for easier maintenance can be a real game-changer. A model like the Hunter Apex 72 in. Ceiling Fan (around $849) is built with powerful airflow and a sleek design that doesn’t have as many nooks and crannies for dust to collect, making those future cleanings a whole lot simpler.
At Fan Connection, we believe the right fan does more than just move air—it enhances the style and comfort of your home. From minimalist three-blade designs to elegant statement pieces, we offer a curated selection to fit any space. Explore our collections and find the perfect fan to elevate your home's airflow and aesthetic. Find your perfect match at https://www.fanandlights.com.


