


Ceiling Fan Wiring Diagram With Remote Control Explained
Adding a remote control to your ceiling fan is one of those small upgrades that makes a huge difference. No more fumbling for pull chains in the dark! But before you can kick back and enjoy that sweet, sweet convenience, you've got to get the wiring right. Consider this your pre-flight check, here to walk you through the process so you can tackle the job safely and with the confidence of a seasoned pro.
Think of it less like a complex electrical puzzle and more like a high-stakes matching game. You have power coming from the ceiling, a fan that needs that power, and a remote receiver that plays middleman. The whole goal is to connect these three pieces so they can talk to each other and bring a cool breeze into your life.
Understanding the Core Components
Getting the wiring right starts with knowing the key players. There are three main elements you'll be working with in any remote-controlled ceiling fan installation:
- Your Home's Wiring: This is the power source from your ceiling's electrical box, usually with a black (hot), white (neutral), and a bare copper or green (ground) wire.
- The Remote Receiver: This small black box is the star of the show. It's the brain of the operation, with one set of wires to connect to your home's power and another set that connects directly to the fan and its light.
- The Ceiling Fan Wires: The fan itself has its own wires—typically black for the motor, blue for the light kit, white for the neutral, and green for the ground.
The entire installation really just comes down to connecting these wire sets in the right order. The receiver intercepts the power from the wall switch and, based on your remote's commands, sends it to either the fan motor or the light. It's a simple, yet brilliant, system.
For a great overview of the whole process from start to finish, check out our guide on how to install a ceiling fan.
Pro Tip: Before you disconnect anything, snap a quick picture of the existing wiring in your ceiling box after you take down the old fixture. Trust me, that photo can be a lifesaver if you get stuck and need to remember how things were.
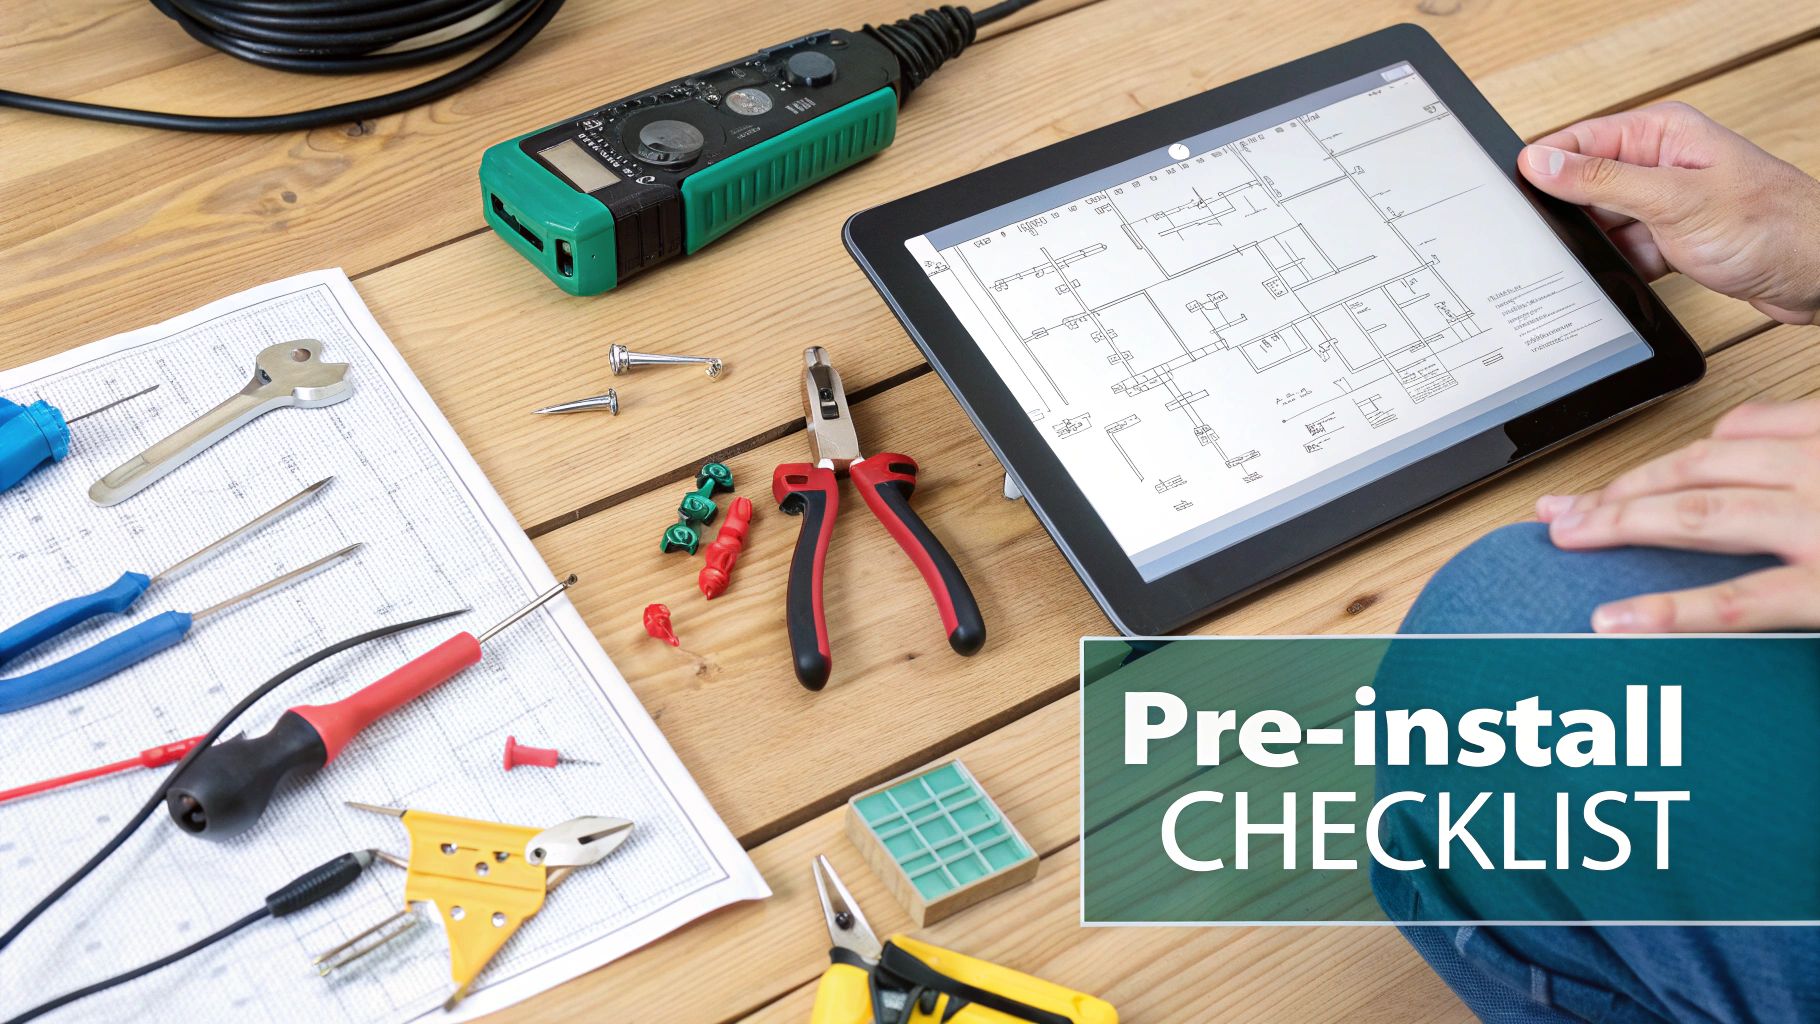
Essential Tools and Materials Checklist
Having the right tools on hand makes the difference between a frustrating afternoon and a job well done. You don’t need a pro-level workshop, but a few key items are non-negotiable for doing this safely and efficiently.
| Tool/Material | Purpose | Pro Tip |
|---|---|---|
| Non-Contact Voltage Tester | To 100% confirm the power is off before you touch any wires. | Test it on a live outlet first so you know it's working properly. |
| Screwdrivers | Phillips and flat-head for mounting bracket and fan screws. | A multi-bit screwdriver saves time and space in your tool belt. |
| Wire Strippers/Cutters | For stripping insulation and trimming wires to the correct length. | Don't use your teeth or a knife; a proper stripper prevents damaged wires. |
| Pliers | For twisting wires together before capping them with a wire nut. | Needle-nose pliers are great for grabbing wires in a tight electrical box. |
| Ladder | A sturdy stepladder to safely reach the ceiling. | Make sure it's on a flat, stable surface. Wobbling is a bad sign. |
| Wire Nuts | To connect and secure all wire connections. | Use the correct size for the number of wires you're connecting. |
| Electrical Tape | To wrap around wire nuts for an extra layer of security. | Wrap it in the same direction you twisted the nut on. |
A wobbly ladder or a worn-out screwdriver can turn a simple job into a dangerous one. Taking a few minutes to gather your gear upfront means you can focus on the task without any unnecessary interruptions.
Figuring Out the Wires in Your Ceiling Box
Before you can even think about connecting that new fan, you’ve got to do a little detective work. Popping open the ceiling box and staring at a tangle of wires can feel like defusing a bomb, but it's really just about identifying a few key players. Getting this right is the most important step for a safe, functional, and headache-free installation.
Think of your ceiling box as the junction where power from your home's breaker panel arrives. Your job is to figure out which wires do what. The very first thing you need to do—no exceptions—is turn off the power at the circuit breaker. A non-contact voltage tester is your best friend here. Always test the wires to be absolutely certain they're dead before touching anything.
What’s Your Wiring Situation?
Once you’ve confirmed the power is off, you can safely pull the wires out a bit to see what you're working with. Most homes will have one of a few common setups, and figuring out yours will tell you exactly how to hook up that remote receiver.
- The Standard Single-Switch: This is what you'll find most of the time. You’ll see one cable coming into the box with a black wire, a white wire, and a bare copper or green ground wire. It just means a single wall switch controls whatever is installed there.
- Dual-Switch for Fan and Light: In this setup, you'll probably spot an extra wire, usually a red one. This is a good sign—it means the room was wired so you could control a fan's motor and its light from two separate switches on the wall.
- Older Two-Wire Systems: In some older homes, you might only find a black and a white wire, with no ground. It’s not ideal from a modern safety standpoint, but you can still install a fan. You just have to be extra careful with your connections.
Knowing which of these you’re dealing with is crucial. If you're swapping an old light for a new fan, our guide on how to change a ceiling fan to a light fixture can also give you some great reverse-engineering insights into your home's wiring.
The Electrical Wire Color Code
While things can sometimes get creative in older homes, residential wiring in North America generally follows a standard color code. This is your decoder ring for making sense of it all.
- Black Wire (Hot): This is the live wire that brings the power from the switch to your fan.
- White Wire (Neutral): This wire completes the circuit, carrying the electrical current back to the source.
- Bare Copper or Green Wire (Ground): This one is all about safety. Its job is to give electricity a safe path to the ground if there's a short circuit, which helps prevent shocks.
- Red Wire (Second Hot): If you see this, it’s almost always the second live wire in a dual-switch setup, typically used to control the light kit separately from the fan motor.
A classic mistake is just trusting the wire colors. Don't do it. Always use a voltage tester to verify which wire is actually hot before you start disconnecting or connecting anything. It’s a five-second check that can save you from a major headache.
This whole focus on home upgrades is part of a much bigger picture. The North American ceiling fan market is on track to hit USD 5.55 billion by 2033, pushed by a huge demand for energy-efficient cooling and smart home tech. With over 80% of new single-family homes being built with ceiling fans, features like remote controls are becoming the standard. You can dig into more of this data on market trends and see how things are changing over at marketdataforecast.com.
Now, what about the fan you're about to unbox? It comes with its own set of wires, and the final piece of the puzzle is matching them up correctly with your ceiling wires and the new remote receiver. This is where your wiring diagram truly comes to life.
Wiring a Remote on a Single-Switch Circuit
This is the classic setup you'll find in most homes: one wall switch controls the power to the junction box in the ceiling. It’s the most common configuration for bedrooms and living rooms, making it a perfect starting point for adding a remote control to your fan. Let the fun begin!
Think of the remote's receiver as the new command center for your fan. Power will travel from your wall switch to the receiver, which then acts like a smart dispatcher, sending power to the fan's motor and light whenever you press a button on the remote. That single wall switch now becomes the master on/off for the whole system.
Before you touch a single wire, this infographic lays out the crucial first steps for any electrical project.
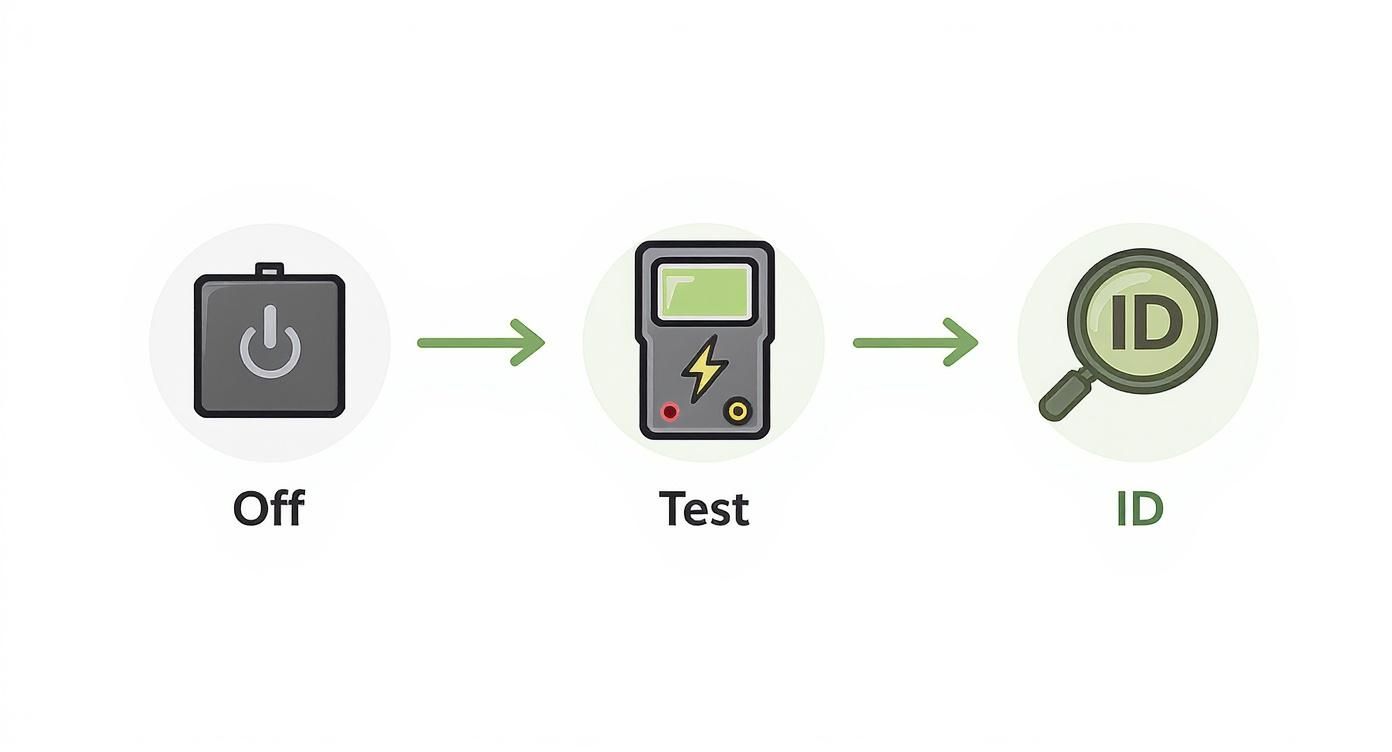
This sequence—power off, test, and identify—is non-negotiable. It's the foundation of a safe and successful installation, every single time.
Getting Power to the Receiver
First things first, let's get power from the ceiling to the receiver. After you’ve killed the power at the breaker and double-checked with a voltage tester that the circuit is dead, you'll be working with the "input" side of the receiver.
- Connect the Neutral Wires: Grab the white (neutral) wire from the ceiling box and connect it to the white wire on the receiver, usually marked "AC IN N".
- Connect the Hot Wires: Now, take the black (hot) wire from the ceiling box and connect it to the black wire on the receiver, typically marked "AC IN L".
Use a wire nut for each of these connections. I always give the bare copper ends a good clockwise twist with my pliers before screwing the nut on. Give each wire a gentle but firm tug afterward to make sure it's secure. For an extra layer of safety, I like to wrap each wire nut with electrical tape, following the same clockwise direction.
Wiring the Fan from the Receiver
With the receiver powered up, it's time to connect it to the fan itself. You'll now be working with the "output" wires coming from the receiver, often labeled "TO MOTOR" or something similar.
- The Fan Motor: Connect the receiver's black wire (often labeled "For Fan" or "Motor") to the fan's black motor wire.
- The Light Kit: Take the receiver's blue wire (usually labeled "For Light") and connect it to the fan's light wire, which is also typically blue or sometimes black with a white stripe.
- The Shared Neutral: Finally, connect the white neutral wire from the receiver to the white neutral wire on the fan.
This is the core of any ceiling fan wiring diagram with remote control—the receiver is now the middleman, managing the fan and light circuits independently.
Tying in the Ground Wires
Don't even think about skipping the ground wires; this is a critical safety step. You should have three of them: a green or bare copper wire from the ceiling box, one from the fan's mounting bracket, and one from the fan motor assembly itself.
Twist all three of these ground wires together under a single wire nut. This provides a safe path for electricity to travel in case of a short circuit, preventing dangerous shocks.
A Common Pitfall: The biggest mistake I see people make is not planning for where the receiver will actually fit. It's a tight squeeze up there. Before connecting anything, do a dry run and figure out the best way to tuck the receiver into the mounting bracket so it sits flush without pinching any wires. This little bit of planning saves a massive headache later.
Once all your connections are solid, carefully tuck the wires and receiver up into the mounting bracket. The goal is to get everything neatly organized without putting any strain on your connections. Take your time, arrange the wires, and then you’ll be ready to slide the fan’s canopy up and secure it. This careful placement is key to a fan that works perfectly from the first click.
Wiring Your Remote When You Have Two Wall Switches
Walking into a room and seeing two switches—one for the fan, one for the light—usually feels like you've hit the wiring jackpot. It’s the ideal setup for independent control. But when you throw a remote control receiver into the mix, the rules change a bit. You may have two separate power wires coming from the wall, but your new remote receiver only has one spot for a power input. It's like having two quarterbacks but only one can be on the field.
So, what’s the fix? It's all about simplifying. Instead of trying to juggle two hot wires, you're going to pick one to power the entire fan unit. This move effectively turns one of your wall switches into the master "on/off" switch for the fan, while the remote takes over the fun part: controlling the motor and the light separately.
This approach neatly avoids a really common and frustrating problem where the remote will only work if both wall switches are flipped on. By consolidating the power source, you create a simple, logical circuit that just works.
Picking Your Power Source and Getting it Connected
Your first job is to figure out which of the two hot wires in the ceiling box will be your new power source. In most dual-switch setups, you'll find a black wire and a red wire, along with the usual white (neutral) and green or bare copper (ground). Both the black and red wires are "hot," with each one getting its power from a different switch on the wall.
First things first: head to your breaker box and kill the power to the room. Double-check that it's off with a voltage tester before touching anything. Safety first, always.
Now, you just have to make a choice. Pick one of the hot wires—let's use the black one for this example—to be the single power source for the receiver.
- Take that black hot wire from the ceiling and connect it to the black input wire on your remote receiver (it's often labeled "AC IN L").
- Next, connect the white neutral wire from the ceiling to the white input wire on the receiver (labeled "AC IN N").
That’s it. You’ve now channeled all the power through a single switch, which is exactly what the remote receiver needs to do its job.
What to Do with That Extra Hot Wire
You're probably looking at that leftover red wire and wondering what to do with it. It’s simple: you’re going to safely cap it off so it's out of the circuit. Think of it as sending a player to the bench.
Just twist a wire nut securely onto the exposed end of the red wire. Give it a gentle tug to make sure it’s on tight, and for good measure, wrap it once or twice with electrical tape. That wire is now safely isolated and won't interfere with your new setup.
By dedicating one switch as the master power supply, you streamline the electrical flow. The remote receiver gets the constant power it needs, and you get flawless control without the confusion of managing two switches. Think of it as promoting one switch to CEO and letting the remote become the department manager.
It's no surprise that upgrades like this are becoming more popular. The global demand for ceiling fans is booming, with the market expected to hit USD 18.90 billion by 2033. This growth is all about homeowners wanting more convenience and better energy efficiency—exactly what a smart, remote-controlled fan delivers. You can read more about this expanding market on GlobeNewswire.
Connecting the Fan and Light to the Receiver
With the receiver powered up and the extra wire safely capped, the rest of the wiring is exactly the same as a standard single-switch installation. You'll just be connecting the receiver's output wires to their matching wires on the fan.
- Fan Motor: Connect the black output wire from the receiver to the black motor wire on the fan.
- Light Kit: Connect the blue output wire from the receiver to the blue (or striped) light wire on the fan.
- Neutral Wires: Connect the white output wire from the receiver to the white neutral wire on the fan.
- Ground Wires: Finally, gather all the ground wires—from the ceiling, the mounting bracket, and the fan itself—and connect them together with a single wire nut.
Once those connections are made, your ceiling fan wiring diagram with remote control is officially complete. Now you can carefully tuck the receiver and all the wires into the mounting bracket, install the canopy, and enjoy your new, simplified remote-controlled fan.
Thinking about upgrading your ceiling fan? It's more than just a practical choice these days; it's a real investment in your home's comfort, style, and tech. Once you look past the basic models, you'll find a whole new world of fans that are less like simple fixtures and more like statement pieces packed with modern conveniences. This is for the homeowner who wants it all: a fan that’s whisper-quiet, beautifully designed, and plugs right into their smart home setup.
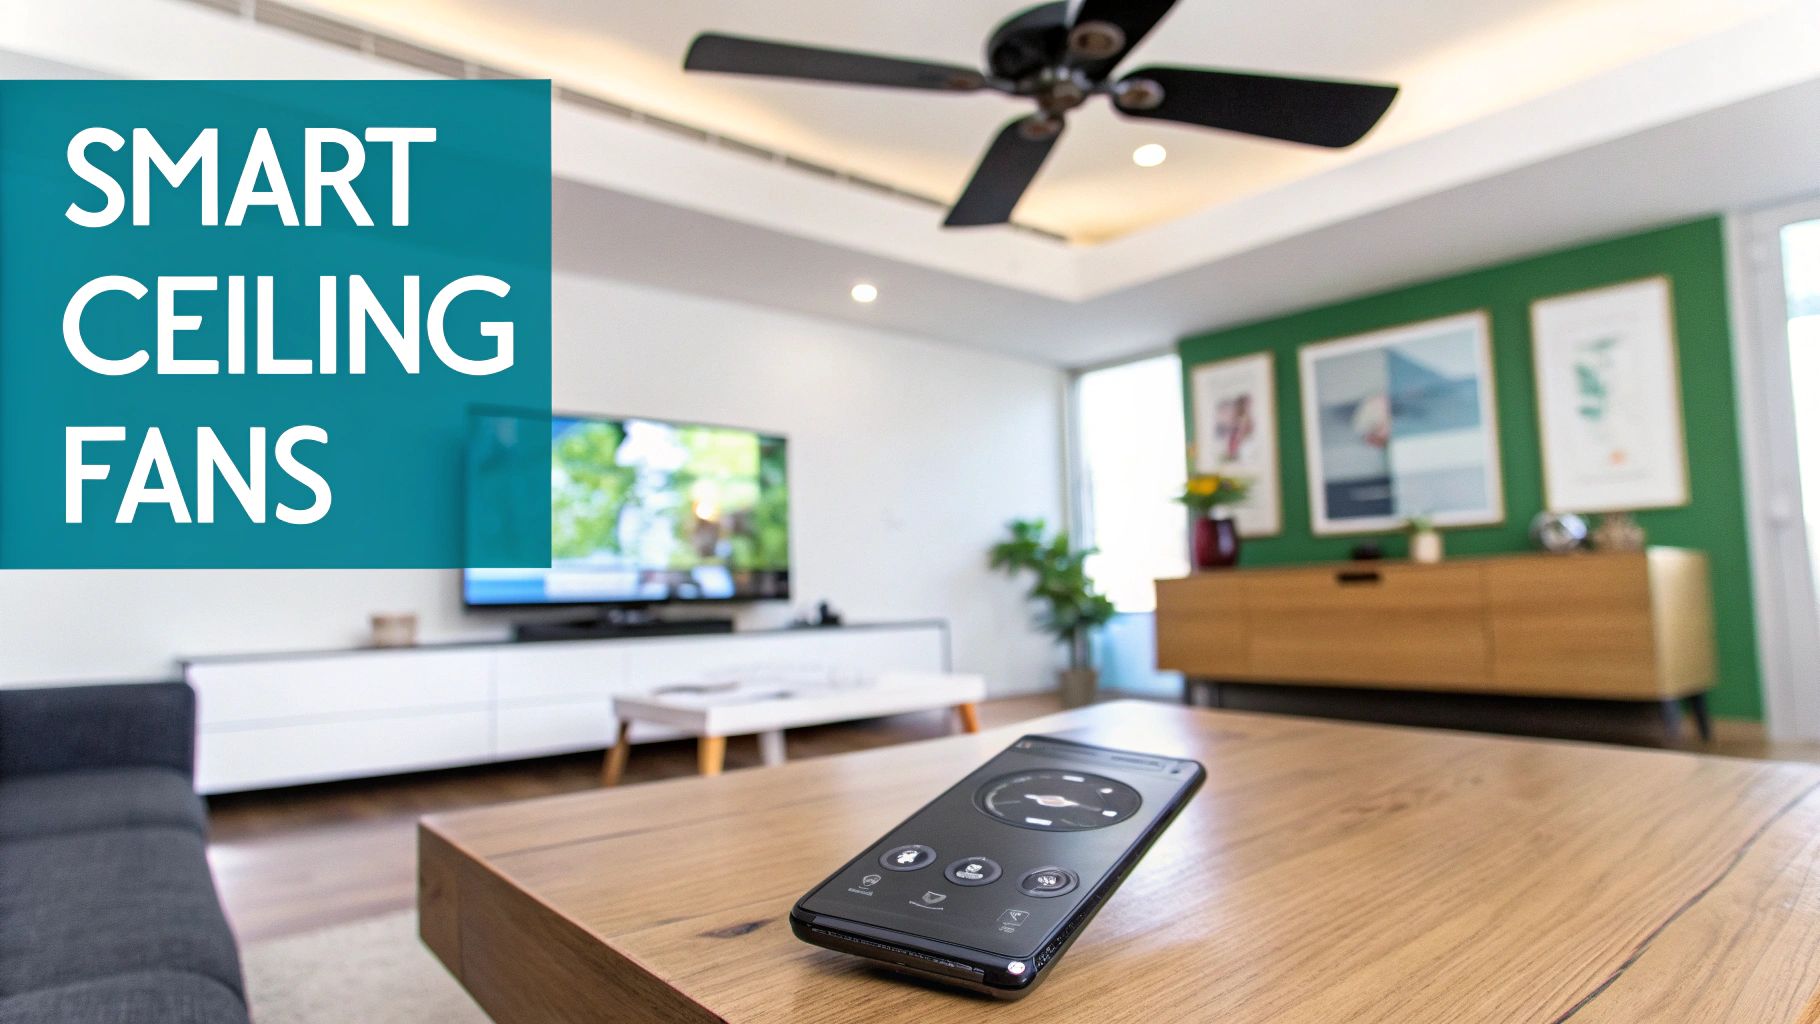
Premium smart fans, which usually start around $300, offer a totally different experience. They've ditched the noisy, old-school AC motors for ultra-efficient and virtually silent DC motors. These advanced motors don't just cut down energy use by up to 70%; they also give you much more precise speed control and let you reverse the blade direction right from the remote or an app. No more wobbly ladders in the winter!
What Sets Premium Fans Apart
It all comes down to the details. High-end fans are built with top-notch materials like solid wood blades, die-cast aluminum, and heavy-duty steel. This means they’re built to last and run for years without a single wobble. But the real magic is in their smart capabilities.
- Seamless Smart Home Integration: Just tell Amazon Alexa or Google Assistant what you want. It's that easy.
- Full App Control: A dedicated smartphone app lets you manage everything—speed, light, direction—and even set schedules, whether you're on the couch or out of the house.
- Advanced Scheduling: You can program your fan to turn on right before you get home or have it adjust its speed based on the time of day, making your home's climate control smarter and more efficient.
This level of control turns a simple appliance into an active part of your home. It's no wonder the demand for these fans is booming. The global smart ceiling fan market was valued at USD 521.6 million in 2025 and is expected to keep climbing, which just shows how much homeowners are leaning into smart, convenient solutions. You can dive deeper into this growing market and its future trends to see where things are headed.
Spotlight on Top-Tier Models
When you're ready to make the investment, a few brands consistently stand out for their quality and innovation. A model like the Minka-Aire F844-DK, for example, brings together a sleek, aviation-inspired look with a powerhouse DC motor and smart controls. It’s famous for its ability to move a ton of air without making a peep.
Then there's the Big Ass Fans Haiku, a true icon in the industry. It's a premium fan with a price tag to match, but it delivers award-winning design, patented motor technology, and even has onboard sensors that automatically adjust the fan speed based on room temperature and humidity. It’s the ultimate "set it and forget it" fan for those who want the best.
And don't forget the controller. Whether you need a specific type or are just looking at upgrade options, you can check out our huge collection of remote controls for fans to find one that's compatible.
A premium smart fan is an investment that pays off daily. The convenience of asking Alexa to turn on the fan, the energy savings from a DC motor, and the elevated style of a well-crafted fixture all contribute to a more comfortable and sophisticated living space.
Choosing one of these models isn't just about buying a fan; it's about upgrading your lifestyle. The good news is that the installation for these high-end models is often more straightforward. The ceiling fan wiring diagram with remote control is usually crystal clear, and the components are designed to fit together perfectly.
Troubleshooting Common Remote Control Glitches
So you’ve meticulously installed your new fan, but the remote is acting up. It happens. Your first instinct might be to sigh, grab the screwdriver, and start undoing all your hard work. But before you do, take a breath. Most remote control glitches are caused by surprisingly simple issues that are easy to fix.
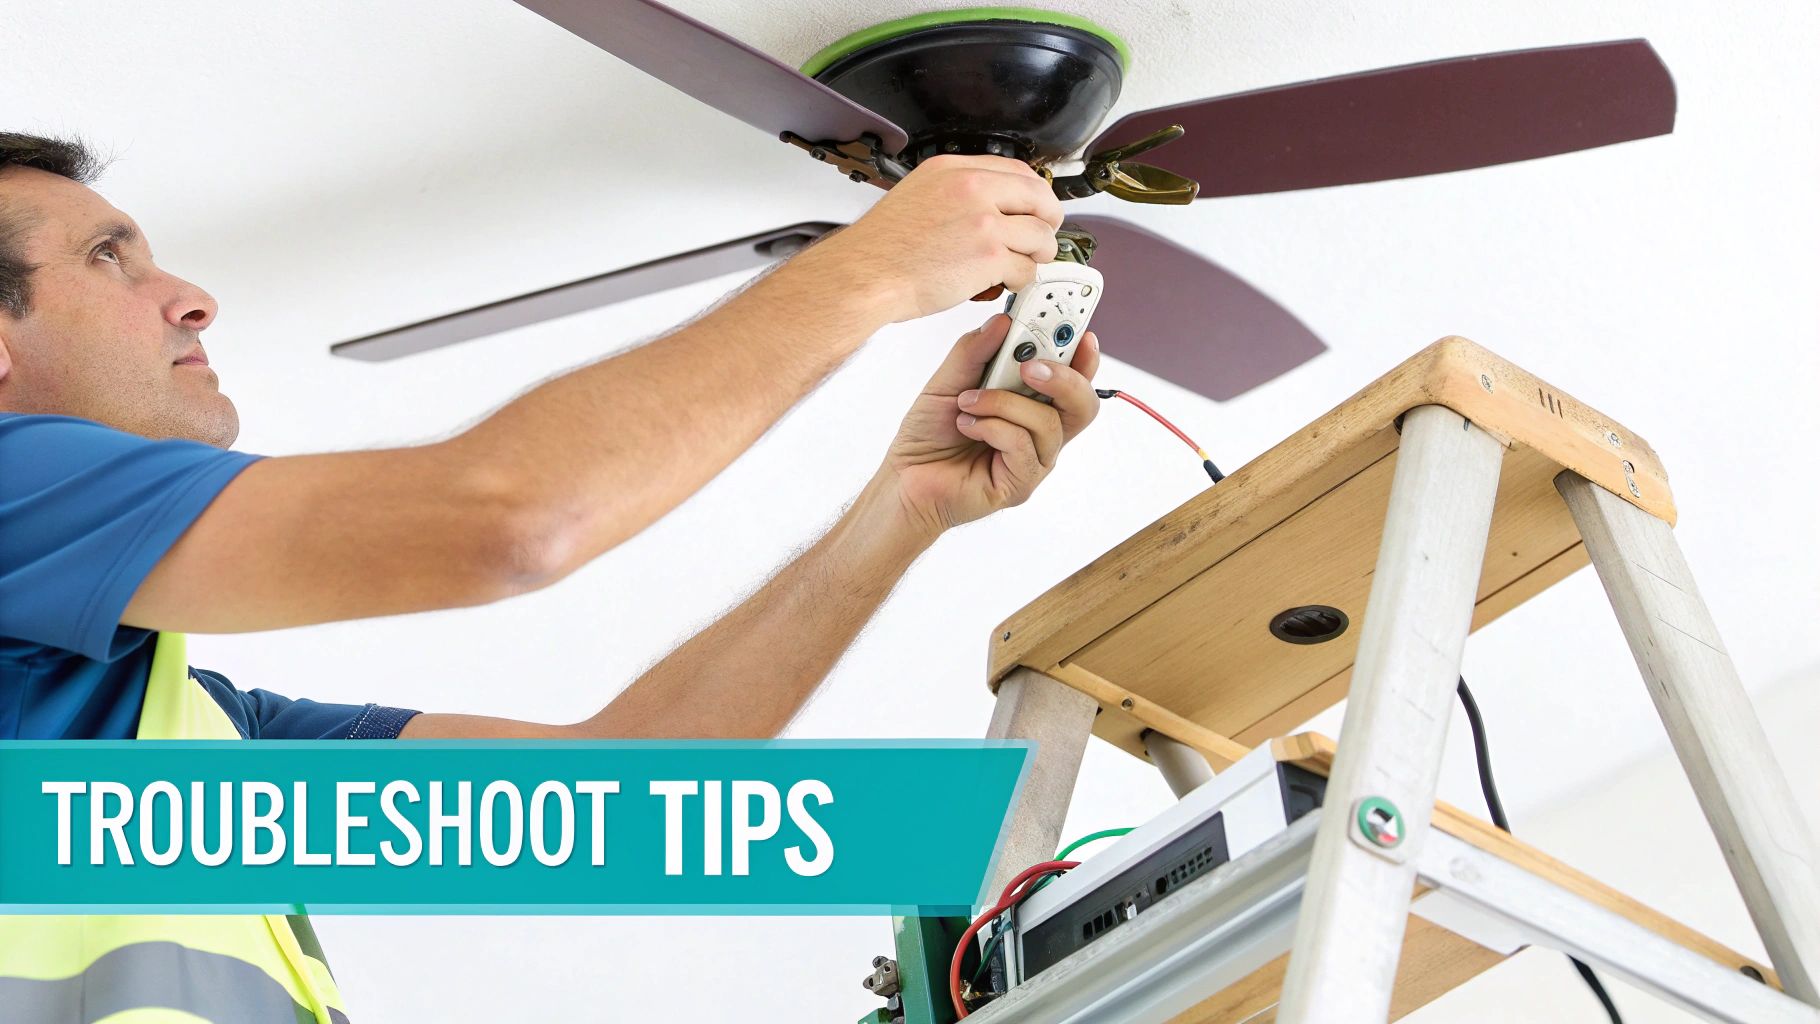
Think of this section as your first line of defense against remote control frustrations. From a remote that seems completely dead to a fan with a mind of its own, we'll walk through the likely culprits and how to solve them. This is your roadmap to getting things spinning again without tearing everything apart.
The Remote Isn't Pairing
One of the most common hiccups we see is a remote that just won't pair with the receiver, especially right after installation. Don't worry, this can almost always be fixed with a quick reset.
First, let's check the obvious. Are the batteries fresh and installed the right way? It sounds almost too simple, but you'd be surprised how often this is the root cause of the problem.
If the batteries are good, it's time to cycle the power. Head over to your wall switch or circuit breaker and cut the power to the fan. Now, wait a full 10-15 seconds. This is key, as it lets the receiver's internal capacitors fully discharge. Once you've waited, flip the power back on.
You have a short window here—usually within three minutes of restoring power—to pair the remote. Press and hold whatever the designated "pair" button is for your model. Sometimes it's a tiny, recessed button inside the battery compartment, or it might be a combination like holding the "Fan" and "Light" buttons at the same time for a few seconds. Check your fan’s manual to be sure. A successful pair is usually confirmed with a little beep from the fan or a quick flash of its light.
Solving Intermittent Operation or Interference
Is your fan turning on by itself in the middle of the night? Or worse, is your neighbor's remote controlling your fan? This is a classic problem, especially with older fans that use physical DIP switches to set their frequency.
Think of it like this: your remote and receiver are broadcasting on a shared frequency, kind of like a walkie-talkie channel. If someone else is on the same channel, you get crosstalk. To fix it, you just need to switch to a private channel.
Here’s how you do it. Start by cutting the power at the breaker for safety. Pop open the remote's battery compartment and you’ll see the little bank of DIP switches. Use a pen tip or a small screwdriver to change the switch pattern to a new, random combination.
Next, you'll need to lower the fan's canopy to get to the receiver tucked up in the ceiling bracket. Find the DIP switches on the receiver and change them to the exact same pattern as the remote. Once they match, restore the power. Your fan will now listen only to its paired remote.
A Few Common Wiring Questions
Even with a perfect diagram in hand, sometimes things just don't go according to plan. Let's walk through some of the most common questions we hear from customers, so you can solve them without breaking a sweat.
Can I Add a Remote to Any Ceiling Fan?
The short answer is almost always a yes. If you have a standard pull-chain ceiling fan, chances are you can add a universal remote control kit to it. The real issue isn't usually the wiring—it's the physical space.
The remote's receiver, that little black box, needs to tuck away neatly inside the fan’s canopy up at the ceiling. Before you buy anything, it’s worth taking a quick measurement inside your fan's canopy. If it's a super compact or low-profile fan, you might not have enough room to house the receiver without pinching wires, which is a big safety no-no.
Keep in mind that some high-end fans, especially those with fancy proprietary electronics or DC motors, are a different story. They’re designed to work only with the specific remote they came with.
The Remote Works the Fan but Not the Light. What Gives?
Ah, the classic. This one almost always points to a single missed connection. Inside your remote's receiver, you’ll find a blue wire specifically meant to power the fan's light kit. If your fan blades are spinning but the light is out, it's a pretty safe bet that this wire isn't connected properly.
Your first move should be to double-check that the blue wire coming from the receiver is securely connected to the light wire on the fan itself (this wire is usually also blue, but sometimes it's black with a white stripe). A loose wire nut is often all it takes to keep your light in the dark.
Help! My Fan Turns On by Itself.
If your fan seems to have a mind of its own, turning on and off at random, the culprit is almost certainly signal interference. This is a common hiccup with older remote models that use DIP switches for pairing. What’s happening is your remote and receiver are likely on the same frequency as your neighbor’s garage door opener or another device nearby.
It's a simple fix, really. Think of it like tuning two walkie-talkies to a private channel so no one else can chime in on your conversation.
To sort this out, kill the power to your fan at the breaker. Pop open the remote's battery compartment and you’ll see a small block of DIP switches. Just flip them into a new, random pattern. Next, get access to the receiver in the fan canopy and change its DIP switches to the exact same pattern. Once they match, you've created your own private communication link, and your ghostly fan problems will be a thing of the past.
Ready to find a fan that works flawlessly and looks incredible? At Fan Connection, we’ve hand-picked a collection of premium fans that integrate seamlessly with modern remote controls and smart home systems. Find the perfect upgrade for your home today.


