


How to Balance a Ceiling Fan: Stop the Wobble with Simple Steps
That rhythmic thump-thump-thump from your ceiling fan isn't the beat of a cool new song; it's a distress signal that something is off-balance. Most of the time, the culprit is something simple—loose screws, a bit of dust buildup, or blades that have shifted slightly. The good news? Fixing it is usually a quick and satisfying DIY job. A little cleaning, some tightening, and maybe a simple balancing kit are all it takes to restore peace, quiet, and smooth spinning glory.
Why Your Ceiling Fan Wobbles and How to Fix It
The gentle whir of a ceiling fan should be a sound of comfort, not a rhythmic wobble that makes you nervously eye the ceiling. A wobbly fan is more than a distraction; it’s a mechanical cry for help. That constant shaking puts a ton of unnecessary stress on the fan's motor and all the mounting hardware, which can lead to a much shorter lifespan. It’s the home appliance equivalent of a shaky dance move that just won’t stop.
Ignoring a wobble is a bit like ignoring a strange clanking noise from your car's engine. Sure, it might be fine for a while, but eventually, that small issue can snowball into a bigger, more expensive problem. Luckily, learning how to balance a ceiling fan is one of the easiest and most rewarding home repairs you can tackle.
The Science Behind the Shake
At its heart, a ceiling fan wobble is a straightforward physics problem. When the weight isn't distributed evenly, the fan's center of gravity shifts as it spins, creating that all-too-familiar shake. It doesn't take much to throw this delicate balance off.
A few common causes I see all the time include:
- Dust Buildup: It sounds minor, but a thick layer of dust on top of just one or two blades adds weight, creating an instant imbalance.
- Loose Screws: From the ceiling mount down to the blade arms, any connection that isn't snug will allow for excess movement and rattling.
- Warped Blades: This is especially common with blades made from natural materials like wood, which can warp over time due to humidity changes.
- Improper Installation: The electrical box in the ceiling has to be fan-rated and securely anchored to a ceiling joist. A regular light fixture box just won't cut it.
You'll find that the core principles of diagnosing and fixing instability apply to a lot of things around the house. In fact, you can use a similar troubleshooting process when you're figuring out how to fix a wobbly table.
Before you dive into the full balancing process, it's worth running through a few quick checks. Most of the time, the fix is simpler than you think.
Initial Wobble Diagnosis Checklist
Use this checklist to quickly identify and solve the most common causes of a wobbly fan before you start the balancing process.
| Check Point | What to Look For | Simple Fix |
|---|---|---|
| Blade Screws | Loose screws where the blade meets the blade arm (bracket). | Tighten all screws with a Phillips head screwdriver until snug. |
| Blade Arm Screws | Loose screws where the blade arms attach to the motor. | Tighten these screws securely. Don't overtighten. |
| Downrod & Canopy | Any play or looseness at the ceiling canopy or downrod. | Ensure the canopy cover is tight and the downrod set screw is secure. |
| Dust on Blades | Visible layers of dust, especially on the top edges. | Wipe down all blades with a damp cloth. Let them dry completely. |
| Blade Alignment | Blades that look obviously bent, warped, or out of line. | Gently try to bend a slightly warped blade back into place. Replace if cracked. |
Running through these steps solves the problem about 80% of the time without ever needing a balancing kit.
More Than Just Annoying Noise
This isn't just a minor inconvenience. An unbalanced fan is one of the leading causes of noise complaints and premature motor failure. Based on industry service data, roughly 18% of all ceiling fan repair calls are directly related to wobbling issues.
Think about it: a fan that wobbles more than 1/8 of an inch can reduce its motor's lifespan by up to 30% simply due to the constant, added stress.
While other factors like blade count can certainly affect how well a fan moves air, a stable, well-balanced fan is the absolute foundation of good performance. You can read more on that in our guide on the impact of fan blade count and fan efficiency.
Fortunately, modern fans are built with stability in mind from the get-go. A great example is the Minka-Aire F844-DK Light Wave 52 Inch Ceiling Fan ($399.95). It comes with precision-balanced blades and a rock-solid motor designed for smooth, wobble-free operation right out of the box, proving you can get high style without the shake.
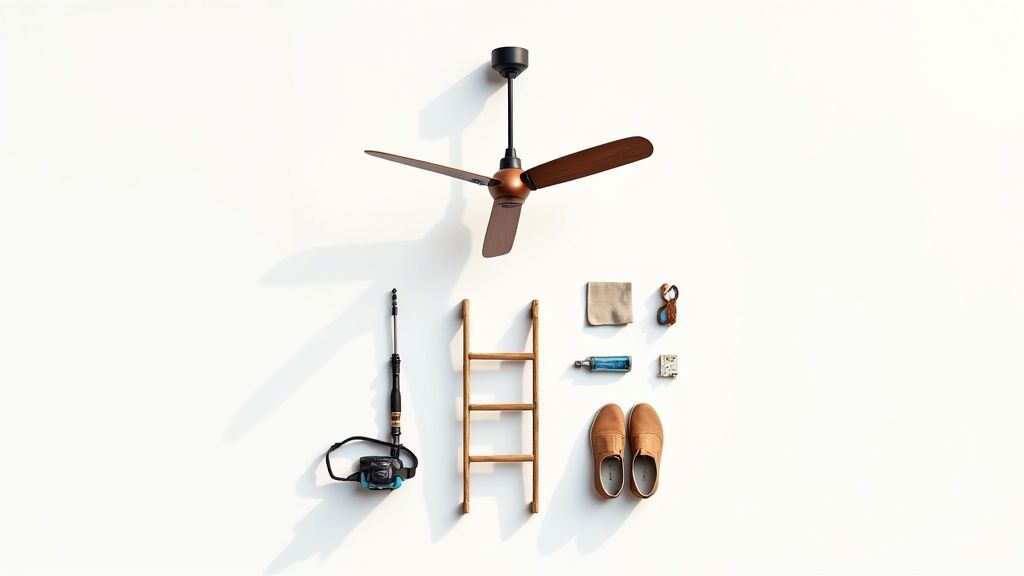
Assembling Your Fan Balancing Toolkit
Before you even think about climbing a ladder, taking a few minutes to gather your tools is going to make this whole process a lot smoother. It’s the difference between a quick fix and multiple frustrating trips up and down to the garage. We’re not just grabbing any old screwdriver; we're getting prepped like a pro.
Trust me on this one: a magnetic-tipped Phillips head screwdriver is a total game-changer. It holds onto those tiny blade and canopy screws, so you're not crawling around on the floor trying to find one that's rolled under the sofa. That little detail alone saves a surprising amount of headache.
Core Toolkit Essentials
Your toolkit doesn’t need to be massive, but having the right things on hand is key. The goal here is to be ready for the easy stuff (like a loose screw) and the more detailed balancing work that might come up.
Here’s a quick rundown of what you’ll want to have ready:
- A Sturdy Stepladder: Safety first, always. Make sure your ladder is on a flat, stable surface and is tall enough for you to work comfortably without reaching over your head.
- Microfiber Cloth: A good cleaning is the first real step, and a microfiber cloth is perfect because it traps dust instead of just flicking it into the air. Dust buildup is a surprisingly common cause of fan wobble.
- Ceiling Fan Balancing Kit: This is your secret weapon if simple tightening doesn't do the trick. Most kits come with a plastic clip to find the problem spot and a few small weights with adhesive backs to stick on the blade.
- Safety Gear: This is just practical stuff. A good pair of non-slip shoes gives you a secure footing, and a headlamp can be a lifesaver when you’re trying to see those tiny screws tucked away inside the fan’s housing.
The Ultimate Upgrade for Wobble-Free Living
While a balancing kit is great for fixing an existing wobble, starting with a fan engineered for stability is the best long-term play. For instance, the Modern Forms FR-W1801-72L-GH/WG Vox 72 Inch Ceiling Fan ($1,099.00) is designed from the ground up to avoid these issues. Its powerful DC motor and precision-crafted blades are factory-balanced, meaning it runs silently and smoothly right out of the box.
Having the right tools on hand is half the battle. When everything is organized and within reach, you can focus on diagnosing and fixing the wobble correctly the first time.
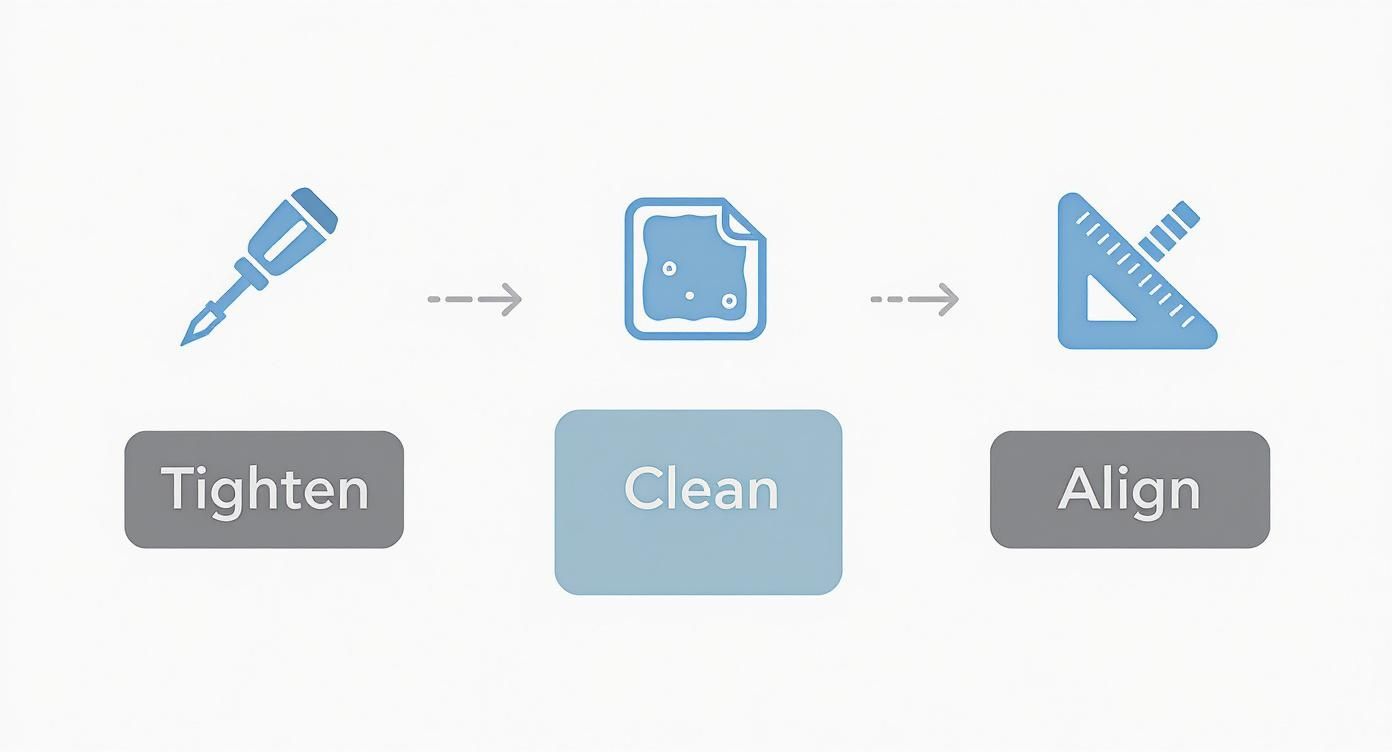
With your gear all set, you’re ready to tackle the most common culprits. The next steps will walk you through a simple system of cleaning, tightening, and aligning—the three pillars of a perfectly stable ceiling fan.
Your First Fixes: Tighten, Clean, and Align
Before you even think about reaching for a balancing kit, let's cover the basics. More often than not, a wobbly ceiling fan is just asking for a little TLC, not a complicated repair. The most common culprits are surprisingly simple—loose screws, an uneven blanket of dust, or blades that have drifted out of alignment.
By tackling these three areas first, you can often solve the wobble in just a few minutes without any special tools. It's the fan-fixer's equivalent of checking if something is plugged in before calling for help. Let's walk through this simple but systematic approach to get your fan spinning smoothly again.
The Systematic Tightening Process
Vibrations are the enemy of anything held together by screws. Over months and years of spinning, a ceiling fan's constant motion can loosen key connections just enough to create that irritating wobble. Your mission is to work from the top down, making sure every single screw is snug.
Start right at the ceiling. Gently push on the fan's canopy—that's the decorative cone pressed against the ceiling—to see if it moves. If there's any play, tighten the screws holding the mounting bracket to the electrical box above. Next, give the downrod a little wiggle and check that the set screw holding it in place is secure.
Finally, move on to the blades themselves. One by one, tighten the screws that connect each blade to its blade arm (or bracket), and then tighten the screws holding those arms to the fan's motor. Just be careful not to overtighten, which can strip the screws or crack the blade. All you need is a snug, secure fit.
The Importance of a Thorough Cleaning
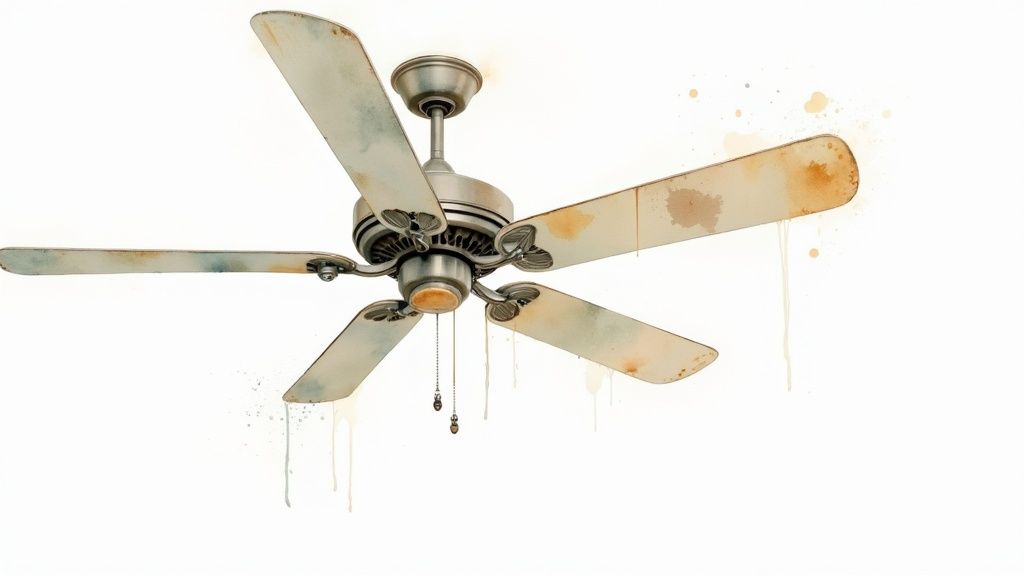
It sounds almost too simple, but a thick layer of dust can absolutely throw a fan off balance. When dust and grime build up unevenly, one blade can become heavier than the others, creating a lopsided spin that results in a wobble. A good cleaning isn't just about looks; it's a critical balancing step.
Don’t just wipe the dust off—capture it. Using a slightly damp microfiber cloth or a dedicated fan duster stops you from launching that dust into the air, only to have it settle right back where it started.
For a complete guide on getting your blades spotless, check out our post on how to clean ceiling fan blades. You'd be surprised how often this step alone completely eliminates a minor wobble.
Proper balance is also directly tied to performance. A wobbly, unbalanced fan can increase its power draw by 8–12% because of the extra strain on the motor. Over a year, that can add up to real money wasted on your electricity bill. On the flip side, a well-balanced fan can improve its airflow efficiency by up to 15%, giving you better cooling with less power. You can see more insights like this in the latest ceiling fan market trends on expertmarketresearch.com.
Check Blade Alignment and Tracking
The last check before moving on is to make sure all the blades are spinning on the same level plane—a concept known as "tracking." If even one blade is sitting slightly higher or lower than the others, it will chop through the air unevenly and create a wobble.
Here’s an easy way to check this: grab a yardstick or a tape measure. Hold the yardstick vertically, touching the ceiling, and measure the distance down to the tip of one blade. Now, slowly turn the fan by hand, measuring each blade as it passes that same spot.
If you find a blade that's off by more than a quarter-inch, you can usually fix it by gently bending its blade arm up or down. Make sure to apply slow, steady pressure to the metal bracket—not the blade itself—until it lines up with the others.
Using a Balancing Kit Like a Pro
So, you've tightened every last screw, cleaned the blades until they gleam, and made sure they're all perfectly aligned... but the fan still has that annoying wobble. Don't throw in the towel just yet. This is when we bring out the secret weapon: the ceiling fan balancing kit. Think of this as moving from general maintenance to precision tuning. It sounds technical, but I promise it's surprisingly simple.
Most wobbles that stick around after the basics are handled come from tiny, almost imperceptible weight differences between the fan blades. A balancing kit is designed to fix exactly that. By adding a very small, strategically placed weight, you can bring the whole system back into perfect harmony. The whole process is really just a simple game of elimination.
Mastering the Balancing Clip
Every balancing kit comes with a little plastic clip—this is your MVP. It's a temporary weight that lets you test each blade without having to stick anything on permanently. The goal is to find which blade, when weighed down a bit, makes the fan run smoothest.
Here’s the methodical way to go about it:
- Pick a Blade, Any Blade: It doesn't matter where you start. Just choose one blade and slide the clip onto its trailing edge, somewhere in the middle between the motor and the tip of the blade.
- Run the Test: Crank the fan up to its highest speed and watch it carefully. Is the wobble better? Worse? No different?
- Rotate and Repeat: Turn the fan off and wait for it to stop completely. Move the clip to the exact same spot on the next blade over. Fire it up again and observe. Do this for every single blade, taking a mental note of which one seemed to respond best to the clip's weight.
Once you’ve identified the blade that showed the biggest improvement, you’ve found your culprit. This process saves you a ton of guesswork down the line.
This just reinforces that you should always start with the basics. Tightening, cleaning, and aligning are the foundation of a stable fan.
Finding the Sweet Spot
Alright, you've figured out which blade is causing the trouble. Now you just need to find the perfect spot along that blade to place the permanent weight.
Leaving the clip on that problem blade, it's time for another round of testing. This time, instead of moving between blades, you're going to move the clip along the length of the blade. Start by sliding it a few inches closer to the motor and turn the fan on. Then, try sliding it a few inches closer to the tip. You're hunting for that "sweet spot" where the wobble practically vanishes.
This part takes a little patience, I know. But it's the difference between a "good enough" fix and a fan that runs perfectly smooth. You want to keep making small adjustments until there's virtually no vibration left.
Installing the Permanent Weight
Once you've found that perfect location, you're ready to make the fix permanent.
Turn the fan off and carefully take the plastic clip off, marking its exact position with your finger or a small piece of tape. Grab one of the adhesive-backed weights from your kit, peel off the paper, and press it firmly onto the top-center of the blade, right where the clip was.
Now for the moment of truth. Turn the fan on and enjoy the smooth, silent rotation. If you still notice a tiny bit of movement, you can add a second weight right next to the first one, or even cut a weight in half for a super-fine adjustment.
Of course, if you'd rather skip this process entirely, you can always invest in a fan designed for perfect balance right out of the box. A great example is the Kichler 300160SBK, 60 Inch Renew Patio Fan ($524.99), which comes with factory-balanced blades and a high-quality motor to ensure it runs without a wobble from day one.
What to Do When the Wobble Just Won't Quit
So you’ve done everything right. You tightened all the screws, cleaned every last speck of dust off the blades, and even worked your way through the entire balancing kit. But that ceiling fan is still doing its wobbly dance. It’s frustrating, I know.
When a fan refuses to cooperate, it’s a sign that the problem runs deeper than a simple imbalance. We need to look past the blades and investigate the fan's core structure and its connection to your ceiling.
Diagnosing Deeper Structural Problems
Sometimes, the issue isn't the fan at all—it's the foundation it's attached to.
-
The Mounting Box: The electrical box in your ceiling has to be specifically rated to hold a ceiling fan. A standard box made for a lightweight light fixture just can't handle the torque and constant motion of a spinning fan. An improperly secured box is one of the most common reasons for a wobble that nothing seems to fix.
-
Warped Blades: While you can gently bend a metal blade bracket back into alignment, a blade that's actually warped is a lost cause. Humidity, age, or accidental damage can cause the blade itself to twist, and no amount of counterweight will ever make it spin true.
-
The Downrod: The downrod is another sneaky culprit, especially on sloped ceilings. If it’s too short or too long for the angle, it throws off the fan's entire center of gravity. For more on this, you can learn all about choosing the correct downrod for your fan. A proper downrod is critical for allowing the fan to hang level and operate smoothly.
When an Upgrade Makes More Sense Than a Repair
If you’re dealing with warped blades or—even worse—suspect the mounting box is the problem, you're moving into territory that often requires a professional. A fan that vibrates constantly isn't just annoying; it can cause real damage to your ceiling over time. If you're starting to see stress cracks, it's worth understanding what causes ceiling drywall damage and how it's repaired.
This is where you have to make a call: do you spend money on a potentially expensive repair, or do you invest that same money into a brand-new fan that won't have these issues?
A stubborn wobble, after you’ve tried all the standard fixes, is usually your fan’s way of saying it’s time to retire. Older, cheaper fans are just more prone to these kinds of deep-seated problems.
Think about it. A modern fan like the Minka-Aire F844-DK Light Wave 52 Inch Ceiling Fan ($399.95) is engineered from the ground up for wobble-free performance. Its motor is precision-built and its blades are factory-balanced to work perfectly right out of the box.
An upgrade doesn't just solve the wobble for good—it also gives you better airflow, improved energy efficiency, and a fresh new look. Plus, if the mounting box is the real issue, you'll need an electrician for the new installation anyway, making it the perfect opportunity to start fresh with a fan you can rely on.
Got More Questions About Fan Balancing?
Even with the best instructions, you can run into weird little issues when trying to balance a ceiling fan. It can feel like you're part detective, part scientist. Let's tackle some of the most common questions that pop up, so you can handle any curveballs with confidence.
Can I Use More Than One Weight on a Blade?
You absolutely can. Sometimes, one weight gets you close, but a stubborn wobble hangs on. If you've found the blade that needs help but the shake is still there, it's perfectly fine to add a second weight.
For the best results, stick the second weight right next to the first one, keeping them both lined up along the center of the blade. Think of them as working together. Pro tip: If you only need a tiny bit more weight, you can even snip one of the adhesive weights in half with scissors to get that perfect, buttery-smooth spin.
What if I Can't Find My Balancing Kit?
It happens to all of us—that little plastic bag with the clip and weights vanishes into a junk drawer or gets tossed out with the box. Don't sweat it. You can grab a replacement ceiling fan balancing kit at any hardware store or find one online for a few bucks. They're universal, so any kit will work with just about any fan.
If you're in a pinch and need a fix right now, you can get creative. A small piece of electrical tape or a couple of pennies stuck on with strong double-sided tape can do the trick. The key isn't what you use, but that you add weight in small, controlled amounts until the wobble is gone.
Just remember, the goal is simple: add a tiny bit of counterweight to the "light" blade. The tool you use matters a lot less than being patient and methodical in finding the right spot.
Does a Brand New Fan Need to Be Balanced?
You'd think a brand new fan would be perfect right out of the box, and most high-quality ones are. Manufacturers precision-balance them at the factory, so a wobbly new fan is often a sign of something else.
If your new fan is shaking, do a quick once-over on the basics first. Make sure every single screw on the blades, brackets, and mounting hardware is snug. Double-check that the electrical box in the ceiling is solid and rated for a fan. If you've done all that and it still wobbles, then it's time to break out the balancing kit that came with it.
Of course, investing in a premium fan from the get-go can help you avoid these headaches entirely. For a truly silent, stable, and powerful experience, it's worth exploring the meticulously engineered models at Fan & Lights. Fans like the Modern Forms FR-W1801-72L-GH/WG Vox 72 Inch Ceiling Fan ($1,099.00) are designed for flawless balance from day one. Check out their collections at https://www.fanandlights.com.


