


How to Install a Ceiling Fan With Lights A Pro DIY Guide
Are you ready to transform your room from stuffy to spectacular? Installing a ceiling fan with a light is one of those weekend projects that delivers a massive upgrade in both comfort and style. But before you even think about climbing that ladder, let’s get our ducks in a row. A smooth, safe ceiling fan installation is all about preparation, not speed. Getting everything ready now prevents those frustrating mid-project trips to the hardware store and, more importantly, keeps you safe.
Breaking it down, the whole process has five main parts: gathering your gear, taking down the old fixture, mounting the new fan, wiring everything up, and finally, getting those blades attached and balanced. But nothing—and I mean nothing—is more important than that first step: killing the power at the circuit breaker and double-checking it with a voltage tester. Let's make this fun, informative, and get it done right the first time.
Your Essential Pre-Installation Safety and Tools Checklist
A successful install is built on a solid foundation of prep work. Think of this as your pre-flight check—it’s the part that ensures a smooth ride and prevents any nasty surprises once you’re up on the ladder with wires in hand.
A few minutes of planning will save you a world of hurt later. Trust me, you don't want to be balancing on one foot, holding a half-installed fan, only to realize you have the wrong screwdriver.
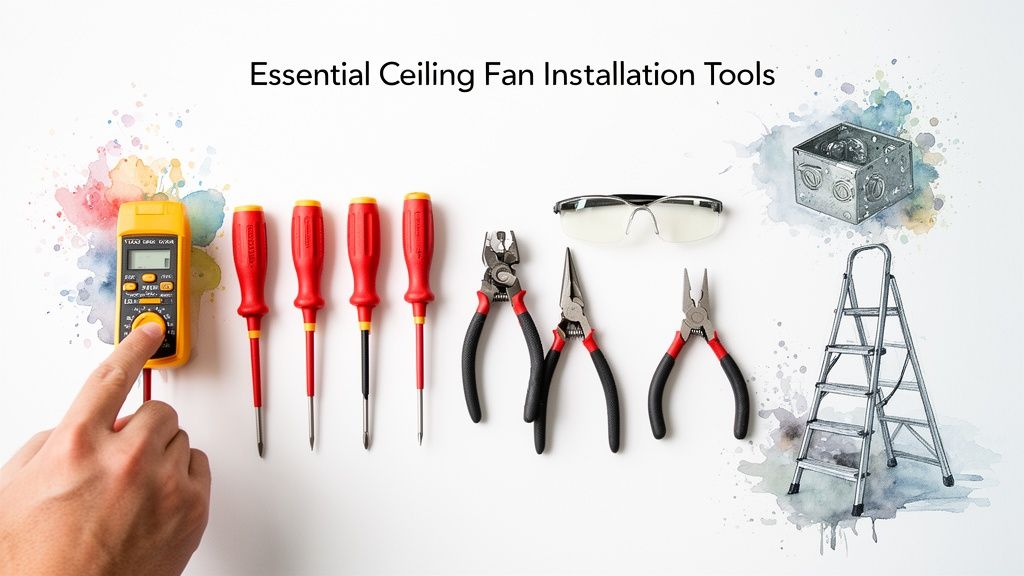
Your Installation Toolkit
Having every tool you need within arm’s reach is a game-changer. There's nothing worse than getting halfway through a step, then having to climb down to go digging through your toolbox. Let’s get everything lined up first.
Here is a quick look at everything you'll want to have ready before you start.
| Tool/Material | Purpose | Pro Tip |
|---|---|---|
| Voltage Tester | Confirms power is 100% off at the fixture. | A non-contact tester is cheap, safe, and easy to use. Don't skip this! |
| Screwdrivers | Phillips and flathead for various screws. | A multi-bit driver saves space and time. |
| Linesman's Pliers | Cutting, stripping, and twisting wires. | A good pair provides better leverage for twisting wires tightly. |
| Stepladder | Provides a stable, safe work platform. | Make sure it's tall enough so you aren't overreaching. |
| Wire Strippers | Cleanly removes insulation from wires. | Far more precise than pliers and prevents damage to the copper core. |
| Wire Connectors | Secures wire connections (wire nuts). | Your fan kit includes some, but having extras in different sizes is a lifesaver. |
With the residential market making up a massive 75.77% of ceiling fan demand, it's clear homeowners are tackling this upgrade themselves. Yet, so many guides gloss over the critical safety details. That’s what we’re focusing on here—doing it right, and doing it safely.
Pro Tip: I always keep a small magnetic parts tray or even just an old cup on the ladder with me. It’s perfect for holding all those tiny screws you’ll be removing. It's shockingly easy for one to vanish into thin air.
The All-Important Ceiling Box Check
Okay, now for the single most important safety check: the electrical box in your ceiling. This is the round or octagonal box that houses the wiring. The problem is, not all of them are built to handle the weight and vibration of a ceiling fan.
A standard box is only meant to hold a lightweight light fixture, maybe 15 pounds at most. A ceiling fan, on the other hand, can weigh 50 pounds or more and creates constant dynamic stress while it’s running. Hanging a fan from the wrong box is a serious hazard waiting to happen.
So, how do you know if your box is up to the job?
- Look for Markings: A fan-rated box will be stamped right on the metal with "Acceptable for Fan Support" or similar wording.
- Check the Screws: Fan-rated boxes use beefier #10-32 screws. Standard light fixture boxes use thinner #8-32 screws.
- Confirm the Mounting: The box absolutely must be screwed directly into a ceiling joist or a metal fan brace that spans between two joists. It can't just be attached to the drywall.
If your box doesn't meet these criteria, you must replace it before going any further. This isn't optional. And while you're focused on the wiring, make sure your circuit can handle the load. Using a cable size calculator is a great way to confirm you’re using the correct wire gauge for the job, giving you that extra peace of mind.
Out With the Old: Removing Your Fixture and Prepping the Wires
With your tools laid out and a game plan in mind, it's time to get started. Think of this as the satisfying demolition phase of a home reno show, but with less dust and more focus. We're clearing the way for the main event—your new ceiling fan.
This isn't just about yanking out an old light. It's about carefully dismantling it while getting acquainted with the electrical system you're about to tap into. A little patience here makes for a much smoother installation.
First, and Most Importantly: Kill the Power
Before you even think about touching a screw on that old fixture, you have to cut the power at the source. This is the absolute golden rule of any electrical work. Make your way to your home's circuit breaker panel—it’s usually tucked away in a garage, basement, or utility closet.
Find the breaker that controls the room you're in and flip it firmly to the "OFF" position. If your panel is a mystery of unlabeled switches (a common headache, for sure), you might need a helper. Have them stand in the room and shout when the light goes out as you flip breakers one by one.
Once you think you've got it, grab your non-contact voltage tester. This is the moment of truth. Touch the tip of the tester to the wall switch and, once the old fixture is down, directly to the wires in the ceiling box. If it stays silent and dark, you're good to go.
A classic DIY mistake is just flipping off the wall switch. Don't do it. That switch often only cuts power to the hot wire, leaving other wires potentially live and extremely dangerous. Always, always shut off the power at the breaker.
Disconnecting the Old Fixture
Alright, with the power confirmed off, you can get to the fun part. Most light fixtures are held up by a couple of decorative nuts or screws on the canopy—the part that sits flush against the ceiling. Loosen those, and the fixture should start to lower.
Get ready to support its weight as you bring it down! You'll find a small bundle of wires joined together with plastic wire nuts. Carefully untwist these connectors to separate the fixture's wires from the ones coming out of your ceiling.
With the old light completely detached and safely out of the way, you’ll be left with the wires from your ceiling box. You should see three:
- A black wire: This is your "hot" wire, the one carrying the electrical current.
- A white wire: This is the "neutral" wire that completes the circuit.
- A bare copper or green wire: Your ground wire, a crucial safety feature.
Take a second to give them a quick inspection. Are the copper ends clean, or do they look a little frayed or corroded? If they’ve seen better days, use your wire strippers to snip off the old ends and strip about 3/4 of an inch of fresh insulation.
This simple cleanup ensures you get a solid, secure connection for your new fan. A great connection now prevents a lot of frustrating troubleshooting down the road.
Alright, this is where the magic happens—turning that box of parts into a real, functioning ceiling fan. Getting the mechanical assembly right is crucial. It's the difference between a fan that runs whisper-quiet for a decade and one that wobbles like it’s about to take off.
We're about to get hands-on: attaching the mounting bracket, putting the motor and downrod together, and hoisting it all up to the ceiling. A little bit of care here makes the wiring part feel like a victory lap.
First, Secure the Foundation: The Mounting Bracket
The first thing you'll likely pull out of the box is the mounting bracket. This simple piece of metal is the unsung hero of the whole setup—it’s the bridge between your fan and that fan-rated ceiling box we talked about earlier.
Grab the screws that came with your ceiling box (not the fan!) and attach the bracket. You want this thing completely solid. After tightening it down, give it a firm tug. If you feel any wiggle or play, stop and figure out why. It needs to feel like it’s part of the ceiling itself.
One of the most common rookie mistakes is using the screws from the fan's hardware bag for the bracket. Those screws are meant for other parts. The machine screws that connect the bracket to the box should come with the fan-rated box, as they're specifically engineered for that job.
Assemble the Motor and Downrod
Next up is the fan motor. Most instructions have you do this part on the floor, which is a whole lot easier than trying to juggle parts on top of a ladder. Trust me on this.
The downrod is the pipe that sets the fan’s height. Start by feeding the fan’s electrical wires up through it. Then, screw the downrod into the top of the motor housing until it's hand-tight. You're not done yet, though. Look for a small set screw on the motor collar and tighten it firmly with a screwdriver. This locks the downrod in place so it can't unscrew itself over time.
Before you forget, slide the decorative canopy over the downrod. This is the piece that will eventually cover the bracket and all the wiring. Forgetting this step now means you’ll be taking everything apart again later—a frustrating lesson most of us only need to learn once!
The Big Lift: Hoisting the Fan into Place
This is absolutely a two-person job. A modern fan motor is surprisingly heavy and awkward to handle. Trying to lift it while balancing on a ladder and lining it up with the bracket is just asking for a sore back or a dropped fan.
Have your helper steady the ladder and hand the fan assembly up to you. Most modern fans have a clever hook or a ball-and-socket system for this exact moment. You'll either hang the fan from a hook on the bracket or seat the ball at the top of the downrod into the bracket's cradle. This design brilliantly holds the fan's full weight, freeing up both of your hands for the wiring.
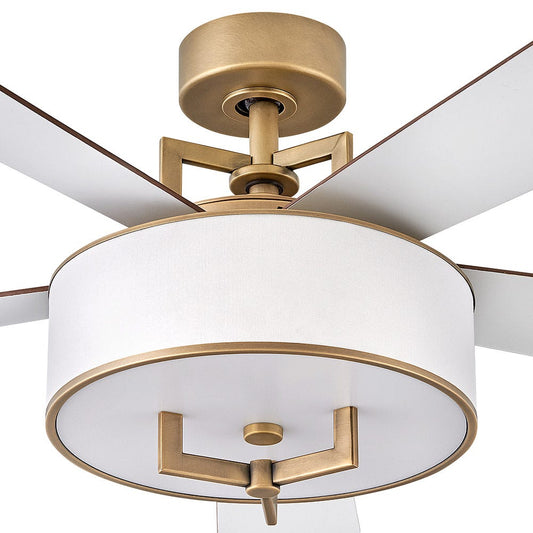
This is one area where investing in a quality fan really pays off. A premium model like the Minka-Aire Artemis XL5, which has a commanding presence and a price tag over $800, is engineered to make this step much smoother. The precision parts and smart design of high-end fans make this "big lift" feel secure and simple, which is a big part of what you’re paying for.
Why a Helper is Your Most Important Tool
Let's be real. You can install a fan by yourself, but it's not fun or particularly safe.
- Safety First: Juggling a 30-pound motor while climbing a ladder is a serious risk. A partner can pass the fan to you or simply steady the ladder.
- Less Frustration: Aligning the downrod ball into its socket while you're looking straight up and holding the fan's weight is a pain. A spotter can guide you right in.
- Pure Efficiency: A task that could take one person 30 minutes of struggling can be done in just 5 minutes with a partner.
This is the physical peak of the project, so take your time and work smart. Once that motor is hanging securely from the bracket, you're officially on the home stretch.
5. Connecting the Wires for Your Fan and Light Kit
Alright, let's tackle the part that makes most folks a little nervous: the wiring. Take a deep breath. It’s not nearly as complicated as it looks. Honestly, wiring a ceiling fan with lights is mostly just a game of matching the right colors.
You’ve done the heavy lifting, the fan is hanging securely, and now you’ve got both hands free. This is the moment we connect your home’s power to the fan motor and light kit to bring your new fixture to life. We’ll walk through the most common setups you're likely to find.
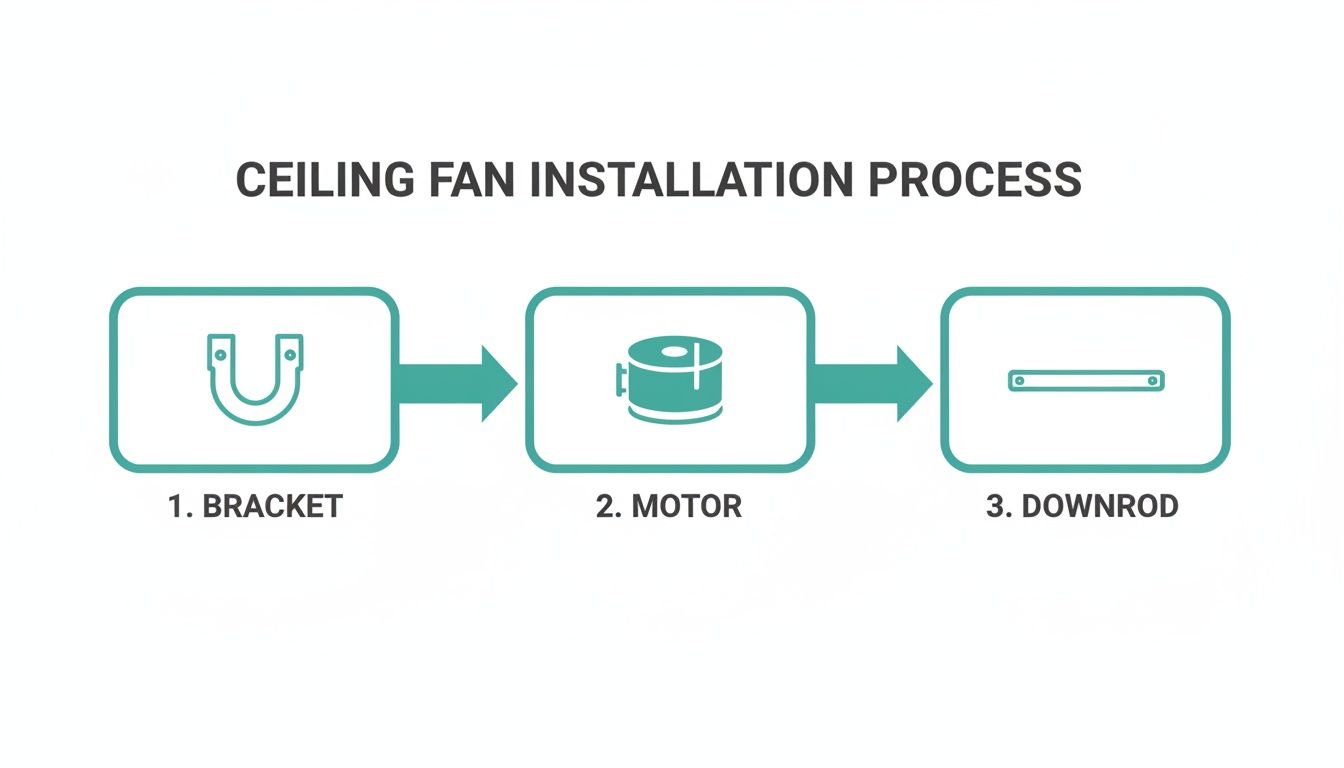
This just shows the basic mechanical steps—getting the bracket up, hanging the motor, and attaching the downrod. Now, for the final piece of the puzzle.
Decoding Your Wires
First, let’s identify the players. Peeking out from your ceiling, you should have a black (hot), white (neutral), and a green or bare copper (ground) wire. Inside your fan, you'll find a similar set, but with one extra wire—usually blue.
- Black Wire (Fan): This one powers the fan motor.
- White Wire (Fan): This is the fan's neutral wire.
- Green Wire (Fan): The ground wire for safety. Can’t miss this one.
- Blue Wire (Fan): This is the hot wire specifically for the light kit.
Your job is simply to connect the wires from the ceiling to these fan wires using the wire nuts that came in the box. If you're new to this, it's always a good idea to have a basic electrical wiring guide handy for reference as you go.
To help you visualize the most common setups, here's a quick comparison.
Common Ceiling Fan Wiring Scenarios
| Connection Point | Single Switch Wiring | Dual Switch Wiring |
|---|---|---|
| Hot Wire(s) | Connect ceiling Black to both fan Black & Blue | Connect ceiling Black to fan Black; ceiling Red to fan Blue |
| Neutral Wire | Connect ceiling White to fan White | Connect ceiling White to fan White |
| Ground Wire | Connect ceiling Green/Copper to fan Green | Connect ceiling Green/Copper to fan Green |
This table should give you a clear picture, but let's walk through each scenario step-by-step.
The Single Wall Switch Scenario
This is the most common setup you'll find in homes. You have one switch on the wall that kills the power to the entire fixture. From there, you'll use the fan's pull chains or a remote to control the fan and light separately.
The connection for this is wonderfully simple:
- Twist the black wire from the ceiling together with both the black fan wire AND the blue light wire. Secure all three with a wire nut.
- Connect the white wire from the ceiling to the white fan wire.
- Finally, connect the ground wire from the ceiling to the green ground wires from both the fan's bracket and the motor assembly.
That’s it! The wall switch now acts as a master power control, sending electricity to both the fan and the light at the same time.
The Dual Wall Switch Scenario
If you're lucky enough to have two switches on the wall—one for the fan, one for the light—your wiring will be slightly different. In this case, your ceiling box will likely have an extra hot wire, which is often red.
Here’s how you’ll connect everything for independent control:
- Connect the black ceiling wire to the black fan wire.
- Connect the red ceiling wire to the blue light wire.
- Connect the white ceiling wire to the white fan wire.
- And as always, connect all the ground wires (green and bare copper) together.
This setup is a fantastic convenience, letting you control everything right from the wall. For more details on this, you can check out our guide on how to add a light kit for your ceiling fan.
Pro Tip: Before you screw on a wire nut, make sure the copper ends of the wires are neatly aligned. Give them a good twist clockwise with your pliers first. After the nut is on, give each wire a firm tug to confirm you have a solid, safe connection.
Wiring a Fan with a Remote Receiver
Modern fans, like the sleek Fan Connection Aerovon (priced over $300), often come with a remote and a receiver unit. This little black box might look intimidating, but it actually simplifies things. The receiver slides right into the mounting bracket, and you just wire it between the ceiling and the fan.
The receiver will have two sets of wires: one side labeled "TO POWER SUPPLY" (AC IN) and the other "TO FAN" (OUT).
- AC IN Side: Connect the black and white wires here to the corresponding black and white wires coming from your ceiling.
- OUT Side: Connect the black, white, and blue wires on this side to the matching wires going down to the fan motor.
- Ground: As always, connect all the ground wires together, bypassing the receiver.
With this setup, the wall switch provides the main power, but the receiver intercepts the signal, letting the remote handle all the fan speed and light functions. This is a common feature in premium fans, offering a level of convenience that both DIY installers and professional contractors appreciate.
You're in the home stretch now. The heavy lifting is done, the wiring is buttoned up, and your new fan is hanging securely from the ceiling. It’s time for the final touches that really separate a DIY job from a professional one—the small details that guarantee years of silent, wobble-free operation.
This last part is all about precision. We'll get the blades on, which is pretty straightforward, and then dive into the crucial art of balancing. Nailing this step is what makes a fan feel like a high-quality, perfectly installed fixture.
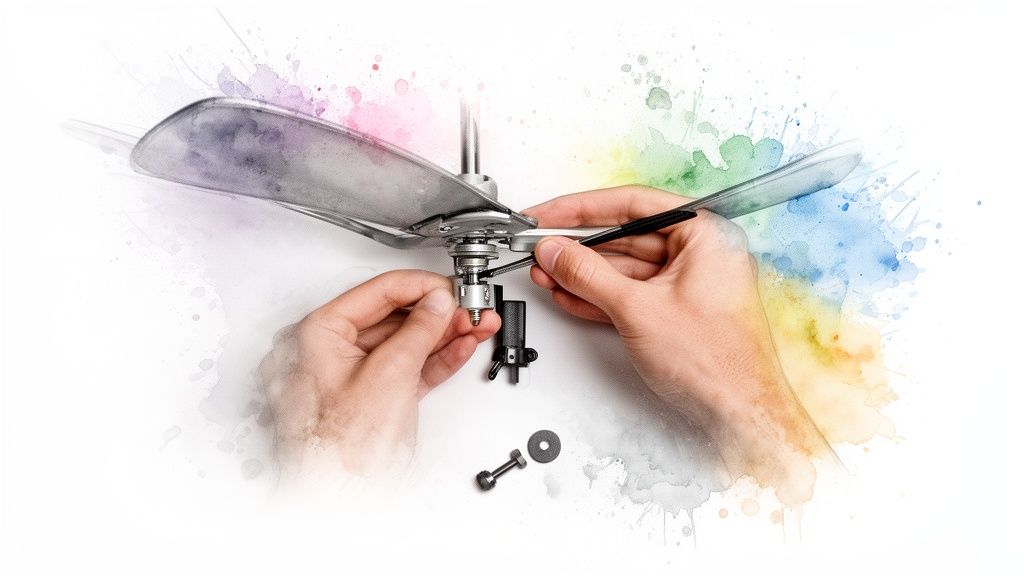
Installing the Fan Blades Evenly
First things first, let's get those blades attached. Most models have you screw each blade to a metal bracket (or "blade iron") first, then attach that whole assembly to the fan motor. It’s a lot easier to do this part on the floor, maybe on a towel or a piece of carpet, before you’re working overhead.
Here’s a little trick I’ve picked up that can prevent a wobble before it even starts. When you’re ready to mount the blade assemblies to the motor, don't just tighten the first screw all the way down. Instead, get all the screws for a single blade started by a few threads. Then, go back and tighten them down in an alternating pattern, kind of like you would with the lug nuts on a car wheel.
This simple technique makes a huge difference. It distributes the pressure evenly across the blade iron, preventing any tiny warping that could throw the fan's balance out of whack right from the start.
The Fine Art of Fan Balancing
With the blades on, it's time for the moment of truth. Go flip the breaker back on, turn on the fan, and run it through all the speeds. It's completely normal to see a slight wobble, especially on the highest setting. No matter how perfectly a fan is manufactured, there can be tiny weight differences between the blades.
Don't panic if you see a wobble! This is exactly what the balancing kit included with your fan is for. It's a tiny packet with a plastic clip and some small adhesive weights, and it's your secret weapon for achieving perfect stability.
This is where you can really feel like a pro. The goal is to systematically find which blade is causing the imbalance and add a small weight to counteract it. It's a simple process of trial and error, but it's incredibly effective.
For a deep dive into the nitty-gritty of this process, check out our detailed guide on how to balance a ceiling fan.
Using Your Balancing Kit Like a Pro
Ready to put that little kit to work? Here’s the play-by-play.
- Clip it on: Grab the U-shaped plastic clip and slide it onto the trailing edge of any fan blade. A good starting point is about halfway between the motor and the tip of the blade.
- Run a test: Turn the fan on high and see how it looks. Is the wobble better, worse, or about the same?
- Rinse and repeat: Turn the fan off, wait for it to stop spinning completely, and move the clip to the exact same spot on the next blade over. Test it again. Go through all the blades like this, and make a mental note of which blade showed the most improvement when the clip was on it.
- Find the sweet spot: Once you've figured out which blade is the culprit, leave the clip on it. Now, just experiment by sliding the clip a little closer to the motor, or a little farther out toward the tip. Test it each time until you find the spot where the wobble is at its absolute minimum.
- Stick the weight: You’ve found it. Now, take one of the small, adhesive-backed weights from the kit. Peel off the backing and stick it to the top surface of the blade, right in line with where you placed the clip. You can remove the plastic clip now—its job is done.
Even on a premium fan like the Minka-Aire Artemis IV, a design-forward model that sells for over $700, this final check is worthwhile. Its blades are engineered with such precision that balancing is often minimal, but taking a few minutes to fine-tune it ensures the fan performs exactly as the designers intended: silently and flawlessly.
Tackling Your Ceiling Fan Installation Questions
Even the best guides can't cover every little thing that might pop up during a project. You're on the ladder, everything’s clicking into place, and then you hit a snag. We’ve all been there. That’s why we’ve put together answers to the most common questions people have when installing a ceiling fan.
What if My Fan Wobbles After I Install It?
A wobbly fan is easily the most frequent headache, but thankfully, it's usually a simple fix. Before you do anything else, kill the power and double-check every connection. Make sure each blade is screwed tightly to its blade iron, and that the irons themselves are snug against the fan motor. Give the mounting bracket a good, firm tug—it should feel rock-solid against the ceiling box.
Still got a wobble? Time to break out that little balancing kit that came in the box. Clip the small plastic piece onto the edge of one blade, turn the fan on high, and see what happens. You'll want to repeat this on every single blade, taking note of which one makes the biggest difference in stabilizing the fan. Once you’ve found the culprit, stick one of the adhesive weights on the top of that blade, right in the center, and take the clip off. Nine times out of ten, that’s all it takes.
Can I Put a Ceiling Fan on a Sloped Ceiling?
You absolutely can, it just takes a bit of extra planning. Most standard fan mounts can handle a slight slope, usually up to about 15 degrees. Anything steeper than that, and you’re going to need a sloped ceiling adapter.
These adapters are specifically designed to replace the standard mounting bracket. They ensure the fan hangs perfectly level, which is critical for preventing extra wear and tear on the motor and giving the blades plenty of clearance. Always double-check the maximum angle supported by both the fan and the adapter kit before you make a purchase.
My New Fan's Remote Isn't Working. What's Wrong?
This is another one that trips people up all the time. Before you start questioning your wiring job, check the simple stuff first. Pop open the remote and make sure the battery is in correctly—and pull out that little plastic tab if you haven't already.
Next, make sure the fan is actually getting power from the circuit breaker and the wall switch. Many modern fans also have tiny DIP switches inside both the remote and the receiver unit (that little box in the fan's canopy). These need to be set to the same frequency to "pair" them. If they don't match, they can't talk to each other. Your fan’s manual will show you exactly how to do this.
How Do I Pick the Right Downrod Length?
Getting the downrod length right is key for both safety and performance. You want the fan blades to hang somewhere between 7 and 9 feet from the floor for the best possible airflow.
Here’s a quick cheat sheet to get you started:
- 8-foot ceilings: Just use the short downrod that comes with the fan.
- 9-foot ceilings: A 6-inch downrod is usually perfect.
- 10-foot ceilings: Go with a 12-inch downrod.
If your ceilings are higher than 10 feet, the general rule is to add another 6 inches of downrod for every extra foot of ceiling height. This positioning gets you that perfect breeze without becoming a hazard for taller family members.
Ready to put your new installation skills to the test? At Fan Connection, we've curated a collection of high-quality fans for any style or room. Find the perfect centerpiece for your home, like the sleek Aerovon or the elegant Artemis IV, both statement pieces with price tags over $300. Explore our collections and find your perfect fan today.


