


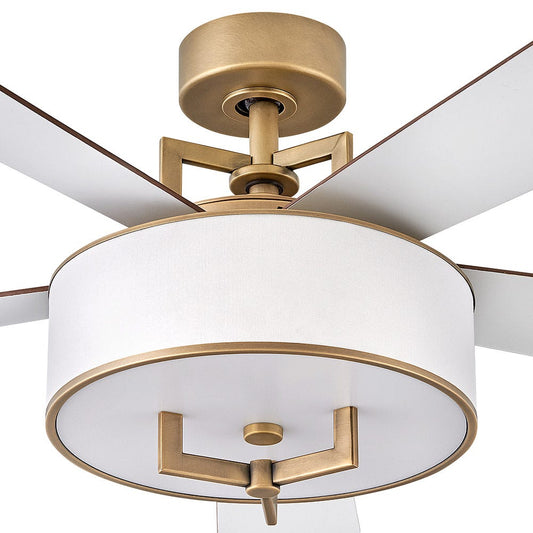


Minka Aire Fan Repair: A DIY Troubleshooting Guide
A Minka Aire fan usually doesn’t fail gracefully. One day it’s quiet, balanced, and doing its job without drama. The next day the light won’t respond, the remote acts possessed, or the whole fan sits there like a sculpture you accidentally wired into the ceiling.
That’s the moment most homeowners get stuck. They don’t know whether they’re dealing with a dead remote, a bad receiver, a loose downrod, a wiring issue, or a fan that’s reached the point where repair is more hassle than it’s worth. The good news is that modern minka aire fan repair is often less about tearing apart a motor and more about finding the specific electronic or mechanical weak point.
I’ve seen the same pattern again and again. People assume the motor is gone because the fan won’t turn on. In reality, the motor often isn’t the problem at all. On these fans, the trouble usually starts with the control side of the system, especially the receiver and remote pairing. Once you know where to look, the whole job gets less mysterious and a lot less frustrating.
Your Minka Aire Fan is Acting Up Now What
When a Minka Aire fan starts misbehaving, the symptom usually sends you in the wrong direction. A fan that won’t start feels like a major failure. A wobble feels like a mounting problem. A remote that stops talking to the fan feels random. In practice, these fans tend to fail in a handful of predictable ways.
The first thing to do is stop guessing. A fan can be dead, partly alive, or mechanically unhappy, and each of those points to a different fix. If the light works but the fan doesn’t, that’s a different path than a fan that runs but won’t change speed. If the whole unit ignores every command, that’s another path entirely.
Start with the symptom, not the fear
Homeowners often jump straight to replacement because the fan is stylish, expensive, and mounted overhead. That makes people cautious, which is smart. But caution doesn’t mean panic. It means isolating the symptom.
Here’s how I mentally sort the first call or first inspection:
- Completely unresponsive fan means check power delivery and control electronics first.
- Remote works inconsistently points toward battery, pairing, or receiver trouble.
- Wobble or rattling usually comes from hardware, blade alignment, or downrod seating.
- Light works but fan doesn’t, or the reverse often means one section of the control chain has failed.
Shop-floor rule: The ugliest symptom is not always the hardest repair.
A lot of homeowners who like to tackle their own projects already have the right instincts. They just need a clean process. If you’re someone who handles small fixes around the house, this kind of electrical-mechanical troubleshooting fits right in with the mindset behind an ultimate guide for handyman home repairs. The same principle applies here. Rule out the simple problem before you go hunting for the dramatic one.
What usually frustrates people most
Minka Aire fans are design-forward, and that’s part of why people buy them. The downside is that many owners expect a problem to announce itself clearly. It rarely does. The fan may hum, blink, ignore the remote, or start only after several tries. That in-between behavior annoys people because it feels unpredictable.
It isn’t really unpredictable. It’s just that these fans often fail through the control system before anything mechanical gives out. Once you accept that, the process gets easier. Instead of treating the fan like a mystery box, you treat it like a series of checkpoints.
And if this repair turns into the moment you decide your room deserves something newer and sharper, that’s not failure either. Sometimes a repair is the thing that tells you it’s time for a better fit.
Safety First Your Pre-Repair Checklist
Before you touch a canopy screw, get serious about power isolation. Ceiling fan work is not difficult, but it becomes dangerous fast when someone trusts a wall switch instead of the breaker.
A wall switch can leave part of the circuit energized. A remote-controlled fan can also fool you because it looks off while the receiver still has live power feeding it. That’s why I always tell people the same thing. Breaker first, tester second, tools third.

Kill the right circuit
Go to the panel and shut off the breaker that feeds the fan. If the panel labeling is vague, don’t trust it blindly. Turn off the breaker, then confirm at the fan that the circuit is dead.
Use a non-contact voltage tester before touching any conductor or wire connector. Test the tester on a known live source first, then test the fan circuit, then retest the tester. That routine catches bad testers and false confidence.
Never work on a fan because “the light didn’t come on.” Verify. Every time.
For a broader look at smart setup habits and installation safety, this walkthrough on how to install a ceiling fan safely and easily step by step is worth reviewing before you open anything up.
Tools that actually help
You don’t need a van full of gear, but the right tools make the job cleaner and safer.
- Stable ladder: Use one tall enough that you’re not overreaching with a screwdriver over your head.
- Non-contact voltage tester: This is not optional.
- Screwdrivers and nut drivers: Minka Aire hardware often means working in a tight canopy, so compact tools help.
- Needle-nose pliers: Handy for pins, wire positioning, and small connectors.
- Flashlight or headlamp: Ceiling boxes swallow light.
- Small container for screws: Because dropped canopy screws love disappearing into vents and rugs.
Pre-repair habits that prevent bad days
Most mistakes happen before the repair starts. Not during it.
Use this quick routine:
- Shut off the breaker
- Confirm the fan is dead at the wall switch
- Test for voltage at the canopy area
- Photograph all visible wiring before disconnecting anything
- Clear the area below the fan
- Keep blades and glass parts supported when loosening hardware
If you’re opening a fan with a light kit, be ready for glass and trim pieces to come loose once screws are backed off. If you’re checking a downrod or canopy connection, support the fan body while you work so nothing twists on the hanging assembly.
When safety means stop
Some warning signs mean the job has moved out of DIY territory.
- Burning smell: Stop immediately.
- Scorched wire insulation: Don’t re-energize the fan until the wiring is diagnosed.
- Sparking at the canopy or switch: Leave the breaker off.
- Unclear house wiring: If you can’t confidently identify what’s what, call an electrician.
A careful DIY repair saves time. A rushed ceiling repair creates a bigger repair.
Diagnosing Common Minka Aire Fan Problems
The fastest way to waste an afternoon is to replace parts before you’ve pinned down the symptom. Minka Aire fans reward a simple diagnostic order. Start outside the fan, then move inward. Don’t open the canopy until you’ve ruled out the easy stuff.

Dead fan versus dead control
The biggest distinction is whether the fan itself has failed or whether the control chain has failed. Those are not the same thing.
A defective receiver module is the most common cause of Minka Aire ceiling fan failure, and in an estimated 60 to 70% of reported breakdowns, replacing that component resolves the issue, often in less than 30 minutes according to B&M Electric’s Minka Aire repair write-up. That’s why a fan that appears totally dead is often not a dead motor at all.
A practical troubleshooting sequence
Work through the fan in this order:
- Power supply first: Check the breaker and any wall switch feeding the fan.
- Remote second: Replace the battery and make sure the remote isn’t the weak link.
- Receiver suspicion third: If the fan still won’t respond, the receiver becomes the prime suspect.
- Mechanical inspection fourth: If the fan runs but shakes, clicks, or rattles, shift to hardware and alignment.
Here’s a quick guide I use when sorting symptoms.
| Symptom | Most Likely Cause | First Action Step | Difficulty |
|---|---|---|---|
| Fan is completely dead | Receiver module or power issue | Check breaker, wall switch, then remote battery | Easy to Moderate |
| Light works but fan won’t spin | Control issue or internal component fault | Try reset and verify remote commands | Moderate |
| Fan runs but remote won’t change speed | Remote pairing or receiver communication problem | Replace battery and resync remote | Easy |
| Fan wobbles at speed | Downrod seating, loose hardware, blade imbalance | Check mounting hardware and blade screws | Easy to Moderate |
| Fan clicks or rattles | Loose canopy, blade hardware, or trim | Tighten visible hardware in sequence | Easy |
What each symptom usually means
A fan that is totally silent after you’ve confirmed power is available usually points me toward the receiver before anything else. A fan that runs on one speed only or ignores some remote commands often lives in that same electronic neighborhood. A fan with flickering or partial function can also be control-related, though wiring and connected accessories need a look too.
If your fan hums but doesn’t behave correctly on speed changes, it can be useful to understand how the electrical side of speed control works. This primer on a ceiling fan capacitor helps explain why some fans act alive without operating properly.
Diagnostic shortcut: If a fan is stylish, expensive, and suddenly “dead,” don’t assume the motor burned out. Assume the control system quit first, then prove otherwise.
Don’t diagnose by one weird event
Homeowners often tell me, “It worked once after I tapped the housing,” or “It came back last night and died again this morning.” Intermittent behavior doesn’t mean you have a ghost in the ceiling. It usually means a failing control component, a loose connection, or a part that’s breaking down under load.
That’s why random success is not proof that the problem is solved. You want repeatable behavior. If the fan only responds after several attempts, that’s still a fault. If it loses light control but still spins, that’s still a fault.
Good diagnosis keeps you from buying the wrong part, and that’s half the battle in minka aire fan repair.
Solving Mechanical Issues Wobbles and Noises
A wobbling Minka Aire fan can feel dramatic, but most of the time the fix is mechanical, not catastrophic. Fans don’t need much looseness to start looking wild. One slightly mis-seated ball, one loose set screw, or one blade bracket that backed off a touch can make a perfectly good fan look like it’s trying to leave the room.

The first places I check
Start with the obvious hardware. That means blade screws, blade brackets, canopy screws, and the hanger hardware. Don’t just glance at them. Put a driver on them.
For wobbling Minka Aire fans, making sure the downrod ball is seated correctly in the hanger bracket’s registration slot prevents 95% of rotational wobbles, and the motor coupling set screws should be tightened to 20 to 25 in-lbs to avoid stripping, according to the Minka F572 instruction manual. That one detail solves more “mystery wobble” complaints than most homeowners expect.
How to tighten the downrod assembly correctly
If the fan has a downrod, don’t just tighten random screws and hope. Follow the assembly path.
- Power off at the breaker
- Support the fan body
- Loosen access hardware enough to inspect the coupling
- Check the lock pin and hitch pin
- Tighten the two set screws at the motor coupling to the correct torque
- Verify the downrod ball sits fully in the registration slot of the hanger bracket
If the ball isn’t seated in the slot, the fan can rotate slightly where it shouldn’t. That creates a wobble pattern that balancing kits won’t fix because the problem starts at the mount, not the blade tips.
For more hands-on balancing technique, this guide on how to balance a ceiling fan is a solid companion once the mounting hardware checks out.
Blade balance versus mounting fault
These two problems get mixed together constantly.
- Mounting fault: The whole fan body sways or rotates unevenly.
- Blade balance issue: The fan is mounted correctly, but one blade assembly throws the spin off.
- Loose trim or canopy: The fan spins fine but chatters or clicks.
If the fan wobbles even after a careful blade balancing attempt, go back up and inspect the mount again. I’ve seen homeowners spend too long chasing blade weights when the actual problem was the hanging ball not indexed properly in the bracket.
A balancing kit can correct a blade issue. It cannot fix a bad seat at the hanger bracket.
Here’s a useful visual if you want to compare your adjustments against a general balancing process:
What causes the noises
Clicks, ticks, rattles, and canopy chatter usually come from parts touching where they shouldn’t or from hardware that has relaxed over time.
Check these in order:
- Blade screws: A slightly loose blade-to-bracket connection can click once per rotation.
- Bracket-to-motor screws: These often create a sharper metallic chatter.
- Canopy screws: If the canopy sits loose, vibration telegraphs into the ceiling area.
- Glass and trim pieces: Decorative parts love to buzz when they aren’t seated evenly.
A good mechanical repair is patient. Tighten methodically, spin the blades by hand, look for rub points, then test the fan at low speed before going higher. That step-by-step approach beats tightening everything blindly and hoping the noise disappears.
Mastering Electronic and Remote Control Fixes
Most minka aire fan repair jobs find their success or failure in this specific challenge. Modern Minka Aire fans don’t usually ask you to rebuild a motor. They ask you to understand the electronic chain between the handheld remote and the receiver hidden in the fan.
When that chain breaks, the fan can look far more broken than it really is. The remote may light up but do nothing. The fan may stop responding after a power flicker. In apartments and townhomes, one remote may even start talking to the wrong fan if the code settings overlap.

The reset that fixes most remote problems
For an unresponsive Minka Aire remote, the fix is often a breaker reset and resync. Turn the power off at the breaker for 10 to 15 seconds, restore power, then within 60 seconds press and hold the stop button for 6 to 10 seconds until the light blinks. This RF reset resolves over 90% of remote failures without new parts, as shown in this Minka Aire remote sync demonstration.
That sequence matters. People rush it, miss the timing window, or keep pressing random buttons during startup and then decide the receiver is dead. Sometimes the fan is fine. It just never got a clean pairing attempt.
For a model-specific troubleshooting companion, this article on a Minka Aire remote control not working pairs well with the reset process.
Start with the battery before you open the canopy
Don’t laugh. This catches a lot of failures.
Many Minka Aire remotes use an A23 12V battery. If the battery is weak, the remote may still appear alive but fail to transmit consistently. Replace it with a fresh one, confirm correct polarity, and press the buttons a few times with the old battery removed if you suspect a sticky key.
A stuck button can also jam the remote’s behavior and make the whole system look worse than it is. If one button feels mushy or doesn’t spring back cleanly, deal with that before blaming the receiver.
When the receiver is the real problem
The receiver is the hidden traffic cop in the fan. It sits between your house power and the fan functions, translating the remote command into fan speed, direction, and light behavior. When it fails, you can get a full shutdown, partial function, or bizarre response patterns.
Common signs that push me toward receiver replacement:
- No response after battery replacement and proper resync
- Fan and light both dead despite confirmed incoming power
- One function works but the other doesn’t
- Intermittent operation that keeps getting worse
On many AC motor Minka Aire fans, the receiver is tucked into the canopy and is fairly approachable. That’s why these repairs are often reasonable for a careful DIYer.
Bench wisdom: If the reset fails cleanly and power is good, stop arguing with the remote and start suspecting the receiver.
Dealing with neighbor interference
Dense housing creates a specific headache. One fan starts reacting to another remote, or your fan won’t hold its pairing because nearby units share overlapping code settings.
The first fix is matching and changing the DIP switch positions on both the remote and receiver so your fan uses its own code combination. Do this with power off, set both to the same unique pattern, then restore power and perform the sync sequence again.
A few practical habits help here:
- Change both sides, not just the remote
- Avoid copying the factory default if multiple units are nearby
- Perform the pairing cleanly after the code change
- Test from normal room distance, not with the remote pressed against the canopy
Some users in dense installations run into repeated interference issues even after a reset. In those cases, the one-time quick fix isn’t always enough. You may need a more deliberate code-isolation approach or a different control strategy if the environment is crowded with similar RF devices.
AC versus DC receiver repairs
This is the part many guides gloss over. Not all receiver swaps feel the same.
Older or more traditional AC motor Minka Aire fans often keep the receiver in the canopy, where access is straightforward. Newer DC motor models are a different animal. The receiver may sit on top of the motor housing with connector layouts that require more disassembly and more care.
That’s why DIY confidence has to match the model in front of you. If you open the canopy expecting a simple box swap and discover a DC setup that wants deeper tear-down, stop and reassess before you turn a tidy repair into a parts pile.
What doesn’t work
A few moves almost always waste time:
- Pressing random buttons during the sync window
- Skipping the breaker reset and using only the wall switch
- Changing the remote battery but not checking for stuck keys
- Assuming all Minka Aire receivers are interchangeable
- Forcing a canopy closed on top of pinched wires
Electronics repair gets easier when you stay boring and precise. Follow the sequence. Confirm each result. Then move to the next step.
The Repair vs Replace Dilemma When to Upgrade Your Fan
Not every fan deserves another afternoon on a ladder. That’s the honest answer.
Some Minka Aire repairs are clean, sensible, and worth doing every time. A basic remote resync. A receiver swap on an AC fan. A downrod correction. Tightening blade hardware. Those are repairs I’d encourage because the problem is narrow and the payoff is immediate.
Other situations are different. A fan may be older, have multiple symptoms, or hide its failure inside a more complex DC layout. At that point, repair stops feeling like maintenance and starts feeling like negotiation.
When repair still makes sense
If the fan looks good in the room, the finish still works with your space, and the problem is clearly isolated, repair is often the right move.
Good candidates for repair usually look like this:
- Single known issue: One control problem, one wobble source, one failed part.
- Good overall condition: No cosmetic damage, no signs of overheating, no repeated failures.
- Straightforward access: The fan comes apart normally and the parts are easy to inspect.
- You like the fan enough to keep it: This matters more than people admit.
A clean repair on the right fan feels great because you preserve the look you already chose and avoid swapping hardware, finish tones, and room proportions.
When replacement becomes the smarter call
The conversation changes fast when the motor type changes. A key factor in the repair-versus-replace decision is motor type. AC motor receiver swaps are simple, but replacing a receiver on a modern Minka Aire DC motor fan is more complex because the receiver sits on top of the motor housing and the DIY repair averages 45 to 60 minutes, according to this overview of Minka Aire DC receiver replacement complexity.
That doesn’t mean DC fans are bad. It means the repair threshold is different.
If I’m advising a homeowner, contractor, or property manager, I start asking a few direct questions:
| Situation | Repair Usually Wins | Replace Often Wins |
|---|---|---|
| Is the issue isolated? | Yes | No, multiple symptoms |
| Is the fan easy to access? | Yes | No, complex disassembly |
| Is the fan still a design fit? | Yes | No, room has evolved |
| Is the control system aging out? | Maybe | Often |
| Is the owner already considering a style update? | Maybe not | Yes |
The style question matters more than people think
A lot of homeowners treat replacement like surrender. I don’t.
If your current fan is giving you trouble and you’ve already been thinking about changing the room, replacement is a design decision as much as a repair decision. Minka Aire’s appeal has always been that its fans don’t just move air. They define the ceiling line, especially in living rooms, vaulted spaces, bedrooms, entry volumes, and hospitality installs.
That’s why I tell people to be honest. If you’re repairing a fan you no longer like, you may be paying in time to keep a compromise alive.
A practical way to make the call
Here’s the simplest decision method I know.
Keep the fan if the problem is narrow
If you’ve got one clear issue and the rest of the fan is solid, repair it. This applies especially to familiar AC units where the electronic parts are accessible and the fix doesn’t require deep disassembly.
Replace the fan if the repair opens a bigger project
If the receiver is buried, the fan has become unreliable, the trim is dated, or you’re already questioning whether you want to keep it, replacement often saves frustration. It also resets the whole ownership clock.
Upgrade if the room deserves a stronger focal point
At this point, people stop thinking like repair techs and start thinking like homeowners again. A ceiling fan can disappear into a room or complete it. There’s a big difference.
If your current unit is giving you one more reason to revisit the space, it can be the right time to move into a stronger design category. That might mean a sculptural piece like Artemis XL5, an architectural option like Aerovon, a cleaner contemporary profile like Axis, or a more expressive statement model like Artiste. If the room leans warm or rustic, a Barn-style direction can change the entire ceiling presence.
Why premium replacement can be the better value
The author brief here is right to push past bargain-bin thinking. If you decide to replace, it makes sense to look at fans priced at $300 and up, because once you’re spending time on removal and installation, the fan should earn its place in the room.
The better move is often to shop by collection and intended visual effect, not by impulse. A few strong categories stand out:
- Modern sculptural fans over $300: These work well in open-plan living spaces and rooms where the fan is meant to be seen, not hidden.
- Clean contemporary designs over $300: Good for remodels where lighting, hardware, and furniture lines are already disciplined.
- Rustic or hospitality-friendly models over $300: Useful when the fan needs to support a broader design story rather than just circulate air.
- Statement fans for high ceilings over $300: Better proportion, stronger visual anchor, and usually a more intentional finish package.
You should also think about lifespan in practical terms. A fan that keeps requiring attention costs more than the invoice suggests. If you’re weighing age, wear, and expected service life, this guide on how long ceiling fans last helps frame the decision without turning it into guesswork.
Replace when the repair solves the symptom but not the ownership problem.
My technician’s take
If I’m standing under a fan with a homeowner and the diagnosis is simple, I’ll usually lean repair. It’s efficient, honest, and keeps a good fan in service.
If I’m dealing with a more involved DC electronic issue, awkward access, repeated failures, or a fan the owner already dislikes, I lean replacement faster. Not because repair can’t be done, but because the best answer isn’t always the most stubborn one.
A successful minka aire fan repair gets your breeze back. A well-chosen upgrade can improve the whole room.
If your current fan has reached the point where repair feels like a compromise, take a look at Fan Connection. Their selection makes it easy to move beyond basic replacement and choose a fan that upgrades the space, whether you want a modern centerpiece like Artemis XL5 or Aerovon, a sharp architectural style like Axis, or a warmer design direction from collections such as Barn. For homeowners, builders, and designers shopping serious ceiling fans priced at $300 and up, it’s a clean place to compare styles, finishes, and room-ready options without the usual clutter.


