











Upgrade Guide: remote control ceiling fan wiring diagram for Safe Install
Let's be honest, staring at a remote control ceiling fan wiring diagram can feel like you're trying to decipher ancient hieroglyphics. But don't sweat it—it’s way simpler than it looks! The whole high-tech setup boils down to one key component: a small receiver that catches the signal from your remote and tells the fan's motor and light what to do. Once you get how the black (hot), white (neutral), and green (ground) wires play together, you're golden. This is your ticket to controlling the climate of your room without ever leaving the couch.
Cracking the Code of Your Fan's Wiring Diagram
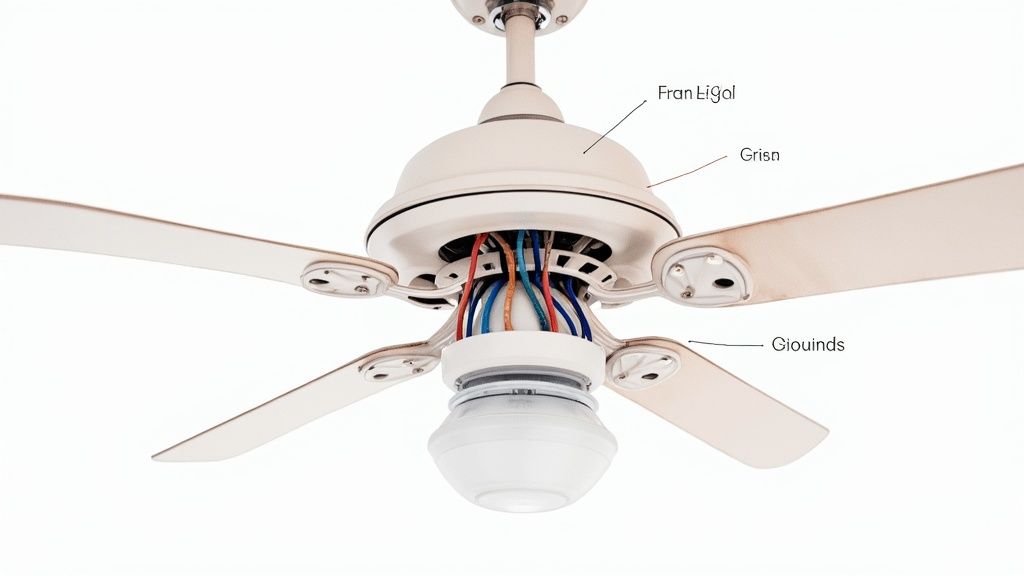
Before you even think about twisting a wire nut, you need to understand the blueprint. That wiring diagram isn't just a jumble of colorful lines; it's your treasure map to a successful installation. It shows exactly how electricity travels from the box in your ceiling, through the new remote receiver, and finally to the fan itself.
Think of the receiver as the mission control for your fan. Instead of power going straight from your house to the fan, it makes a little detour. The house wiring powers the receiver, and the receiver then acts like a smart switch, managing the fan's speed and light based on what you tell it to do with the remote. This little box is what gives you the magic of controlling everything from your comfort zone.
The Key Players on the Diagram
Even though diagrams can look a little different from one brand to the next, they all have the same main characters. Get to know these, and the whole thing will feel way less intimidating.
- The Power Source: These are the wires poking out of the electrical box in your ceiling. You'll almost always have a black (hot), white (neutral), and a green or bare copper (ground) wire.
- The Remote Receiver: This is that small black box that you need to tuck into the fan's canopy. It has two jobs: an "input" side that connects to your house wiring and an "output" side that feeds power to the fan.
- The Fan Motor: The heart of your fan. It’s powered by a black wire. While some old-school fans had multiple wires for different speeds, the receiver handles all that logic now.
- The Light Kit: If your fan has a light, it gets its own power wire, which is almost always blue. This is what lets the remote turn the light on and off separately from the fan motor.
One of the most common hangups I see is with the blue wire. Just burn this into your memory: Black is for the fan motor, blue is for the light kit. Keeping those two straight is absolutely critical for the remote to work right.
Demystifying the Wire Colors
In the world of electrical work, color coding is the universal language that keeps things safe and straightforward. While you should always, always double-check your fan's manual, the standard colors are thankfully consistent across most models.
For example, the black wire coming from your ceiling is the main power line. It connects to the black "AC In" wire on your receiver. Same logic applies to the white neutral wire from the ceiling—it hooks up to the white "AC In" on the receiver. That completes the input side. From there, you just match the output wires from the receiver (black for fan, blue for light) to the corresponding wires on the fan itself.
Getting this right is crucial, especially with higher-end smart fans. If you're installing a premium model like the Minka-Aire F844-DK Light Wave (retailing for over $400), flawless wiring is non-negotiable. One wrong connection and you could lose the very smart home features you paid for. Nail the basics, and the rest is a breeze.
Gathering Your Tools and Prepping for a Safe Install
Before you even think about touching a wire, a successful and safe installation starts with getting everything ready. Think of it as your pre-flight checklist. Taking a few minutes to get organized now will save you a ton of trips back and forth to the garage and, more importantly, keep you safe from start to finish.
Let's be honest, jumping into a wiring project without the right gear is a recipe for frustration and, frankly, a bit of danger. You don't need a professional electrician's entire van, but a handful of key items are absolutely non-negotiable for doing this right.
Your Essential Toolkit
Having these tools laid out and ready to go will make the whole process feel a lot smoother. You'll want to grab:
- Screwdrivers: You’ll need both a Phillips head and a flathead. Most fan parts use Phillips screws, but the electrical box itself might have flathead screws.
- Wire Strippers/Cutters: This is the right tool for the job. It cleanly removes the plastic insulation from wires without nicking the copper strands inside, which is key for a solid connection.
- Non-Contact Voltage Tester: This is your best friend for safety. It confirms the power is off just by getting it close to the wires—no risky direct contact needed. Don't skip this.
- Pliers: A good pair of needle-nose pliers is perfect for bending wires into those little hooks that go around terminal screws.
- Ladder: Make sure you have a sturdy stepladder that lets you work comfortably at ceiling height without stretching or standing on your tiptoes.
Once your tools are ready, the next step is the most important one: cutting all power to the area where you'll be working. Head over to your home's circuit breaker or fuse box and flip the switch that controls the ceiling fan's circuit.
Safety First: I can't stress this enough: don't just rely on the wall switch. Always shut off the power at the main circuit breaker. This completely eliminates any chance of a live wire causing a serious shock. It's a risk that's never, ever worth taking.
After flipping the breaker, go back to the room and use your non-contact voltage tester on the wires hanging out of the ceiling box. The tester should stay silent and dark. Only when you've got 100% confirmation that the power is dead should you move on.
Verifying Your Electrical Box
Now for a quick but crucial check that a lot of DIYers miss: the electrical box itself. Not all ceiling boxes are built the same. The one in your ceiling must be rated to support the weight and movement of a ceiling fan. A standard box made for a simple light fixture just isn't strong enough and can fail over time.
If you're unsure, it’s worth taking a moment for some understanding different electrical box types to make sure you have the right foundation for a secure fan. An underrated box is a ticking time bomb.
Proper preparation is what separates a weekend project from a weekend headache. For a complete walkthrough, our guide on how to install a ceiling fan safely and easily step-by-step covers everything in more detail.
Alright, this is where the magic happens. All that prep work is about to pay off as we turn that wiring diagram into a fully functional fan. It might seem intimidating, but if you follow the diagram, it’s a pretty logical process.
First things first, let’s find a home for the remote receiver. This little black box is the new brain for your fan, and it's designed to slide right into the mounting bracket, nice and snug against the ceiling. Gently tuck it in there. If it has an external antenna, make sure it’s positioned where it won't get pinched or blocked, so it can get a clear signal.
Wiring the Receiver Input From the House
With the receiver sitting pretty, it's time to connect the power coming from the ceiling. This is the "input" side, and it's where you'll work with the house wiring.
You'll connect the black (hot) wire from your ceiling box to the black "AC In" wire on the receiver. Then, do the same with the neutral wires: connect the white wire from the ceiling to the white "AC In" wire on the receiver.
Use the wire nuts that came with the fan. Twist them on until they’re firm and you can’t see any bare copper sticking out. Give each wire a gentle tug to be sure the connection is solid.
This is the most critical part of the job, and getting it right starts with getting the prep right.
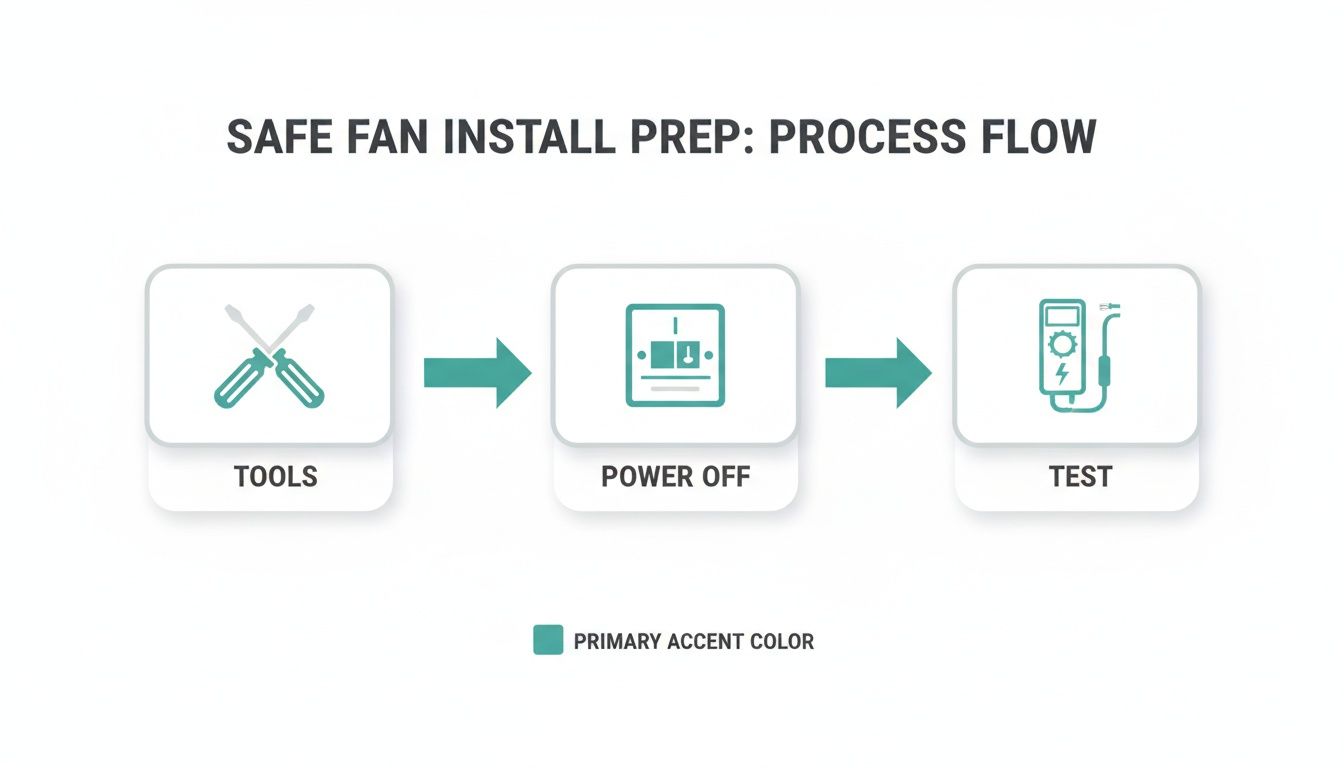
This little flow chart is a great reminder of the non-negotiables: have your tools ready, kill the power, and double-check with a tester before you touch a single wire.
Connecting the Receiver Output to the Fan
Now we flip our focus to the "output" side of the receiver—these are the wires that will send power down to the fan and its light kit. The good news is that these are almost always color-coded, making it hard to mess up.
You’ll see a black wire (sometimes it's red) labeled something like "To Motor" or "For Fan" coming out of the receiver. That gets connected to the matching black wire on the fan motor. Simple enough.
Next, you'll find a blue wire labeled "For Light." This, you guessed it, connects to the blue wire for the fan's light kit.
My Two Cents: If your fan doesn't have a light, don't just leave that blue wire hanging loose. Pop a wire nut on the end to cap it off. An exposed wire, even if you don't think it's live, is a safety hazard you just don't need.
You'll see this same logic whether you're installing a basic fan or a high-end model. For instance, the premium Craftmade Velocity Ceiling Fan, which often sells for around $380, follows this exact color-coding. House black/white to receiver input, receiver black/blue to fan/light output. That consistency is what makes this a job you can tackle with confidence.
As a handy reference, here’s how the connections typically map out.
Standard Wire Color Connections for Remote Receivers
This table is a great cheat sheet for matching the wires from your home’s electrical box to the remote receiver, and then from the receiver down to the fan itself.
| Connection Point | From House Wiring | To Receiver (Input) | From Receiver (Output) | To Fan/Light Assembly |
|---|---|---|---|---|
| Hot (Power) | Black | Black ("AC In") | Black ("To Motor") | Black (Fan Motor) |
| Light Power | (N/A) | (N/A) | Blue ("For Light") | Blue (Light Kit) |
| Neutral | White | White ("AC In") | White ("To Motor") | White (Fan/Light Neutral) |
| Ground | Green or Bare Copper | (Bypasses receiver) | (Bypasses receiver) | Green or Bare Copper |
Just remember to always consult your specific fan's diagram, as a manufacturer might occasionally throw you a curveball.
The Critical Grounding Connection
Okay, let's talk about the most important safety step: grounding. This is absolutely non-negotiable. The ground wire gives electricity a safe path to follow if something ever goes wrong, preventing the fan's metal parts from becoming energized.
You need to connect all the green and bare copper wires together. That means you'll have one from:
- The electrical box in your ceiling
- The fan's mounting bracket
- The fan motor assembly itself
Gather all three, twist them together with a single wire nut, and make sure that connection is rock-solid. This one connection protects the entire fixture. If you're curious about the principles behind creating secure electrical junctions, the way industrial terminal blocks are designed is a great example of creating organized and reliable connections.
With all the connections made, it's time to gently tuck all the wires and the receiver up into the canopy. The goal is a neat arrangement where nothing is pinched or strained when you slide the canopy into place. Don't rush this part—a loose connection or a damaged wire will only cause headaches later.
Once everything is tucked in, you're ready to secure the canopy and move on to pairing the remote. The hard part is over.
Handling Advanced Setups and Smart Fan Integration
Not every ceiling is a straightforward, single-switch affair. You'll occasionally run into a setup that makes you pause and scratch your head—like a room with separate wall switches for the fan and light. This is pretty common in older homes, but a remote control setup actually simplifies things beautifully.
Instead of wrestling with the wiring to make the receiver play nice with both switches, the goal is to bypass that dual-switch logic entirely. You’ll consolidate all the control into the remote by connecting the receiver to a constant power source. This usually means hooking the receiver's input to the single hot wire that's always live. Then, you just cap off the second switch's hot wire, making it inactive. From that point on, your remote becomes the one and only controller for both the fan and light, which makes for a much cleaner user experience.
If you're dealing with more complex wall controls, our guide on how to wire a ceiling fan switch dives into some of those trickier scenarios.
Entering the World of Smart Fan Wiring
The game changes once you step into the world of smart fans. These aren't just fans with a remote; they are connected devices that sync up with your home Wi-Fi and voice assistants like Alexa or Google Assistant. Unsurprisingly, their wiring diagrams often look a little different from the standard models you might be used to.
Take a high-end model like the Big Ass Fans Haiku Gen 4, a premium fan that often costs over $1,000. It doesn't just have a simple receiver. Its diagram will likely show an additional communication module or a specialized receiver that juggles both RF signals for the remote and Wi-Fi signals for smart home connectivity.
You might see extra wires for data communication or a completely different wiring configuration. Don't let this throw you. The core principles of connecting your hot, neutral, and ground wires are still the same; you're just adding a layer for data.
Decoding the Smart Fan Diagram
When you look at the remote control ceiling fan wiring diagram for a smart model, you'll still see the familiar power connections. However, you might also find:
- A Wi-Fi Module: This component needs its own power and might have specific placement instructions inside the canopy to ensure it gets a strong signal.
- Data Wires: Some models use extra, smaller-gauge wires to send information back and forth between the motor and the smart module.
- App-Based Pairing Steps: The final step isn't just pairing a remote; it's connecting the fan to your home network using a smartphone app.
This evolution in fan technology is a huge market driver. Smart ceiling fans, which rely on these more intricate wiring diagrams, are reshaping the industry. The segment was valued at USD 951.42 million and is projected to keep growing. In North America and Europe, where 35% of new installations now feature voice control, the trend is especially strong.
The Ultimate Payoff: Convenience and Efficiency
So, why go through the extra steps for a smart fan installation? The payoff is huge. You unlock features like scheduling your fan to turn on before you get home, controlling it with your voice, or tying it into automated home routines that save energy.
Imagine your fan automatically adjusting its speed based on the room's temperature, or syncing with your smart thermostat. This is the level of control and efficiency you get when you correctly wire a premium smart fan. By taking the time to understand the advanced wiring diagram, you're not just installing a fan—you're upgrading your home's entire ecosystem. It's about turning a standard fixture into a powerful, convenient, and energy-saving appliance.
Troubleshooting Common Remote Control Fan Issues
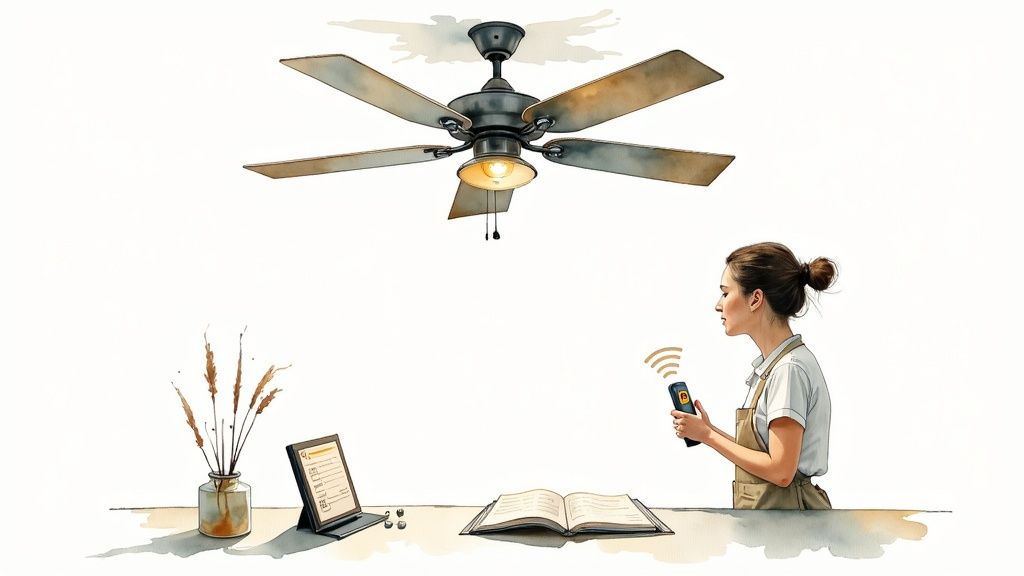
Even after you’ve followed the wiring diagram perfectly, sometimes a fan just won’t cooperate on the first try. Don’t panic—it happens to the best of us. More often than not, the solution is surprisingly simple and doesn't involve tearing everything apart again.
Before you start second-guessing your work on the remote control ceiling fan wiring diagram, let’s run through a quick checklist. Most post-install headaches come from just a few usual suspects, like the fan being completely dead, the light not working, or an annoying hum. Let's figure out what's going on.
The Fan Is Completely Unresponsive
This is the big one, but thankfully, the fix is usually pretty easy. Let’s start with the obvious stuff before you even think about touching those wires again.
- Check the Power: Did you flip the circuit breaker back on? It’s a classic, surprisingly easy step to forget when you’re excited to see your work come to life. Also, make sure the wall switch that controls the fan is flipped on, since the receiver needs a constant flow of power.
- Check the Remote's Batteries: This is the #1 culprit. Pop open the remote. Did you pull out that little plastic battery tab? Are the batteries fresh and put in the right way?
- Pair the Remote: Most remotes don't work right out of the box. They need to be "paired" or "synced" with the receiver. This might involve setting tiny DIP switches inside the remote and on the receiver to the same pattern, or just pressing a "learn" button. Your manual will have the exact steps.
If you’ve done all that and still get nothing, then it’s time to suspect a loose connection. It's totally possible a wire nut wiggled loose while you were cramming everything into the canopy.
Before you even think about opening up that canopy, shut the power off at the breaker again. Safety first. A quick check of the black and white "AC In" wires on the receiver often reveals the problem. Those connections have to be rock-solid for the receiver to get any juice.
The Fan Works but the Light Doesn't
Okay, this is actually good news! If the fan blades are spinning, you know the main power connections to your receiver are solid. The problem is isolated to just one wire.
Your prime suspect is the blue "For Light" wire. That connection you made between the blue wire from the receiver and the blue wire on the light kit? That’s the first—and probably only—place you need to look. Just kill the power at the breaker, lower the canopy, and make sure that one connection is secure.
Unwanted Hum or Wobble After Installation
A humming sound can drive you crazy, but it’s rarely a serious electrical issue. More often than not, the receiver is just a little loose in the mounting bracket, causing it to vibrate against the metal as the fan runs. A small piece of foam or even electrical tape tucked in there can usually dampen the noise.
A wobble, on the other hand, is almost always a mechanical problem, not a wiring one. Double-check that all the fan blades are screwed in tightly and that the fan assembly is securely mounted to the electrical box in the ceiling.
These kinds of hiccups are common across all brands, even on premium models like the Clarity Ceiling Fan, which can run over $470. If you suspect the remote itself is the problem, our guide on choosing a replacement fan remote control can point you in the right direction.
The rise of energy-efficient models has also changed the game. BLDC ceiling fans, which almost always rely on a remote, dominated the USD 1,583.7 million BLDC fan market. These models are popular for their 40-50% energy savings, and their remotes are key to the precise speed control they offer.
Got Questions About Your Ceiling Fan Wiring? We've Got Answers.
Even with the best diagram in front of you, it’s only natural to hit a snag or two during an installation. Every home’s wiring is a little different, and those little variations can leave you scratching your head. Let's walk through some of the most common questions that pop up, so you can get your fan spinning without any headaches.
Can I Still Use My Wall Switch?
This is probably the number one question we hear. And the answer is yes, but its role changes completely. Once you install a remote receiver, the wall switch becomes the master power supply. You’ll want to leave it flipped on all the time.
Think of it this way: the wall switch gives power to the fan’s brain (the receiver), and the remote is what tells the brain what to do—change speeds, turn on the light, etc. If the switch is off, the receiver gets no power, and your remote is useless.
What Do I Do With This Extra Red Wire?
If you open up your ceiling box and see a red wire alongside the black and white ones, don't panic. This usually means your home was wired to control a fan and its light from separate wall switches. But your new remote makes that setup redundant.
The remote receiver is designed to take a single power source and split it between the fan motor and the light kit. So, you'll connect the main black hot wire from your ceiling to the receiver's input. The extra red wire? Just cap it off safely with a wire nut and tuck it away in the electrical box. It’s no longer needed.
Can I Use One Remote for Multiple Fans?
Absolutely. This is a great trick for large, open-concept rooms or covered patios with two fans. How you do it depends on the type of remote you have.
- For fans with DIP switches: These are the little toggle switches you'll find inside the remote's battery compartment and on the receiver itself. Just set the switches on both receivers to the exact same pattern. Then, match that pattern on your remote, and voilà—one remote will command both fans.
- For fans with "learning" remotes: Newer models use a pairing button instead of switches. To sync two fans, you’ll need to cut the power to both at the breaker, then turn it back on for both at the same time. As soon as they power up, press and hold the "pair" or "learn" button on your remote. Both receivers should "learn" the remote's signal simultaneously.
Just keep in mind, this means the fans will be perfectly in sync. You won’t be able to run one without the other or have them at different speeds using a single remote.
My Remote Just Stopped Working. What Now?
It's beyond frustrating when your fan works perfectly for months and then suddenly quits. Before you start thinking you have a major wiring problem, check the simple stuff first. 90% of the time, the issue is just dead batteries in the remote. Swap them out before you do anything else.
If fresh batteries don't do the trick, the remote probably lost its connection to the receiver. This can happen after a quick power outage. The fix is easy: just re-pair it. Follow the steps in your manual, which usually involves flipping the breaker off for a minute, turning it back on, and then pressing a specific button on the remote to re-establish the link.
Here's a pro tip: When you flip the breaker back on, listen carefully. Most receivers will make a faint "beep" or "chirp" to signal they're getting power. If you hear that sound, you can be confident your wiring is solid and the problem is with the remote or the pairing.
Thinking About an Upgrade?
If you find yourself wrestling with an old, clunky fan, sometimes the path of least resistance is a full upgrade. Modern fans not only have more reliable, built-in remote systems but also offer designs that can completely transform a room's aesthetic.
For example, a model like the Monte Carlo Maverick Ceiling Fan can run upwards of $600 and features a stunning, minimalist look that designers love. It blends right into the ceiling, giving you all the comfort without the visual clutter of older fans. It’s a simple change that elevates both your style and your home's functionality.
Ultimately, knowing your way around a remote control ceiling fan wiring diagram gives you the power to handle the installation with confidence.
At Fan Connection, we believe the perfect fan should be both functional and beautiful. Explore our curated collections to find a fan that fits your style and budget, from modern three-blade designs to elegant statement pieces. Discover your perfect fan at Fan Connection.


