


Ceiling Fan Remote Wiring Diagram: Quick Guide & Safety Tips
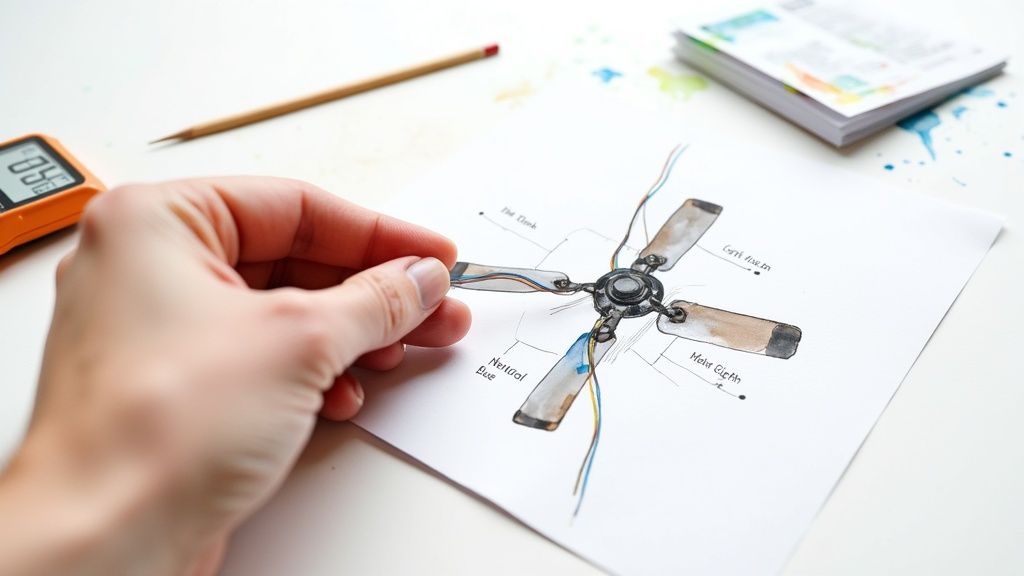
A good ceiling fan remote wiring diagram is your roadmap to getting the job done right. Think of it as the ultimate cheat sheet, showing exactly how the black (hot), white (neutral), blue (light), and green (ground) wires need to connect between your ceiling box, the remote's receiver, and the fan itself. It’s your ticket to modern convenience, and honestly, a pretty fun weekend project.
Taking a few minutes to really understand this schematic before you touch a single wire is the single best way to avoid common electrical mistakes, ensure your new remote works perfectly, and keep your frustration levels at zero.
Cracking the Code of Your Wiring Diagram
Let's be honest, unfolding a wiring diagram for the first time can feel a little intimidating. It's a jumble of lines, strange symbols, and color codes that can look like a secret map to a hidden treasure... or just a confusing mess.
But here’s the secret: it’s way simpler than it seems. The entire goal is to slide a small "brain"—the receiver—in between the power source from your ceiling and the fan motor. This little box is what catches the signals from your remote and tells the fan what to do. Your only job is to hook it up so it can listen. Think of it as playing matchmaker for your electrical wires!
The Three Key Players in Your Diagram
Every single ceiling fan remote installation boils down to connecting three sets of wires. Once you can confidently identify each group, you're halfway to kicking back and enjoying your newly remote-controlled breeze.
You'll be working with:
- Wires from the Ceiling: This is your power supply. You'll typically find a black (hot), white (neutral), and a bare copper or green wire (ground) coming out of the electrical box.
- Wires from the Receiver: This is the middleman. It has an "input" side that connects to the ceiling wires and an "output" side that connects to the fan.
- Wires from the Fan: These are the wires that run the motor and the light. You'll usually see a black (for the fan motor), a blue (for the light), a white (neutral), and a green (ground).
Pro Tip: Before you disconnect a single wire, snap a quick photo of the existing setup with your phone. If you hit a snag later on, having that "before" picture to reference is an absolute lifesaver. Trust me, it’s a simple step that has saved me from a lot of frustration over the years.
Translating the Color Code
Wiring colors are standardized for a very good reason—safety. While you might run into some oddball wiring in older homes, most modern installations in North America follow a predictable color scheme. Learning this "language" turns a confusing diagram into a straightforward to-do list.
It's no surprise that remote-controlled fans are booming in popularity. The global ceiling fan market is projected to be worth between USD 12.4 billion and USD 14.6 billion by 2025, and a huge part of that growth is from people wanting more convenient, high-tech models. As smart homes become the norm, that number is expected to jump to an estimated USD 31.6 billion by 2035.
This massive shift means more and more homeowners are tackling installations that require a solid understanding of a ceiling fan remote wiring diagram. You can discover more about the ceiling fan market's expansion and what's driving these trends through industry analysis.
For a quick reference, here’s a breakdown of what each wire color typically means in this kind of project.
Ceiling Fan Wire Color Code Quick Reference
This table provides a quick guide to the standard wire colors you'll encounter and what they do.
| Wire Color | Common Name | Function (From Ceiling Box) | Function (On Fan/Receiver) |
|---|---|---|---|
| Black | Hot / Live | Delivers power from the circuit breaker. | Powers the fan motor. |
| White | Neutral | Completes the electrical circuit. | Common neutral for both fan and light. |
| Blue | Light / Load | N/A (usually not present in ceiling box) | Delivers power to the light kit. |
| Red | Switched Hot | Delivers power from a second wall switch. | N/A (typically capped if not used) |
| Green/Bare | Ground | Safety wire to prevent electric shock. | Safety ground for the fan's metal body. |
Remember, this is a general guide. Always double-check your fan's specific diagram, as manufacturers can sometimes use different conventions.
What Each Wire Does
Let’s quickly break down the cast of characters. The black wire from the ceiling carries the electrical current from your breaker panel. The white wire is the neutral, which completes the circuit.
On the fan side, the blue wire is almost always dedicated to powering the light kit, while the fan's separate black wire powers the motor. Finally, the green or bare copper wire is your ground—a crucial safety feature that protects against electrical faults. Knowing these roles makes any diagram feel much more intuitive.
Your Toolkit and Pre-Flight Safety Check
Before you even think about touching a wire, let's talk about what makes a project successful. The real magic happens on the ground, long before you climb the ladder. Getting your tools together and adopting a safety-first mindset isn't just about being careful—it's what separates a smooth, satisfying job from a frustrating one that ends with a call to an electrician.
Think of it as your pre-flight checklist. A pilot wouldn't dream of taking off without checking their instruments. You shouldn't be climbing a ladder without the right gear and a safe workspace.
Assembling Your Essential Toolkit
Having the right tools isn’t just about making the job easier; it makes it safer and gives you a professional result. A cheap wire stripper that nicks the copper can cause a bad connection, and just guessing the power is off is a gamble you never want to take.
Here's what you should have within arm's reach:
- A Non-Contact Voltage Tester: This is, without a doubt, your most important safety tool. It lets you confirm with 100% certainty that the power is off before you touch anything. Safety is paramount when dealing with electrical installations; ensure your toolkit includes a non-contact voltage detector for these crucial checks.
- Insulated Screwdrivers: You’ll want both a Phillips head and a flathead. Those insulated handles are an extra layer of protection if you accidentally touch a live circuit.
- Wire Strippers/Cutters: A good pair of strippers cleanly removes insulation without damaging the wire inside, which is key for a solid, secure connection. Trying to make do with a knife or scissors is just asking for trouble.
- A Sturdy Ladder: Make sure your ladder is the right height for the room and is sitting on a stable, level surface. Never overreach—it's always safer to climb down and move the ladder.
- Safety Glasses: Dust, little bits of drywall, and even stray wire clippings can fall from the ceiling. Protecting your eyes is a simple but critical step.
The Non-Negotiable Safety Protocol
With your tools ready, it's time to make your workspace safe. This isn't optional—it's the foundation for any electrical work you do at home.
The most common DIY electrical mistakes don't come from complex wiring errors, but from simple safety oversights. Taking five minutes to run through this checklist can prevent hours of trouble or, more importantly, a serious injury.
First things first: head to your circuit breaker panel and kill the power to the room you're working in. Don't just rely on the wall switch. That only interrupts the circuit; it doesn't shut down the power flowing into the ceiling box.
Next, you need to prove the power is off. Grab your non-contact voltage tester and touch its tip to every single wire in the ceiling box. The tester should stay silent and dark. A good habit is to test it on a known live outlet first to make sure the tester itself is working properly.
Finally, stick a piece of tape over the breaker you just flipped off. It’s a small thing, but it stops someone from accidentally turning the power back on while you’re in the middle of the job. For a deeper dive into the full installation process, our comprehensive guide on how to install a ceiling fan provides additional details that complement these safety checks.
The Hands-On Guide to Wiring Your Receiver
Okay, this is where the real work begins. With the power off and your tools handy, it’s time to install the brains of the operation—the remote receiver. Don't let the bundle of wires intimidate you; this is mostly just a game of matching the colors. We’re going to connect the wires from your ceiling to the receiver, and then from the receiver down to your fan.
This is the part that transforms your old pull-chain fan into a modern, remote-controlled fixture. We'll walk through the most common setups you'll find, making sure you get solid, safe connections every step of the way.
Before you touch a single wire, let’s do a quick safety check. This is non-negotiable.

This three-step process—Power Off, Test, and Secure—is your foundation for a safe installation, starting at the circuit breaker and ending with a steady ladder.
Connecting the Receiver to Your Ceiling Wires
First things first, let’s get power to the receiver. This is the "input" side of the unit. Once you've lowered the fan's canopy to get a look at the wiring, you should see a black wire, a white wire, and a green (or bare copper) wire coming out of the ceiling box.
Your receiver has a matching set of wires on its input side, almost always black and white.
- Black to Black: Take the black wire from the ceiling and the black "input" wire from the receiver. Twist their bare copper ends together in a clockwise direction.
- White to White: Do the exact same thing with the white wire from the ceiling and the white "input" wire from the receiver.
- Secure with a Wire Nut: Screw a wire nut over each twisted pair. Give it a gentle tug to make sure it's snug and no bare copper is showing.
The green ground wires are your safety net. You’ll need to connect the green wire from the ceiling, the green wire from the fan’s mounting bracket, and the green wire from the fan itself all together under a single wire nut. The receiver itself usually doesn't have its own ground wire.
A Pro's Technique for Twisting Wires: Don't just hold the wire ends side-by-side and expect the nut to do all the work. For a rock-solid connection, use your pliers to firmly twist the bare copper ends together before you screw on the wire nut. This creates a much stronger mechanical and electrical bond that won't wiggle loose when you tuck everything back into the box.
Wiring the Fan with a Light Kit
Now for the "output" side, which sends signals from the receiver to the fan. This is the most common setup you'll encounter—a fan that has both a motor and a light. The receiver essentially acts as a traffic cop, directing power to either the fan motor, the light, or both.
Your fan will have a black wire (for the motor) and a blue wire (for the light). The receiver's output side will have corresponding black and blue wires.
- Connect the black wire from the receiver to the black wire from the fan.
- Connect the blue wire from the receiver to the blue wire from the fan.
- Finally, connect the white neutral wire from the receiver to the white neutral wire from the fan.
Secure each of these three connections with its own wire nut. With that, you’ve completed the full circuit.
Wiring a Fan Without a Light Kit
What if your fan is a simple, no-frills model without a light? The process is even easier. In this scenario, your fan will probably just have a black wire and a white wire coming down from its motor.
You’ll connect the output wires from the receiver almost identically, with one tiny difference.
- Connect the black wire from the receiver to the black wire from the fan motor.
- Connect the white wire from the receiver to the white wire from the fan motor.
- The receiver will still have a blue wire intended for a light. Since you don't have one, just cap it off with a wire nut. This ensures it can't touch anything and cause a short.
That extra blue wire is now safely terminated, and you're ready to tuck everything away.
The Art of Tucking the Receiver
This last part is surprisingly important. One of the most common reasons a new remote install fails is because a wire gets pinched or damaged while shoving everything back into the canopy. The receiver is a tight fit, so you have to be a little strategic.
Start by gently pushing the connected wires and their nuts up into the ceiling electrical box. It helps to arrange the "input" wires on one side and the "output" wires on the other.
Next, slide the receiver into the mounting bracket. Most are designed to rest neatly on top of the downrod ball. Make sure its flat side is against the ceiling and the small antenna wire (if there is one) has a clear path and isn't getting crimped.
Once the receiver is settled, carefully slide the canopy back up to the ceiling, checking that no wires are caught between the canopy's edge and the bracket. Secure it with the screws you removed earlier, and you're officially done with the wiring.
For those looking to move beyond a simple remote kit, the world of premium smart fans is worth exploring. Models like the Minka-Aire F868L-WHF Sleek 60" Smart Ceiling Fan, which sells for around $430, come with whisper-quiet DC motors and integrate directly with smart home ecosystems like Alexa and Google Assistant. This is more than just a fan; it's a piece of home automation that blends style and performance, taking you far beyond what a standard add-on remote can do.
Solving Tricky Real-World Wiring Puzzles
Sometimes you pop open the ceiling box and find a tangle of wires that looks nothing like the neat lines on your new ceiling fan remote wiring diagram. Don't panic. This is surprisingly common, especially in older homes or rooms with more complex switch setups.
Think of yourself as a detective. The standard diagram is your textbook case, but the real world often throws a few curveballs. With the right tools and a little logic, you can solve these puzzles and get your remote working perfectly. This is where you go from just following instructions to truly understanding how it all connects.
Decoding Older Home Wiring
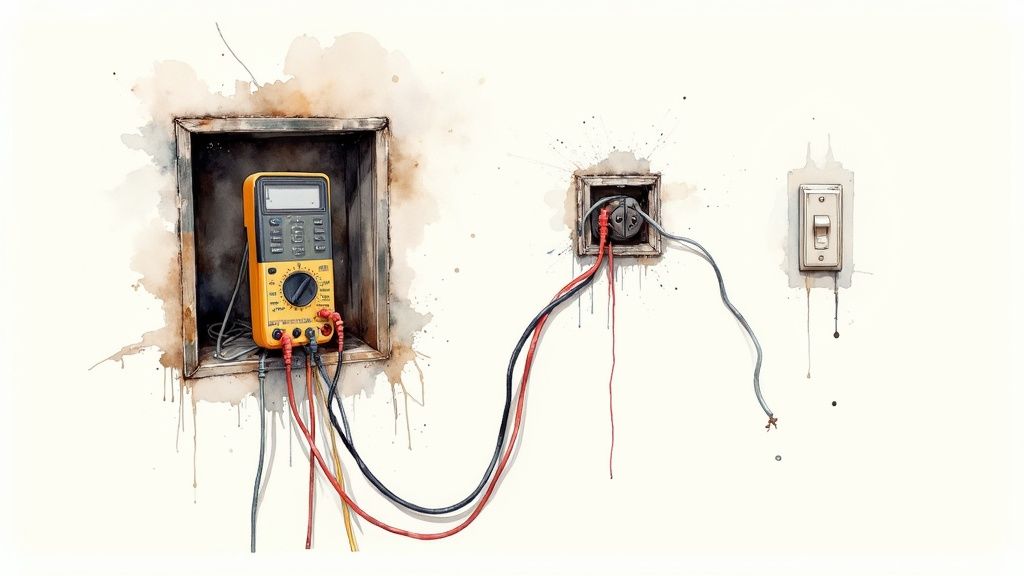
In older houses, the color-coding rules we take for granted today weren't always followed. You might find wires with faded insulation or colors that don't match the modern black, white, and green standard. In these cases, guessing is never an option. Your multimeter just became your best friend.
To safely figure out what's what, you'll need to test for voltage. Set your multimeter to the AC voltage setting (usually marked V~). After you turn the power back on at the breaker, carefully touch one probe to the bare copper ground wire (or the metal electrical box itself) and the other probe to one of the mystery wires.
- Hot Wire: If the multimeter reads around 120V, you've found your hot wire. This is your "black" wire.
- Neutral Wire: If the meter reads 0V (or something very close), you've likely found the neutral, which acts as your "white" wire.
Once you’ve identified them, kill the power at the breaker again. Now, label those wires with a bit of colored electrical tape so you don't forget which is which.
Safety First: Using a multimeter on live circuits demands your full attention. Never touch the metal tips of the probes with your bare hands. If you feel even slightly unsure about this process, it's time to pause. While this guide tackles common wiring puzzles, some issues need an expert eye. If you run into problems that feel too complex, consider reaching out for professional electrical troubleshooting and repair services.
From Two Switches to One Remote
A classic head-scratcher is a room with two separate wall switches—one for the fan motor and another for the light. Your goal is to combine these into a single circuit that gives constant power to the remote receiver, letting the handheld remote do all the heavy lifting.
When you look in the ceiling box for a dual-switch setup, you'll usually find an extra hot wire, which is often red. One hot wire (black) powers the fan, and the other (red) powers the light. Your remote receiver, however, only needs a single hot wire to power itself and control both functions.
To simplify this, you'll connect the receiver's single black "input" wire to the black wire coming from the ceiling. That red wire is now redundant. You need to cap it off with a wire nut in both the ceiling box and down at the wall switch box to make sure it's safely terminated. The rest of your installation will follow the standard diagram. For a deeper dive into switch setups, our guide on how to wire a ceiling fan switch can offer more clarity.
Standard vs Dual-Switch Wiring Comparison
When you're trying to figure out how to handle the wires, a side-by-side comparison can make things much clearer. Here’s a quick breakdown of how these two common scenarios differ.
| Wiring Aspect | Single-Switch Installation | Dual-Switch Installation |
|---|---|---|
| Ceiling Hot Wires | One black wire. | One black wire, one red wire. |
| Receiver Input | Receiver's black wire connects to ceiling's black wire. | Receiver's black wire connects ONLY to the ceiling's black wire. |
| Red Wire Handling | N/A | The red wire is capped off with a wire nut and is not used. |
| Wall Switch | The single switch becomes the master power switch. | One switch becomes the master power; the other is disconnected. |
Once wired, one wall switch will act as a master power switch for the entire fan unit. You'll need to leave it in the ON position for the remote to work. The second switch will now be completely inactive.
If you want a truly seamless experience that goes beyond a standard remote, you might consider an integrated smart fan. A great example is the Fanimation Kute 52" Smart Ceiling Fan, which sells for around $380. It boasts a sleek, modern design and connects directly to your Wi-Fi, allowing you to control it with your phone or voice commands. This approach eliminates the wall switch puzzle entirely, offering a high-tech solution that adds both value and serious convenience to your space.
Upgrade Your Space with a Premium Smart Fan
So, you've mastered the ceiling fan remote wiring diagram and successfully added a remote to your fan. That's a fantastic upgrade. But if you're wondering what the next level looks like, let me introduce you to the world of premium smart fans. This is where high-end design gets a serious tech upgrade, turning a simple fixture into the centerpiece of a truly connected home.
We’re not just talking about fans with remotes anymore. Think about brands like Haiku, Minka-Aire, and Fanimation. They're building integrated systems from the ground up, engineered for silent performance and seamless connectivity.
The Power of a DC Motor
One of the biggest game-changers in modern fans is the move to brushless DC (BLDC) motors. Unlike the old-school AC motors you might be used to, these things are incredibly efficient—often using up to 70% less energy.
That efficiency isn't just a number on a spec sheet. It means the motor runs whisper-quiet, even when it's spinning at top speed. No more humming or wobbling sounds, just a silent, steady breeze.
This isn't just a niche trend, either. As global energy standards get stricter and homeowners demand lower running costs, the whole market is shifting. We're seeing more and more manufacturers build their fans with these advanced, receiver-based systems right from the factory. Industry reports even show double-digit growth for smart fan controllers, which you can read more about here. Knowing how to wire a universal remote is a great skill, but the future is definitely in these integrated smart setups.
Seamless Smart Home Integration
The real magic of a premium fan, though, is its brain. These models are designed to connect directly to your home's Wi-Fi, giving you control that goes way beyond a little handheld remote.
You can literally just talk to your fan:
- "Alexa, set the living room fan to 50%."
- "Hey Google, turn on the bedroom fan light."
This level of integration opens up a world of automation possibilities. You could, for instance, create a routine where your fan automatically kicks on to a gentle breeze the moment your smart thermostat senses the room is getting a bit too warm.
A truly smart fan doesn't just react; it anticipates. Many high-end models have onboard sensors that track room temperature and humidity, automatically adjusting fan speed to keep you comfortable without you lifting a finger.
An Investment in Style and Comfort
Let's be honest, investing in a premium smart fan is about more than just cool tech. These fans are legitimate statement pieces. They’re built with higher-quality materials and come in stunning designs that can completely elevate a room's aesthetic.
Take the Haiku L Series 52" Smart Fan, for example. It's not cheap, retailing for over $600, but you're paying for a sleek, minimalist design and that dead-silent DC motor. It's an investment, for sure, but it’s one that pays off in style, comfort, and a layer of sophisticated tech that just makes life easier. For anyone who appreciates both form and function, it’s the ultimate upgrade.
Common Questions About Fan Remote Installations
Even with a perfect ceiling fan remote wiring diagram, questions inevitably pop up. You're not alone if you hit a small snag—most DIY projects come with a little head-scratching. We've gathered the most common questions that arise during and after the installation process to give you quick, clear answers.
Can I Add a Remote to Any Ceiling Fan?
The short answer is: almost. Most standard, pull-chain-operated AC motor ceiling fans are perfect candidates for a universal remote control kit. These kits include the receiver you wire into the fan's canopy, effectively giving your old fan a new brain.
However, there are exceptions. Fans with unique DC motors, existing integrated remote systems, or proprietary smart features often won't play nice with a universal kit. It's crucial to check the fan's manual and the remote kit's specifications for compatibility before you buy.
If you're trying to fix a fan that already had a remote, you'll likely need a specific replacement part from the manufacturer. You can find helpful information in our guide about finding a replacement fan remote control.
My Fan Hums After Installing the Remote. How Do I Fix It?
That annoying hum is a classic sign of an incompatibility issue, often between the new receiver's electronics and the fan's AC motor. Universal remotes control speed by modulating the electrical current, and some motors just don't like it.
First, double-check your work. Make sure all wire nut connections are tight and no wires are being pinched inside the canopy. Sometimes, a poor connection is the culprit. If the hum continues, the problem is likely the receiver itself. A higher-quality remote kit, perhaps one from the same brand as your fan, can often eliminate the noise entirely.
Expert Insight: Fans with modern DC motors are far less susceptible to remote-induced humming. Their design is inherently quieter and more efficient, which is a major reason why premium models offer a superior user experience.
The Remote Works But the Wall Switch Does Not. What Did I Do Wrong?
You probably didn't do anything wrong—this is usually how it's supposed to work! When you install a remote receiver, it needs constant, uninterrupted power to "listen" for the remote's signal. The wall switch is no longer a direct controller for the fan; its new job is to be a master on/off switch for the entire unit.
For the remote to function, the wall switch must be left in the 'ON' position permanently. If you turn it off, you cut power to the receiver, and the remote won't work. If you want dual control from the wall and a remote, you need a specialized system where the wall unit is also a transmitter, not just a simple switch.
Why Won't My Remote's Light Dimming Feature Work?
This is a common frustration with a few possible causes. The first thing to check is the bulbs themselves. You absolutely must be using dimmable bulbs. Trying to dim a non-dimmable LED or CFL bulb will result in flickering, humming, or it simply won't work at all.
Second, many receivers have a small DIP switch inside them. This switch needs to be set to the dimming mode (often labeled 'D') instead of a simple 'ON/OFF' setting. If it's set incorrectly, the dimming command from the remote will be ignored.
Finally, make sure the fan's original pull chain for the light is set to the 'ON' position. The remote can only control a circuit that's already been turned on at the source.
Ready to elevate your home's comfort and style? At Fan Connection, we offer a curated selection of stunning, high-performance ceiling fans to fit any aesthetic. From the sleek lines of the Minka-Aire F868L-WHF Sleek 60" Smart Fan ($430) to the modern appeal of the Fanimation Kute 52" Smart Fan ($380), we have the perfect centerpiece for your space. Explore our collections and find your ideal fan today at https://www.fanandlights.com.


