


How to fix wobbly ceiling fan: Quick, Easy Fixes
That rhythmic thump-thump-thump isn't just annoying; it's your fan telling you something is off. The good news is that fixing a wobbly ceiling fan usually boils down to tightening a few loose screws or balancing the blades. It’s a totally manageable DIY fix that will bring back quiet, steady operation and help your fan last longer.

Decoding the Wobble: Why Your Fan Is Unsteady
A wobbly ceiling fan is more than just a distraction—it's a classic sign of imbalance. Think of it like a car tire that needs balancing; the faster it spins, the worse the vibration gets. This constant shaking puts extra stress on the fan’s motor and mounting hardware, leading to premature wear and tear.
Fortunately, that mechanical cry for help is rarely a sign of a major disaster. In fact, nearly 90% of wobble issues come from a handful of simple, correctable problems. You can almost always track down the cause with a bit of systematic troubleshooting.
Common Culprits Behind the Shake
So, what are the usual suspects? Most of the time, the problem lies in one of these key areas:
- Loose Connections: This is the number one cause. Over time, vibrations can loosen screws on the blade irons (the metal arms holding the blades), the downrod, or even the mounting bracket at the ceiling. Just one loose screw is enough to throw the whole thing off balance.
- Blade Imbalance: Blades can have tiny weight variations right out of the box. A thick layer of dust can also do the trick, adding just enough extra weight to one blade to cause a wobble. A few grams of difference doesn't sound like much, but it’s amplified significantly when the fan is spinning at high speed.
- Improper Installation: This one's a big deal. The fan absolutely must be secured to a fan-rated electrical box. A standard plastic box for a light fixture just isn't built to handle the weight and dynamic force of a spinning fan. This is a primary cause of wobbling and a serious safety risk.
- Warped or Damaged Blades: Blades made from wood can warp from humidity changes over the years. A bent blade iron can also cause a single blade to sit at a different angle than the others, which is a sure-fire recipe for a wobble.
While you're checking for dust buildup, it's a good time to give them a thorough cleaning. You can learn how to clean your ceiling fan blades properly to prevent this from becoming a recurring issue.
To make things easier, here's a quick cheat sheet for diagnosing your wobbly fan at a glance.
Quick Diagnosis for a Wobbly Fan
| Symptom | Most Likely Cause | First Action to Take |
|---|---|---|
| Visible shaking at the base/canopy | Loose mounting bracket or downrod | Turn off power and tighten all connections at the ceiling. |
| Consistent, rhythmic wobble | Unbalanced or loose blades | Check and tighten all blade screws first, then proceed to balance. |
| Wobble is worse at high speeds | Blade imbalance or warped blades | Visually inspect blades for warping; if they look fine, use a balancing kit. |
| Fan looks like it's "hula-dancing" | Bent blade iron or loose downrod ball | Check if one blade is out of alignment; inspect the ball joint in the canopy. |
This table covers the most frequent issues, helping you narrow down the problem before you even grab a screwdriver.
Key Takeaway: A stable fan starts with a solid foundation. Always make sure your fan is attached to an electrical box specifically rated for the job. It's the single most important check for safety and long-term stability.
Understanding these common causes lets you tackle the problem like a pro. Instead of just guessing, you can perform a targeted inspection and fix the exact source of the wobble. You'll turn a frustrating annoyance into a satisfying DIY win and get your room back to being peaceful and quiet.
Your Pre-Repair Safety Checklist
Before you even think about climbing that ladder, let's talk about doing this the right way. Jumping into a fix without a little prep work is a recipe for frustration, or worse, an accident. A few minutes of planning will make the whole process smoother and a lot safer.

First thing's first, and this is non-negotiable: cut the power at the circuit breaker. Don't just flip the wall switch. Someone could easily flip it back on by mistake. Walk over to your electrical panel, find the breaker for that room, and shut it down. This simple step is the only sure way to eliminate the risk of electric shock.
Setting Up Your Workspace
With the power safely off, it's time to get your work area ready. Grab a sturdy stepladder—not a kitchen chair. Make sure it's on a flat, solid surface and give it a good shake to test its stability before you climb.
Next, get your tools together so you aren't making a dozen trips up and down. A little organization goes a long way. If your tools are a mess, it might be a good time to organize your garage tools so everything is easy to find.
Here's what you'll probably need:
- Phillips Head Screwdriver: You'll use this for just about every screw on the fan.
- Tape Measure or Yardstick: This is key for checking if the blades are out of alignment.
- Fan Balancing Kit: A cheap but essential kit with a clip and weights to fix imbalances.
- Damp Cloth: Sometimes a thick layer of dust is all it takes to throw a fan off balance.
Pro Tip: Pop on some safety glasses. Dust, dirt, or a dropped screw can easily fall while you’re looking up, and you don’t want that stuff in your eyes.
The Most Important Check: The Junction Box
Alright, this next step is the most critical inspection you'll do. Before you touch the fan itself, you need to check the electrical junction box in the ceiling. This is the hidden foundation holding everything up, and if it’s not the right kind, you’ll never truly fix the wobble.
A standard plastic box meant for a simple light fixture just can't handle the constant vibration and weight of a spinning ceiling fan. It's a huge safety hazard. A survey of contractors found that 30% of wobbles are caused by fans attached to the wrong type of junction box.
You might have to loosen the fan's canopy to get a peek, but you're looking for a metal box, usually stamped with "Acceptable for Fan Support" or something similar. If you see a plastic box, you've found the root of your problem. An approved, fan-rated box can support up to 70 pounds—essential for heavier, more stylish models. If you find the wrong box, it has to be replaced before you do anything else. Our guide on how to install a ceiling fan walks you through this. Getting these safety checks right from the start sets you up for a successful, long-lasting fix.
The Tightening and Alignment Masterclass
Alright, let's get hands-on and stop that wobble for good. The truth is, most shaky fans aren't broken—they're just a little loose in a few key spots. We're going to work our way down from the ceiling, methodically checking and tightening every connection. It’s a systematic approach that makes sure you don’t miss that one rogue screw, which is often all it takes.
Think of your fan like a spinning top. Any tiny bit of play at the pivot point—the ceiling mount—gets magnified into a huge wobble at the blade tips. That’s exactly why we start at the very top.
Securing the Foundation at the Ceiling
First up is the mounting bracket. With the power still off at the breaker, of course, gently slide the decorative canopy down the downrod. This will expose the hardware holding everything up. You’ll see the bracket screwed into the electrical junction box in the ceiling. Grab your screwdriver and give those screws a firm twist.
If they feel even the slightest bit loose, you’ve probably found a big part of your problem. These screws carry the entire weight and rotational force of the fan, so they need to be rock solid. You can learn more about the different hardware setups in our guide on ceiling fan mounting bracket types.
Once the bracket is solid, give the canopy screws a quick check. While a loose canopy cover won't cause a wobble, it can definitely rattle and add to the noise. It’s a good habit to snug it up while you're there.
Downrod and Motor Connections
Next, let's look at the downrod—the pipe connecting the motor to the ceiling mount. At the top, where it sits in the mounting bracket, you'll often find a small set screw in the ball joint. This little screw is designed to lock the downrod in place and stop it from shifting. Make sure it's tight.
Now, follow that downrod to where it meets the motor housing. You'll find another set of screws, and maybe a pin, holding it all together. These connections are under constant stress from the fan's rotation, making them prime suspects for loosening over time. Give them a good, solid tightening.
Pro Tip: When tightening screws, especially on the downrod or motor, use a hand screwdriver instead of a power drill. It gives you much better feel and control, so you can get the screws tight without the risk of over-torquing and stripping the threads.
The Blade Iron Checkpoint
We've now arrived at the most common culprit of all: the blade irons. These are the metal arms that connect the blades to the motor. For each blade, you have two sets of screws to inspect.
- Blade Iron to Motor: First, check where the blade iron attaches to the motor housing. Go around and tighten every single one of these screws. If even one is loose, it’ll throw the whole fan off balance.
- Blade to Blade Iron: Second, check the screws holding the actual blade to the blade iron. Make sure these are all uniformly tight, too.
It’s amazing how often a serious wobble can be traced back to just one loose screw on a single blade. This is where being methodical really pays off.
Master the Pro Technique of Blade Tracking
If you've tightened every screw and the fan still has a wobble, the blades themselves might not be spinning on the same level plane. We call this a tracking issue—one blade is flying a little higher or lower than the others. The good news is, you don't need any fancy tools to check this.
Just grab a yardstick or a tape measure. Hold it vertically, straight up to the ceiling, keeping your hand nice and steady. Now, slowly rotate the fan by hand, bringing each blade to the yardstick and measuring the distance from the ceiling to the very tip of the blade. Jot down the measurement for each one.
Ideally, all the blades should be the exact same height. A difference of more than 1/8 of an inch is definitely enough to cause a noticeable wobble. The professional fix for this is almost always blade tracking and arm straightening.
If you find a blade that's off, you can often fix it by slightly loosening the screws on that blade's bracket, slipping a thin washer between the bracket and the blade, and re-tightening. This simple trick resolves over 95% of tracking issues and is crucial for keeping high-end fans like the stunning Artemis XL5 or the bold Aviation series running perfectly smooth.
If a blade is still out of whack, the blade iron itself might be slightly bent, which can happen during shipping or a clumsy installation. You can often correct a minor bend with a little gentle but firm pressure. Just be careful—make small adjustments and re-measure after each one until all the blades are tracking evenly.
Mastering the Art of Blade Balancing
So you've tightened every screw from the ceiling down, and your fan is still doing the cha-cha. Don't throw in the towel just yet.
When a good tightening doesn't solve the wobble, the next logical culprit is an imbalance in the blades themselves. This is an incredibly common issue, and thankfully, it's one of the most satisfying to fix.
This happens because of tiny, almost imperceptible differences in weight between each fan blade. Even a few grams of variation can create a significant wobble when amplified by the fan's centrifugal force. The solution is a simple, inexpensive tool every fan owner should know about: the fan balancing kit. These kits usually just have a plastic clip and a few self-adhesive weights, turning a frustrating guessing game into a methodical process.
The Balancing Act Using a Fan Kit
Your mission, should you choose to accept it, is to play detective. The plastic clip is your main investigation tool. You'll attach it to one blade at a time to temporarily add weight, run the fan, and watch what happens to the wobble.
The goal is to find the one blade that, when weighted, causes the wobble to improve the most. This process systematically isolates the "light" blade that needs a permanent counterweight.
Here’s a quick visual guide to the core steps in fixing a wobbly ceiling fan, from checking the hardware to the final balancing.

This flow shows the systematic approach you need—start by securing the bracket, move to the blades, and finish with precision balancing.
Let's get started. First, turn the fan completely off and wait for it to stop spinning. Pick any blade to be "Blade 1" and attach the plastic clip to the middle of its trailing edge. Now, turn the fan on to a speed where the wobble is most obvious.
- Did the wobble get better?
- Did it get worse?
- Did it stay the same?
Turn the fan off, move the clip to the next blade, and repeat the test. Do this for every single blade, making a mental note of which one produced the best result (the least amount of wobble). Once you've found the problem blade, you're halfway there.
Fine-Tuning the Weight Placement
Now that you've zeroed in on your target blade, the next step is to pinpoint the perfect spot for the permanent weight. Turn the fan off again. Place the clip back on the problem blade, but this time, start near the motor housing. Turn the fan on and check the wobble.
Next, move the clip outward along the blade in small increments—about two inches at a time—and re-test. You'll notice the wobble changes as you move the clip. The "sweet spot" is usually somewhere between the middle of the blade and its tip. Keep adjusting until the fan is running as smoothly as possible.
Once you find that perfect spot, you're ready to make it permanent. Turn off the fan. Grab one of the self-adhesive weights from your kit, peel off the backing, and stick it to the top side of the blade, right where the clip was. Remove the clip, and you're done! For a really stubborn wobble, you can even add a second weight if needed.
Key Takeaway: The balancing process is all about patience and precision. Don't rush it. Moving that clip in small, measured increments is the secret to finding the exact point where the blade's weight is perfectly distributed, giving you a rock-solid, silent fan.
Did you know that fixing a wobbly fan can extend its life by up to 50%? The constant vibration contributes to premature motor failure in roughly 25% of cases if left unaddressed.
This fix isn't just about restoring peace and quiet; it's a critical maintenance step that protects your investment. Speaking of which, if you find that your old fan's blades are warped or permanently damaged, it might be the perfect excuse to upgrade. A modern, high-quality fan with precision-engineered blades is balanced right out of the box, ensuring years of wobble-free comfort.
Balancing blades is a fundamental skill, and understanding how blade design contributes to stability is super helpful. To learn more, check out our detailed article on the impact of fan blade count and fan efficiency.
When to Call It Quits: Repair vs. Replace
So, you’ve tried everything. You’ve tightened the screws, checked the alignment, and even waded into the surprisingly tricky world of blade balancing. But that ceiling fan is still wobbling like a bad dancer. When your best DIY efforts just aren't cutting it, you've hit a critical fork in the road.
This is the point where you have to ask: do I pour more time and money into another repair, or is it finally time to call it and get a new fan? Knowing when to throw in the towel can save you a world of frustration.
Red Flags That Signal It's Time to Replace
Sometimes, a wobble isn't just a symptom—it's a sign of a much bigger, and often terminal, problem. Certain mechanical failures are just too expensive or impractical to fix, making a full replacement the smarter, safer move.
Keep an eye out for these tell-tale signs:
- A Grinding or Humming Motor: If you hear a constant grinding, scraping, or a loud electrical hum, it's a good bet the motor's internal bearings are shot. This isn't a simple part you can just swap out. It usually means a full motor replacement is needed, which can easily cost as much as a brand-new fan.
- Permanently Warped Blades: Over time, humidity can do a number on wooden or composite blades, causing them to warp. Once a blade is visibly bent or twisted, no amount of balancing will fix the aerodynamic mess it creates.
- A Bent Motor Shaft: This one is a dealbreaker. If the central shaft that the motor spins on is even slightly bent, the fan will never run true again. This kind of damage is almost always beyond repair.
- Outdated and Unsafe Wiring: If you pop open the motor housing and find old, frayed, or brittle wiring, you’re looking at a serious fire hazard. Continuing to use a fan in that condition is a risk you just don't want to take.
Your fan's age is a huge factor here. If it's over a decade old, finding the right replacement parts can feel like a treasure hunt with no map. And let's be honest, the style might be a little dated. Think of this as an opportunity for an upgrade, not a defeat.
The Repair vs. Replace Decision Guide
Making the right call can be tough. Use this quick guide to help you decide whether to stick with repairs or invest in a new fan.
| Problem | Repair Feasibility | Recommended Action |
|---|---|---|
| Loose Screws | High | Repair. A simple tightening job. |
| Unbalanced Blades | High | Repair. Use a balancing kit. |
| Cracked/Broken Blade | Medium | Repair, if a matching blade is available. Otherwise, Replace. |
| Bad Motor Noises | Low | Replace. A failing motor is a major, costly fix. |
| Warped Blades | Low | Replace. Warped blades can't be balanced. |
| Frayed Wiring | Very Low | Replace. This is a serious safety hazard. Don't risk it. |
| Bent Motor Shaft | None | Replace. The fan is structurally compromised. |
Ultimately, if your fan is old and the fix is complex, a new fan is almost always the better long-term solution.
The Smart Upgrade: Investing in Stability and Style
Deciding to replace your wobbly fan isn't giving up; it’s choosing a better, more reliable solution for your home. Investing in a high-quality modern fan is one of the most effective ways to permanently fix a wobbly ceiling fan for good.
Premium fans are engineered from the ground up for stability. They come with precision-balanced blades and robust motors that guarantee smooth, silent operation for years.
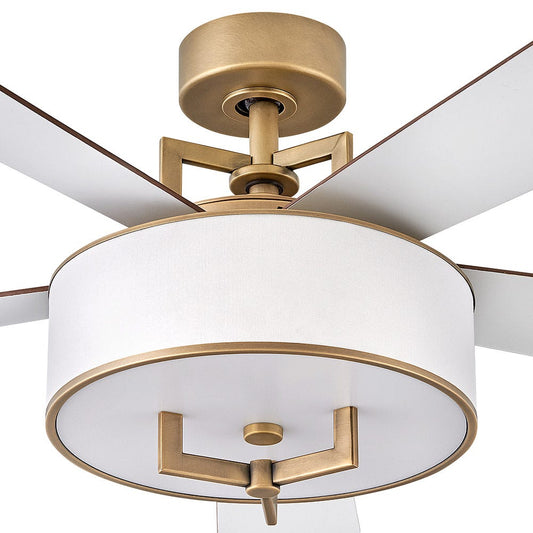
Imagine swapping out that noisy, shaky old fixture for something sleek and powerful. You could go for the stunning Artemis XL5, a true masterpiece of design that moves a ton of air without a hint of a wobble. Or maybe the Aviation series fits your style, with its bold, industrial aesthetic and rock-solid construction. These aren’t just appliances; they’re statement pieces that elevate your home’s comfort and look.
Sure, these fans represent a larger initial investment, often priced at $300 or more, but they offer a peace of mind that endless repairs never will. You're not just buying a fan; you're buying quiet nights, a more comfortable living space, and a fixture you won’t have to climb a ladder to mess with every six months.
To better understand the long-term value, it's helpful to know the difference between preventive versus corrective maintenance. And if you've diagnosed a specific motor issue, like a failed capacitor, you might find our guide on the role of a ceiling fan capacitor useful.
Common Questions About Wobbly Ceiling Fans
Even after you’ve nailed the fix, a few questions might still be spinning in your head. That’s perfectly normal. Let's run through a quick Q&A to make sure your fan stays stable, safe, and whisper-quiet for the long haul.
One of the biggest questions we get is whether a tiny bit of movement is acceptable. The short answer? No, a perfectly balanced fan should have virtually no visible wobble. Sure, you might see a barely perceptible sway on a fan with an extra-long downrod—that's just physics at play. But any noticeable shake is a clear sign of an imbalance that needs to be addressed. Ignoring it just puts unnecessary stress on the fan's motor and all its mounting hardware.
Blade Shape and Balancing
Does the shape of the fan blades make a difference? Absolutely. Fans with those big, paddle-like blades you often see in tropical or rustic designs can be more prone to balance issues. Their huge surface area means even a little dust buildup can create a surprisingly noticeable weight difference.
On the other hand, sleek, aerodynamic blades—like the ones on our modern Aerovon or Apex series fans—are engineered to slice through the air with minimal resistance. That design inherently makes them more stable and far less likely to wobble from minor imperfections.
Maintenance and Prevention
So, how often should you check your fan to stop wobbles before they start? A good rule of thumb is a quick inspection twice a year, usually when you reverse the fan's direction for summer and winter. It doesn’t have to be a huge production.
Just follow these simple steps:
- Dust the Blades: Grab a damp cloth and wipe down each blade. This gets rid of any dust that could be throwing the balance off.
- Check the Screws: With the power off, give the blade screws a quick check to make sure they're snug. No need to overtighten—just confirm nothing has worked its way loose.
- Observe: Flip the fan on high and just watch it for a minute. If you spot a new wobble starting, you can catch it early before it gets out of hand.
Expert Insight: Is a wobbling ceiling fan actually dangerous? While it's extremely rare for a properly installed fan to fall, a persistent wobble is a real safety concern. Over time, it can loosen electrical connections, which creates a potential fire hazard. It also guarantees premature motor failure. Fixing it is always the safest bet.
These small, preventative habits are the key to keeping your ceiling fan running smoothly year after year. By staying ahead of the issue, you’ll know you’ve learned how to fix a wobbly ceiling fan for good, not just for now.
At Fan Connection, we believe a ceiling fan should be a source of comfort, not a noisy distraction. If you’re tired of chasing wobbles and are ready for an upgrade, explore our curated collections of premium, precision-engineered fans. Discover the perfect blend of style and stability today. Find Your Wobble-Free Fan at Fan Connection


