


A Homeowner's Guide to Your Ceiling Fan with Remote Wiring Diagram
Alright, let's get that wiring diagram decoded! When you first pull the instructions out of the box for your new remote-controlled ceiling fan, that diagram can look as complex as a starship's blueprint. But don't worry, it's not secret code—think of it as your treasure map for getting everything connected correctly and enjoying that sweet, sweet breeze.
Decoding Your Ceiling Fan Wiring Blueprint
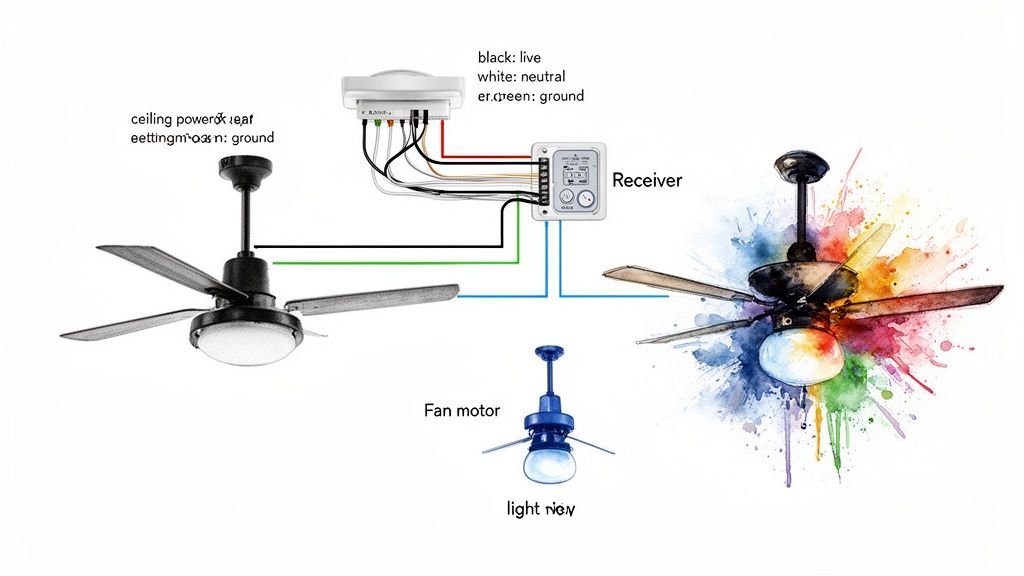
At its heart, the diagram shows a simple detour. Instead of power running straight from the ceiling box to the fan, it makes a quick pit stop at the remote receiver. This little black box is the brain of the operation. It catches the power coming from your switch and then listens for signals from your remote to tell the fan and light what to do. It’s like a tiny, obedient butler living in your fan canopy.
Understanding this flow—from your home's wiring, into the receiver, and then out to the fan—is the key to the whole installation.
The Key Players on Your Diagram
Every wiring diagram, no matter the brand, will show the same essential parts. Get familiar with these, and you're halfway to victory.
-
The Power Source (Ceiling Wires): These are the wires poking out of the electrical box in your ceiling. You'll almost always see a black (hot/live) wire, a white (neutral) wire, and a bare copper or green wire (ground).
-
The Remote Receiver: This is the magic box. It has two distinct sides: an "AC IN" side that connects to the house wiring and an "OUTPUT" side that sends power out to the fan.
-
The Fan Motor and Light Kit: These are the final destinations. They'll have their own set of wires ready to connect to the receiver's output side.
Understanding the Language of Wires
The most confusing part for many people is that jumble of colored wires. The good news is that the colors follow a pretty standard code, and your diagram will spell out exactly where each one goes.
Pro Tip: Before you disconnect a single wire from your old fixture, snap a quick photo with your phone. Trust me, having that picture as a reference can save you from a major headache later. It’s a simple step that has bailed me out more than once.
Here's a quick reference table to help you make sense of the common wire colors you'll be working with.
Standard Wire Color Codes for Remote Fan Installation
| Wire Color | Function | Where It Connects |
|---|---|---|
| Black (from ceiling) | Hot / Live Power | Connects to the Black "AC IN" wire on the receiver. |
| White (from ceiling) | Neutral | Connects to the White "AC IN" wire on the receiver. |
| Green / Bare Copper | Ground | Connects to the fan bracket, motor, and receiver's ground wires. |
| Black (from receiver) | Power to Fan Motor | Connects to the Black wire on the fan motor. |
| Blue (from receiver) | Power to Light Kit | Connects to the Blue wire on the fan's light kit. |
| White (from receiver) | Neutral | Connects to the White neutral wires on both the fan and light kit. |
Once you see it laid out, it's pretty straightforward. The receiver essentially acts as a middleman, splitting the power so it can control the fan motor and the light independently. If you're looking for more guidance on creating clear instructions like these, you might find some great insights in technical writing best practices.
Wiring diagrams have come a long way since the first electric ceiling fan was invented by Philip Diehl in 1882. Today, remote-controlled models make up over 65% of all ceiling fan sales, and their wiring is designed to be much more user-friendly. In fact, this remote-first approach can reduce DIY installation mistakes by as much as 40% because it simplifies the process significantly. Power goes straight to the receiver, which handles everything else.
For a deeper dive into different switch configurations, you can check out our guide on how to properly wire a ceiling fan switch for more detailed scenarios.
Gathering Your Tools and Prepping for a Safe Install
Before you even think about climbing that ladder, let’s talk prep. A successful—and more importantly, safe—installation for any ceiling fan with a remote starts on the ground with the right gear. Trust me, trying to improvise with the wrong screwdriver or, worse, skipping the safety checks is a fast track to a long, frustrating afternoon.
Think of it like this: you wouldn't start a big cooking project without getting all your ingredients out first. Same principle applies here, but the stakes are a little higher than a burnt dinner.
Assembling Your Installation Toolkit
Having everything you need within arm's reach is a game-changer. It saves you from those annoying and risky trips up and down the ladder. It's a bigger deal than you might think—over 500,000 people are treated for ladder-related injuries each year in the U.S. Let's not add to that statistic.
Here’s what you should have ready to go:
- A Sturdy Ladder: This is non-negotiable. Make sure it's tall enough to let you work comfortably at ceiling height without stretching or balancing on the top step.
- Non-Contact Voltage Tester: This little pen-sized tool is your best friend. It lights up or beeps to let you know if a wire is live before you touch it. It's the ultimate peace of mind.
- Screwdrivers: You’ll definitely need a Phillips head and a flathead. A good multi-bit driver is a great way to save space in your tool belt.
- Wire Strippers/Cutters: You need these for clean cuts and to strip the plastic insulation off the wires. A clean strip means a solid connection.
- Pliers: A pair of linesman's pliers is perfect for twisting wires together tightly before you secure them with a wire nut.
- Wire Nuts: Your fan kit will probably come with a few, but it’s always a good idea to have a variety pack on hand. You never know what you'll find in the ceiling box.
The Golden Rule: Shutting Off the Power
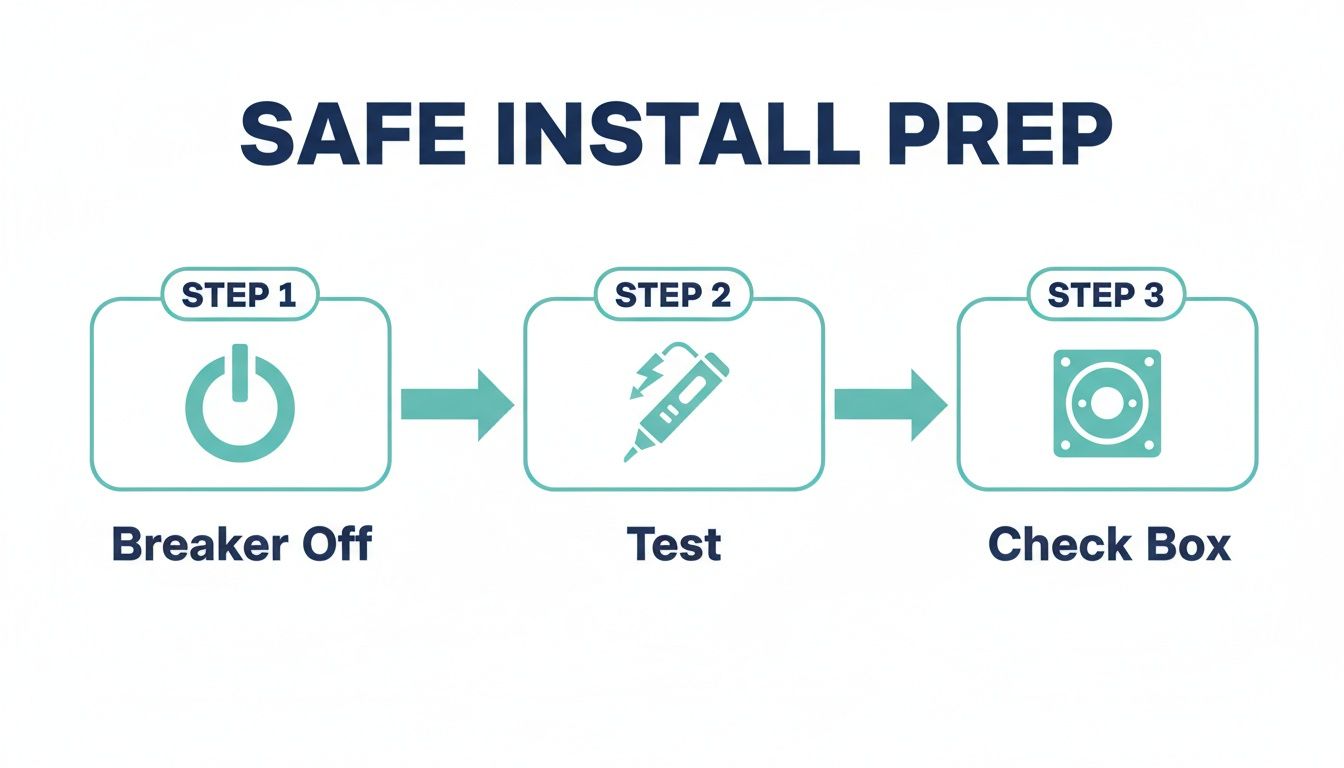
Okay, this is the most critical step, and there are no shortcuts. You absolutely have to kill the power to the circuit you're working on.
Head to your home's circuit breaker panel. Find the breaker that controls the room you're in and flip it to the "OFF" position. I always like to put a small piece of tape over it so a family member doesn't accidentally flip it back on while I'm in the middle of things.
Safety First: Once you've flipped the breaker, double-check your work. Go back to the room and try the wall switch for the old light or fan. If nothing happens, you're on the right track. But the real confirmation comes from your non-contact voltage tester. Touch its tip to the switch terminals and then carefully to each wire inside the ceiling box. Only when that tester stays silent and dark is it truly safe to get started.
Inspect Your Ceiling Box
Here's a step that a lot of people miss: checking the electrical box in your ceiling. Not all boxes are built the same. The one holding up that old, lightweight light fixture might not be strong enough to support the weight and constant motion of a ceiling fan.
Look inside the box for a stamp that says something like "Rated for Fan Support." If you don't see it, you must replace it with a proper fan-rated box. These are usually metal and bolt directly to a ceiling joist or a heavy-duty brace. Skipping this can lead to the fan falling down the road, and that's a disaster nobody wants. For a deeper dive into the whole process, our complete guide on how to install a ceiling fan can walk you through everything.
Installing and Wiring the Remote Receiver
Alright, this is where the magic really happens. The remote receiver is the brain of the operation, the little black box that turns your button presses into a cool breeze or a bright light. Nailing this part of the installation is what transforms a standard fan into a modern, remote-controlled fixture.
The first hurdle you'll probably run into is a bit of a space issue. That receiver needs to slide right into the fan's mounting bracket, sharing space with a whole mess of wires. It can be a tight squeeze, but trust me, a little patience now will save you a headache later.
Fitting the Receiver into the Mounting Bracket
Before you even think about connecting a single wire, do a quick "dry fit." Try sliding the receiver into its designated spot inside the mounting bracket. Most are designed to fit perfectly, but sometimes the antenna or the bundle of wires from the ceiling gets in the way.
Whatever you do, don't force it. If it doesn't slide in smoothly, pull it back out and take a second to organize those wires. I like to gently push them over to one side of the electrical box, clearing a path for the receiver. The goal is to get it sitting securely without being pinched, which could damage the unit or your wiring.
A classic rookie mistake is wiring everything up first and then trying to shove the whole tangled mess into the bracket. Position the receiver first, leaving the wires you need easy to grab. This keeps you from putting strain on your connections when you’re tucking everything away.
Connecting Wires from the Ceiling to the Receiver
With the receiver sitting pretty, it's time to connect it to the power source. You're essentially hooking up your home's wiring to the receiver's "input" side. On the receiver, you'll see a couple of wires clearly marked AC IN.
- Black to Black: Take the black (hot) wire coming down from your ceiling and connect it to the black "AC IN" wire on the receiver.
- White to White: Do the same with the white (neutral) wire from the ceiling, connecting it to the white "AC IN" wire on the receiver.
Use a wire nut for each connection. Twist the bare ends of the copper wires together (always clockwise!), then screw the wire nut on until it's snug. I always give each wire a gentle tug to make sure it's secure. A loose connection is the number one cause of flickering lights or a fan that won't turn on.
Before you even touch a wire, though, make sure you've gone through the proper safety checks.
This sequence is non-negotiable: kill the power at the breaker, test that it's actually off with a voltage tester, and confirm the ceiling box is solid enough to hold the fan.
Wiring the Receiver to the Fan and Light
Now for the final set of connections. You'll be wiring the "output" side of the receiver—usually labeled TO MOTOR—to the fan itself. This side typically has three wires: one for the fan motor, one for the light kit, and a shared neutral.
- Black to Black (Motor): Connect the receiver's black wire to the fan motor's black wire. This one controls the blades.
- Blue to Blue (Light): Connect the receiver's blue wire to the blue wire for the fan's light kit. This powers the light independently.
- White to White (Neutral): Connect the receiver's white wire to the white neutral wires from both the fan motor and the light kit. You'll probably be twisting three white wires together here.
Lastly, let's talk grounds. You should have a green or bare copper ground wire coming from the ceiling, the bracket, the fan, and the receiver. Gather all of them, twist them together securely, and cap them with a wire nut. This is a critical safety step, so never skip it.
If you’re interested in learning more about the fundamentals of home wiring, this electrical conduit installation guide is a great resource for building foundational knowledge.
Once every connection is solid, carefully tuck all the wires and wire nuts up into the ceiling box and canopy, making sure nothing gets pinched.
Following this methodical approach ensures that your ceiling fan with remote wiring diagram is executed perfectly, giving you independent control over your fan and light for years to come. For more tips and tricks, you can find a helpful overview on all things related to a remote control ceiling fan right here on our blog.
Solving Common Wiring Problems You Might Encounter
Even with a perfect wiring diagram in hand, real-world electrical work can throw you a curveball. Let’s be honest, the wires stuffed into your ceiling box rarely look as neat and tidy as the illustrations in the manual. This is where a little troubleshooting knowledge transforms a frustrating roadblock into a simple detour.
Think of this section as your field guide for the unexpected. We'll tackle the most common wiring hiccups you might face, from mystery wires to redundant old switches, giving you the confidence to handle whatever your home's unique setup throws at you.
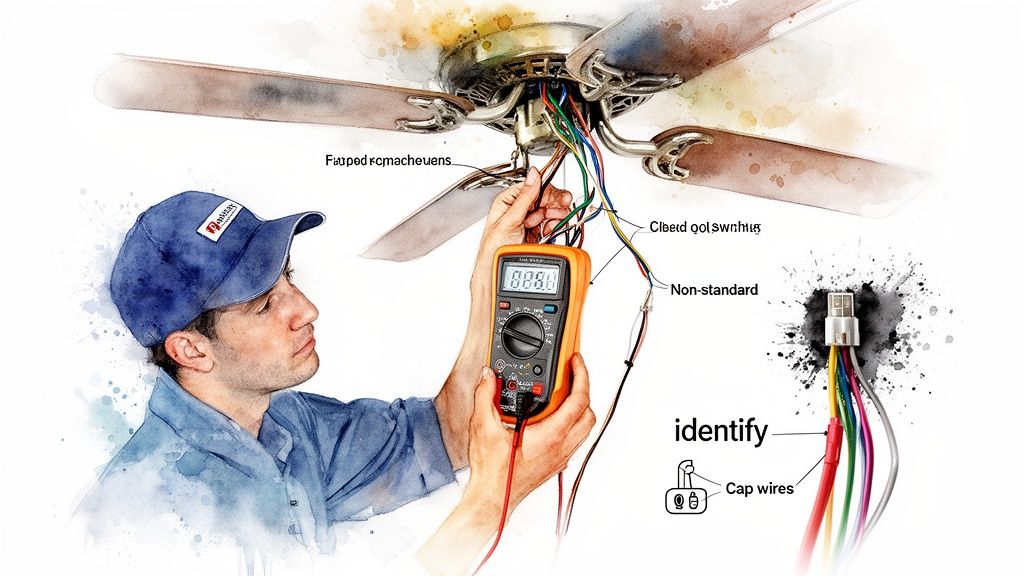
Dealing with Old or Non-Standard Wire Colors
You open the ceiling box and instead of the expected black, white, and green, you find a confusing mess of colors. This is classic, especially in older homes where wiring codes were a bit more... creative. Don't panic; this is a job for a multimeter.
A multimeter is your best friend for definitively identifying wires, no matter their color. By setting it to measure AC voltage, you can figure out which wire is which in just a minute.
- First, with the power ON at the breaker, carefully touch one probe of your multimeter to the bare copper ground wire (or the metal electrical box itself).
- Next, touch the other probe to one of the mystery wires. A reading of around 120V means you’ve found your hot wire.
- If you get a reading close to 0V, that's your neutral wire. Once you've identified them, kill the power at the breaker before you touch anything else.
Bypassing an Unnecessary Wall Switch
Your new fan is controlled by a remote, which makes the old wall switch pretty much obsolete. In fact, for the remote receiver to work, it needs a constant, uninterrupted supply of power. The last thing you want is for someone to accidentally flip the switch off, killing power to the fan.
The best solution is to bypass the switch entirely. With the power off, open up the switch box. You'll probably see two black wires connected to the switch terminals. Just disconnect them, join them together with a wire nut, and pop a blank faceplate over the opening. This locks the circuit in a permanent "ON" state.
Important Takeaway: The remote's receiver needs constant power to listen for signals. If the wall switch is off, the receiver is off, and your fan will seem completely dead. Bypassing the switch is the most reliable way to prevent this common headache.
Consolidating Two Switches into One Remote
What if your old fixture had separate switches—one for the fan motor and one for the light? Now that your remote handles both functions, you only need one of those switches to act as a master power source.
Your first step is to decide which switch you want to keep. The other one can be bypassed using the same method we just covered, ensuring a constant hot feed is sent up to the ceiling. At the ceiling box, you’ll connect that single hot wire to the remote receiver's input, and the receiver will take it from there.
Understanding how these parts work together is key. If you ever run into performance issues down the road, like sluggish fan speeds, it might be worth learning more about the role of a ceiling fan capacitor and how it functions.
Field data shows just how dominant remote setups have become. It's estimated that 85% of remote fan installations now use a receiver tucked into the canopy, wired directly at the ceiling. This approach, which really took off around 1995, actually helped slash electrician callback rates by 35% by simplifying the wiring and avoiding complex wall switch problems.
Don't Just Move Air, Make a Statement
So, you’ve wrestled with the wiring diagrams and now you’ve got the confidence to install a ceiling fan with a remote. Fantastic. Now comes the fun part: picking a fan that’s actually worth all that effort. Sure, a basic fan will move air, but a truly premium model can completely change the feel of a room.
A high-end fan isn’t just an appliance; it's a centerpiece. It's where powerful, quiet performance meets genuine style. Think of it less as a purchase and more as a long-term upgrade to your home's comfort and design.
Why Investing in Quality Makes a Difference
When you step up to a premium fan, you’re not just paying for a fancy name. You're getting better engineering and materials that you'll appreciate every single day. These aren't just bullet points on a box; they're real quality-of-life improvements.
- Whisper-Quiet DC Motors: Lots of top-tier fans run on DC (direct current) motors. They're way quieter and can be up to 70% more energy-efficient than old-school AC motors. That means no annoying hum in the bedroom and a real drop in your energy bill.
- Durable, High-End Materials: Forget the flimsy plastic blades that start to droop over time. We’re talking solid wood, aircraft-grade aluminum, and other tough materials that keep the fan balanced and wobble-free for years.
- Advanced Remote and Smart Features: A good remote is more than an on/off switch. Premium models let you dim the lights, reverse the blade direction for winter, and sometimes even connect to your smart home apps or voice assistants.
Spotlight on Style and Performance
For homeowners, designers, and contractors who want that perfect blend of looks and function, a few models really hit the mark. At Fan Connection, we look for fans that are more like statement pieces than simple hardware.
The Artemis IV from Minka-Aire, which often goes for around $550, is a great example of sleek, minimalist design. Its flowing blades give it a sculptural look that fits right into modern spaces. It's basically kinetic art that also happens to cool your room incredibly well.
If you’re after something a bit bolder, the Aviation fan by Minka-Aire (usually about $380) has an industrial vibe inspired by old airplane propellers. It moves a serious amount of air, making it perfect for big rooms with high ceilings, and proves you don’t have to sacrifice style for power.
Investing in a premium fan is like choosing high-quality furniture or lighting. It becomes an anchor piece that defines the entire room. It’s a decision that pays you back in comfort, style, and even home value down the road.
The Long-Term Value Proposition
Seeing a price tag over $300 might give you pause, but it’s an investment that proves its worth. Better construction means a much longer lifespan, and the money you save on electricity with an efficient DC motor can actually offset the higher initial cost over a few years. For designers and contractors, recommending a quality fan leads to happier clients and adds a touch of class to any project.
Now that you know how to wire a remote-controlled fan, the choice is yours. Why not pick one that adds as much beauty to your home as it does comfort? A premium fan is an upgrade you’ll see, feel, and enjoy every single day.
Common Questions About Wiring a Fan Remote
Even with a diagram in hand, wiring a remote-controlled fan can leave you scratching your head. It happens to everyone. Let's walk through some of the most common questions that pop up during installation so you can get your fan spinning without a hitch.
Can I Add a Remote to Any Ceiling Fan?
The short answer is yes, almost any standard pull-chain ceiling fan can be retrofitted with a universal remote control kit. These kits are great because they come with a receiver that you simply wire in between your ceiling's power source and the fan itself.
The biggest hurdle is almost always physical space. The remote's receiver needs to tuck neatly into the fan's canopy—that's the decorative cover sitting flush against the ceiling. Most modern fans have plenty of room, but some low-profile or "hugger" models are notoriously tight, making it a real squeeze to get everything to fit.
My Fan Works, But the Light Doesn’t. What Gives?
This is easily the most frequent post-installation headache, and thankfully, it's usually just a simple wiring mix-up. The problem almost always comes down to one little wire: the blue one.
Your remote receiver has a specific wire just for the light kit, which is typically blue. If the fan motor runs but the light stays off, it’s a tell-tale sign that the blue wire from your receiver isn't properly connected to the fan's own light wire (which is also usually blue, but sometimes black with a white stripe).
Troubleshooting Tip: Kill the power at the breaker, carefully lower the fan's canopy, and take a close look at that specific connection. A loose wire nut or a completely missed connection on the blue wire is the culprit 9 times out of 10.
Do I Still Need My Wall Switch?
Absolutely. You still need the wall switch to get power to the fan in the first place, but its role changes completely. After you install the remote, the wall switch must be left in the "ON" position all the time.
Think of it as the master power supply. If you flip that switch off, it cuts all power to the receiver, and your remote will be useless. To stop family or guests from accidentally turning it off, a lot of people just pop a simple plastic switch guard over it. Problem solved.
Why Is My Fan Wobbling So Much?
If your newly installed fan is shaking, don't blame the wiring—this is a mechanical issue. Fan wobble is almost always caused by an imbalance in the fan blades, but don't worry, it's an easy fix.
First, double-check that every blade is screwed on securely. If that doesn't stop the shaking, it's time to use the balancing kit that probably came with your fan. This kit has a small plastic clip and some adhesive weights. You'll attach the clip to one blade at a time to find the one causing the imbalance, then stick a small weight on top of that blade to even things out.
And if you've misplaced your remote or just need an upgrade, our guide on choosing a replacement fan remote control can point you in the right direction.


