


Installing ceiling fan brace: Expert Guide: Installing a Cei
You are probably standing under an old light fixture right now, holding a new ceiling fan box and thinking, “How hard can this be?”
The fan itself is the fun part. You picked the finish, the blade style, maybe the remote. You can already picture it running over the bed, the living room seating area, or that stuffy guest room that never seems to cool off. Then you pull down the old fixture and see what is there. A shallow box. Maybe a little flex. Maybe old hardware that looks like it belongs in another decade.
That’s the moment installing ceiling fan brace stops being optional and becomes the whole job.
A ceiling fan isn’t just a light with blades. It carries weight, and it moves. That movement creates vibration, and vibration exposes every weak point in the mounting. The good news is that the fix is straightforward when you choose the right support and install it carefully. The wrong move is trusting a standard box that was fine for a simple light fixture and hoping for the best.
That New Fan Feeling and The Old Fixture Problem
You buy a fan to fix a room that never feels comfortable. Then you drop the old light and find a ceiling box that twists when you touch it, brittle plaster around the opening, or hardware that was never meant to carry a spinning motor.
This is the starting point.
If you are still comparing sizes and styles, this ultimate guide to choosing the perfect ceiling fan for your home can help you match the fan to the room before you commit to the install.
Why the old box matters
A light fixture can hang for years on a box that would be a poor choice for a ceiling fan. The difference is not just weight. A fan adds constant motion, small vibration, and a repeated side load every time the blades spin. That detail is important because a mount that looks fine from below can start showing problems only after the fan has been running for a while.
I see this a lot in older homes. You remove the fixture and find a shallow box nailed to a joist for a light, or a box supported by hardware that was acceptable decades ago but gives you no confidence for a fan. In houses with old plaster, the ceiling opening can also hide cracking around the box, which makes the install more delicate from the first cut.
What a brace fixes
A proper ceiling fan brace gives the fan a stable structure to hang from. It supports the load, and it limits the little movements that turn into wobble, ticking, or a canopy that never sits tight to the ceiling.
That matters most in the situations homeowners usually do not plan for. No attic access means the support has to go in through the existing opening. Old plaster means you need a brace and box that fit without turning a small job into ceiling repair. If the hole lands between joists instead of directly under one, your hardware choice changes before you ever touch the wiring.
Those are the decisions that make the rest of the project go smoothly.
The part that causes trouble later
A fan can look perfectly installed on day one and still have a mounting problem behind the ceiling.
Usually the first clues show up after power is back on. The fan develops a small wobble at medium speed. The canopy shifts a bit when the motor starts. You hear a light clicking noise that sounds like a loose blade screw, but the underlying issue is movement at the box or brace. Homeowners often chase those symptoms at the fan itself and miss the support above it.
That is why I tell people to treat the old fixture location like a diagnosis, not a shortcut. Before you mount anything, you need to know what kind of ceiling you have, how the box is supported now, and whether that support makes sense for a moving load.
Choosing the Right Brace for Your Ceiling
Buying the brace first and figuring out the ceiling later is how a simple fan swap turns into a repair job.
The right choice depends on what is above the drywall or plaster, where the joists land, and whether you can reach the framing. Get that part right, and the install usually goes smoothly. Get it wrong, and you end up forcing a brace into a ceiling that does not want it, or chasing wobble that started with the support, not the fan.
If you want a quick visual on the common hardware options, this guide to ceiling fan mounting bracket types helps you sort out the basic categories before you buy.

Golden rule: Use a fan-rated box and brace. If the package does not clearly say it supports a ceiling fan, leave it on the shelf.
Quick decision table
| Ceiling situation | Best brace choice | Why it works |
|---|---|---|
| Finished ceiling, no attic access | Retrofit brace | Goes in through the existing opening and locks between joists |
| Open attic or new work | Joist-mounted brace or solid blocking | Gives you direct access for alignment and a cleaner install |
| Fan can mount directly to joist location | Fan-rated pancake box | Works well if the hole lands exactly where the framing already supports it |
| Fragile or older plaster ceiling | Retrofit brace with careful cutting | Limits ceiling damage when you cannot open up the area freely |
Retrofit braces for finished ceilings
For many homeowners, this is the right answer.
If the old light sits in the middle of a finished room and you have no attic access, a retrofit brace usually makes the most sense. It slips through the existing hole, spans between joists, and gives the fan a rated mounting point without cutting open a wide section of ceiling.
That convenience comes with a trade-off. Retrofit braces reward careful work and punish rushed work. If the opening is ragged, the box can sit crooked. If the brace is not tightened firmly against the framing, the fan may run fine on low speed and start wobbling at medium speed later. That kind of wobble gets blamed on blades all the time, but I often find movement at the box first.
What works well:
- Standard drywall ceilings with a centered light fixture
- Remodel jobs where you want to keep the existing fan location
- Rooms where patching and repainting would create more work than the fan install itself
What causes trouble:
- Ceiling holes that are too small or chewed up at the edge
- Unknown joist spacing
- Cheap box kits with flimsy screws or missing hardware. If you need replacement fasteners and fittings, get them before you’re on the ladder trying to make mismatched parts work
Joist-mounted braces for attic access or open framing
If you can reach the framing from above, use that advantage.
A joist-mounted brace or solid blocking gives you better visibility and more control over box placement. You can see the cable path, confirm the framing is sound, and set the box where the fan will hang straight. In a house with accessible attic space, this is often the cleanest and strongest setup.
It is not automatically easier. Some attics are cramped, full of insulation, or nearly impossible to move through safely. On paper, attic access sounds great. In practice, a finished-ceiling retrofit can be faster and less frustrating if the attic is miserable.
Pancake boxes for direct-to-joist mounting
A fan-rated pancake box works only in a specific situation. The fan location has to line up with a joist, and the box has to be rated for fan support.
That makes it a good choice in shallow ceiling cavities or spots where a standard box would interfere with framing. It is not the fix for a fan that belongs between joists. If the hole is off the joist, use a brace instead of trying to force a direct mount that was never meant for that location.
Special callout for old plaster ceilings
Old plaster changes the whole decision.
I slow down immediately in plaster houses because the ceiling can crack from vibration, prying, or one bad twist on the old box. A retrofit brace still works well in many of these rooms, but the goal is not just getting the new support in place. The goal is getting it in without turning a fan install into patch, texture, and paint.
Cut cleanly. Support the edge of the opening. Remove the old hardware in pieces if you need to.
Slow hands save ceilings.
Match the brace to the fan and the symptoms you want to avoid
Brace choice is not only about what fits the hole. It is also about what the fan will ask that mounting point to do every day.
A small bedroom fan gives you more margin for error than a large motor with longer blades. Heavier fans and higher-pitch blades put more stress on the box and every connection above the canopy. If you already know you are installing a larger statement fan, choose the brace like you are planning against future wobble, not just trying to hang the unit.
That mindset helps later when troubleshooting. If a new fan develops a shake, a clicking sound, or a canopy that shifts slightly on startup, revisit the support choice before you start swapping blades or balancing weights. Many post-install headaches start with a brace that was acceptable for a light fixture but wrong for a moving fan.
Gathering Your Tools and Prepping the Area
A good ceiling fan job looks easy when it’s done. That’s because the prep was handled before the first wire nut came off.
If you have to climb down the ladder three times to hunt for a voltage tester, a knockout connector, or the right nut driver, the install drags fast. Lay everything out first.

The tool pile you need
Set these out before you start:
- Non-contact voltage tester for confirming the power is off
- Stepladder tall enough that you’re working comfortably, not reaching
- Screwdrivers in both Phillips and flat-head
- Drill/driver with bits
- Wire strippers
- Needle-nose pliers
- Channel-lock or adjustable wrench
- Tape measure
- Utility knife
- Flashlight or headlamp
- Fan-rated brace and box kit
- Wire nuts sized for the conductors in the box
- Cable connector or insulated clamp where required
- A small container for screws and hardware
If you need replacement screws, connectors, or oddball mounting pieces, a good source for fasteners and fittings can save a frustrating mid-project run.
Prep the room before you touch the fixture
Do this first:
- Clear the floor area under the fixture.
- Move furniture or cover it.
- Set up the ladder squarely on a stable surface.
- Open the fan box and confirm all parts are there.
- Read the fan instructions before the old fixture comes down.
This basic install overview on how to install a ceiling fan is a useful refresher if you want the whole sequence in mind before you begin.
The safety step you don't skip
Turn off power at the breaker. Then verify with a tester.
Not the wall switch. The breaker.
That isn’t overcautious. It’s standard practice. Wires in older ceiling boxes can be poorly labeled, and switch legs can surprise you. Test before you handle conductors, and test again if anyone else is in the house and could’ve reset a breaker without telling you.
Shop-floor habit: I always verify dead power at the fixture itself, not just at the panel label. Labels lie more often than homeowners expect.
Deciding whether to DIY or call a pro
This is the point where honesty helps. Installing ceiling fan brace hardware is doable for a careful homeowner, but not every ceiling is a good first project.
Call for help if:
- The wiring is brittle or confusing
- The old box won’t budge without damaging the ceiling
- You find signs of previous bad electrical work
- The ceiling is unusually high or awkward
- The framing doesn’t match the brace you bought
Professional ceiling fan installation in the United States averages $44 per hour as of April 2026, with standard new installations typically costing $250 to $1,000, while replacement installations are often $100 to $300, according to TaskRabbit’s ceiling fan installation cost guide. That gap is one reason many homeowners tackle straightforward replacements themselves and hire out trickier jobs.
The Main Event Installing Your Ceiling Fan Brace
At this point, the project becomes real. The old fixture is down, the wires are exposed, and now we’re building the part that carries the fan.
Take your time here. A neat canopy and a fancy motor won’t make up for a weak mount.

Retrofit method without attic access
This is the most common scenario in finished rooms.
For a retrofit installation without attic access, the process involves inserting an expandable brace through the ceiling hole and rotating its shaft 5-6 full turns until its teeth firmly embed into the joists. The brace must be rated for at least 70 pounds to support modern ceiling fans, as standard junction boxes can fail under the dynamic load, according to this retrofit ceiling fan brace installation demonstration on YouTube.
Remove the old box cleanly
Start by taking down the existing fixture and disconnecting the wiring. Once the conductors are free, remove the old ceiling box.
Sometimes it unscrews. Sometimes it does not. If the old box is nailed to framing and won’t release cleanly, work it out carefully without enlarging the ceiling opening more than necessary.
For older ceilings:
- Support the box while loosening it so it doesn’t tear surrounding material.
- Avoid twisting against plaster edges.
- Keep the opening as round and tidy as possible so the new canopy covers it.
Check the cavity before inserting anything
Before the brace goes in, inspect the cavity with a flashlight.
You’re looking for:
- Joist direction
- Potential obstructions
- Cable path
- Whether the opening needs minor trimming
If the brace won’t sit square because a pipe or other obstruction is in the way, stop and reassess. Forcing a retrofit brace into a bad cavity is how installs turn into ceiling repairs.
Insert and expand the brace
Feed the expandable brace through the opening and turn it into position between the joists. Once centered, rotate the shaft to expand it until the ends bite firmly into the framing.
This isn’t a “snug enough” step. You should feel resistance build as the teeth engage. The brace needs to lock in solidly, not just sit there.
A few practical habits help:
- Center before final tightening so the box lands where you need it
- Watch the ceiling line to make sure the box will sit flush
- Don’t over-muscle the mechanism once the brace is firmly seated
Attach the fan-rated box
After the brace is tight, mount the fan-rated box to the brace hardware. Feed the cable through the proper knockout, not through a path that interferes with the bracket hardware later.
The box should sit flush with the finished ceiling. Not recessed. Not proud. Flush.
That one detail affects how well the mounting bracket sits, how the canopy fits, and whether the final install looks sharp or sloppy.
Top-down method with attic access
If you can get above the ceiling, this method gives you more control.
From the attic, locate the ceiling opening and the joists around it. You can then install blocking or a joist-mounted brace directly and fasten the fan-rated box in line with the finished ceiling below.
This method shines when:
- You’re repositioning the fan
- The old box location is wrong
- You want direct visual confirmation of framing and cable route
Position the support where it belongs
The best attic-access installs happen because the support is aligned before anything gets fastened. Check the opening from below if needed. This is not the step to eyeball.
If the fan is going into a room where appearance matters, and that’s most rooms, even a slightly off-center box becomes obvious once the blades start turning.
Build for the fan, not just for code minimum
A fan can be code-compliant and still feel underbuilt for the model you chose. That matters with large decorative fans.
A rock-solid foundation is essential, especially for a powerful and elegant statement fan like the Minka-Aire Artemis XL5. Its 90-inch sweep demands the kind of stable support that starts with proper brace installation. This is one of those cases where the hardware behind the drywall decides whether the finished fan feels premium or troublesome.
Keep the box flush and the cable protected
Bring the cable into the box cleanly. Leave enough conductor length to work comfortably later, but keep the route tidy and protected.
The fan box should be solid enough that when you tug lightly on it, nothing shifts. If you get movement now, you’ll get worse movement once the fan spins.
For readers who want another visual walkthrough, this complete guide on how to install a ceiling fan is a useful companion reference.
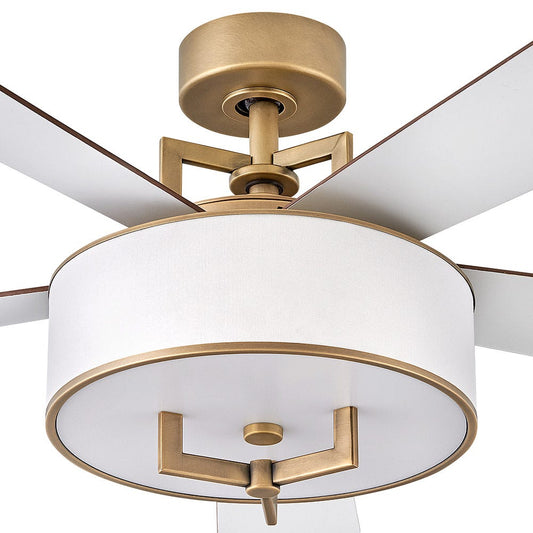
Here’s a visual break before we move on to mounting and wiring:
A final brace check before the fan goes up
Before you grab the mounting bracket, do three checks:
- Grab the box and test for movement
- Confirm the box edge is flush with the ceiling
- Make sure the cable enters cleanly without pinching
If those three are right, the rest of the install usually goes smoothly.
The brace install should feel uneventful when it’s correct. No flex, no shifting, no guessing.
Wiring the Box and Mounting Your New Fan
Now we get the payoff. The brace is in, the box is solid, and it’s time to wire and hang the fan.
Keep this part organized. Most wiring mistakes happen because people rush once the hard framing work is done.

Make the box connections neatly
For typical fan wiring, you’re usually matching:
- Black to black for power to the fan
- White to white for neutral
- Green or bare copper to ground
If your fan uses a remote receiver, follow the manufacturer’s diagram exactly. Don’t freeload on memory from the last fan you installed. Receiver wiring changes the sequence.
If you want a visual reference for remote setups, this ceiling fan wiring diagram with remote control can help clarify the layout.
Mount the bracket like it matters, because it does
The hanger bracket connects your new fan to the support system you just built. Tighten it fully and make sure it sits level against the box.
When installing the fan-rated box to a joist-mounted brace, it’s critical to torque the mounting nuts to 20-25 in-lbs and use insulated clamps on the NM cable. Home Depot installation guides report 98% compliance in professional installs, and CPSC data indicates that skipping the torque check leads to a 20% dropout risk over 5 years, according to Home Depot’s hanging a ceiling fan installation PDF.
That’s one of those details pros don’t skip.
Use the temporary hanging hook if your fan has one
Many modern fans include a hook or hanging slot on the bracket. Use it.
It frees both hands for wiring and keeps the motor from dangling awkwardly while you try to cap wires. If the fan doesn’t have one, a helper makes life much easier.
Finish with the canopy flush
Once the wiring is tucked safely into the box, raise the canopy and fasten it tight to the bracket. The goal is a snug, even fit against the ceiling.
If there’s a gap, don’t assume the trim ring will hide it. A gap means one of three things:
- The box isn’t flush
- The bracket is misaligned
- Wires are bunching behind the canopy
A smooth-running fan with multiple blades looks especially good when the install is tight and centered. If you like fuller blade designs, a model in a 6+ blade style tends to reward careful mounting because every visual detail is more noticeable once it’s up and spinning.
Troubleshooting Wobbles Noise and Other Annoyances
A lot of guides stop the moment the fan turns on. Then the post-installation challenges begin.
Most installation guides lack a diagnostic framework for post-installation issues. Wobbling can come from an unbalanced blade or loose mounting hardware, but many guides don’t separate those causes clearly, which leaves DIY homeowners and property managers guessing, as noted in VEVOR’s discussion of common mounting bracket guidance gaps.
Decoding the wobble
Not all wobble means the same thing.
If the entire fan body shifts at the ceiling, look up first. That points to mounting hardware, box fit, or brace movement. If the body looks stable but the blade tips rise and fall unevenly, you’re likely dealing with blade balance.
Check in this order:
- Tighten canopy and bracket hardware
- Confirm the downrod is fully seated
- Inspect blade screws
- Run the balancing kit if the mount is solid
If you need a blade-by-blade process, this guide on how to balance a ceiling fan is the right next step.
Don’t try to cure a structural wobble with balancing weights. Weights fix blade behavior, not loose mounting.
Chasing scraping or ticking sounds
A scraping sound means something physical is touching that shouldn’t be.
Look for:
- A wire rubbing inside the canopy
- A loose trim piece
- Blade clearance issues
- A bracket or cover installed slightly crooked
A ticking sound often comes from loose blade screws or hardware that only shifts at certain speeds. Run the fan on low, then medium, then high, and listen for when the sound changes. That helps narrow the culprit.
Humming and electrical gremlins
A low hum can be normal on some fans, but a louder electrical buzz needs attention.
Common causes include:
- Loose wire connections
- A dimmer switch controlling a fan that shouldn’t be on one
- Receiver placement crowding wires inside the canopy
If the fan works but acts oddly, shut the power back off and inspect the wiring layout. Don’t keep testing a noisy electrical setup just because the blades are spinning.
What a good final result looks like
A properly installed fan should do three simple things:
- Start smoothly
- Run without visible shake
- Stay quiet enough that you notice airflow, not hardware
If it doesn’t, treat the symptom like a clue instead of a mystery. Wobble, scrape, tick, and hum each point you toward a different fix.
If you’re ready to upgrade from “builder basic” to a fan that fits the room, Fan Connection is a solid place to browse design-forward ceiling fans by style, blade count, and room feel. Whether you’re after a bold statement piece, a clean modern profile, or a multi-room refresh, it’s easier to choose the right fan when the options are organized around how people really shop.


