











Installing Hunter Ceiling Fans: Your Easy DIY Guide
You’ve got the fan box open, hardware bags spread across the floor, and one question in your head: is this going to be a satisfying weekend upgrade or the kind of project that ends with three trips to the hardware store?
Installing hunter ceiling fans usually lands on the satisfying side if you slow down at the beginning. Most problems people blame on the fan start with the mount, the box, or the order of assembly. Get those right, and the rest feels straightforward.
I’ve seen the same pattern over and over. The quiet, solid installs come from homeowners and pros who treat the first half-hour like setup time, not wasted time. The noisy, crooked installs come from rushing straight to the wiring. Hunter fans are well thought out, but even a good fan won’t forgive a loose bracket or a bad box.
Preparation for a Perfect Hunter Fan Installation
Saturday morning goes a lot better when the fan is still in the box and you spend ten minutes checking the room before climbing the ladder. That small pause is what separates a clean, quiet install from the kind that hums, wobbles, or ends up hanging too low over the bed.
Start on the floor, not at the ceiling. Open every carton and lay the parts out on a blanket or a piece of cardboard so the finish does not get scratched. Confirm that you have the motor housing, mounting hardware, canopy, blades, light kit parts if your model includes them, remote pieces, and the manual. Hunter usually gives you a clear sequence, and following that sequence saves a lot of rework later.

Check the room before you touch a wire
A fan can be perfectly wired and still feel wrong in the room. Size, height, and placement decide whether it looks intentional and moves air the way you expect.
Before installing hunter ceiling fans, I check three things first:
- Blade clearance: Make sure the blade sweep will not crowd a wall, cabinet, beam, or tall headboard.
- Center point: Many ceiling boxes were placed for a light, not for airflow. A fan usually works better when it is centered for the room layout.
- Ceiling shape: Flat ceilings are straightforward. Low ceilings may call for a hugger style. Sloped ceilings need the right mounting setup from the start.
If you are still sorting out span, this guide on choosing the right ceiling fan size for maximum efficiency is worth a quick read before you commit to a model. It helps you avoid the common mistake of buying a fan that looks sharp online but feels oversized or undersized once it is up.
Gather tools once and keep them sorted
Good prep is mostly about cutting out preventable frustration.
Set out a sturdy ladder, screwdrivers, pliers, a voltage tester, and a drill if you may need pilot holes or support adjustments. Keep extra wire nuts nearby in case the old ones are brittle or mismatched. If you are comfortable doing basic electrical checks, a quick refresher on 120V outlet wiring can help you recognize household wiring conventions, but a ceiling fan circuit still needs to be verified carefully at the box before any connections are made.
Use a magnetic tray or small cups for hardware. Hunter fan screws are often close in size, and sorting them before you start keeps you from guessing on the ladder with one hand full of fasteners.
Confirm the support before you commit to the fan
This step decides whether the install stays quiet over time.
Pull down the old fixture canopy and inspect the electrical box and how it is attached above the ceiling. You are looking for a fan-rated box secured to framing or to a fan-rated brace, not a light-duty box meant for a basic fixture. Weight is only part of the issue. Fans also create ongoing movement, and a weak mount will show up later as noise, wobble, or a canopy that never sits quite right.
If the box looks questionable, stop and correct that first. Longer screws do not solve a bad support point.
Choose the mount style based on the room
Many first installs go wrong at this point. People pick the fan by finish or blade shape, then realize the room needed a different mounting method.
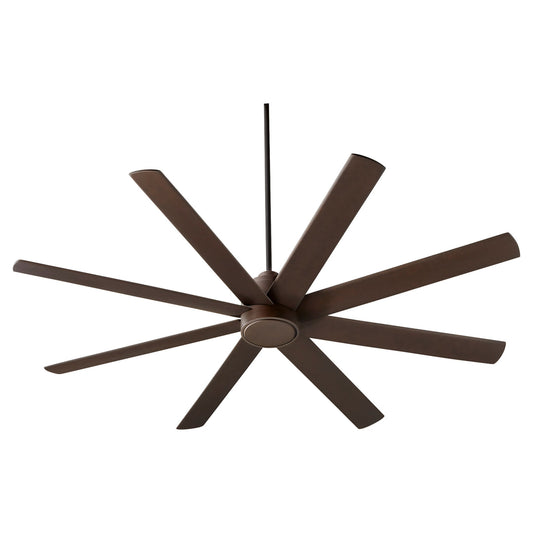
Flush mounts help in tight spaces where every inch matters. Downrods usually look better and move air better in rooms with more ceiling height because the blades sit in a better operating zone. On sloped ceilings, check compatibility before ordering accessories or opening hardware bags. Getting that decision right early makes the finished fan look deliberate instead of adapted.
Give the install enough breathing room
Hunter fans are friendly to install, but they still reward patience. Set aside enough time to work cleanly, especially if this is your first fan or if the room has a high ceiling, slope, or a separate light kit.
I always tell homeowners the same thing. The visible rooms deserve the extra twenty minutes. In a living room, entry, or primary bedroom, small details stand out. Blade alignment, downrod length, and a canopy that sits tight to the ceiling are what make the fan feel high-end.
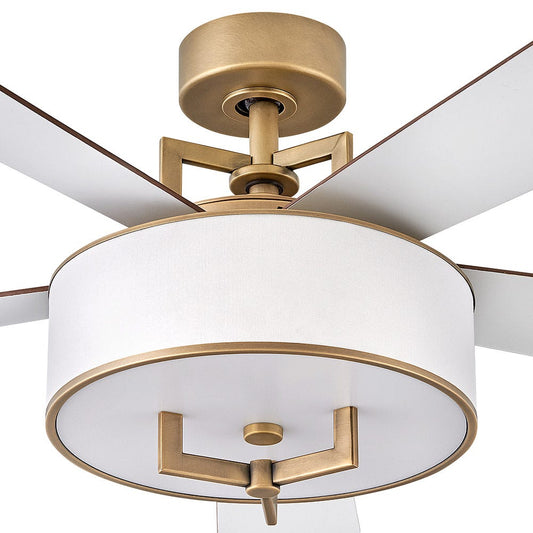
That is also why premium models from Fan Connection make sense in the right room. A well-chosen Hunter fan with a refined finish, clean blade profile, and the right control setup can look custom, but only if the prep work supports it. Do the planning now, and the rest of the job gets much easier.
Mounting the Bracket and Wiring It Right
A ceiling fan can look perfect from the floor and still tell on a rushed install the first night you turn it on. The usual signs are a light hum, a faint wobble, or a canopy that never sits quite tight. Nearly all of that starts at the bracket and in the box.

Start with a solid mounting point
Use a fan-rated junction box and make sure the bracket sits flat against the ceiling surface. If the old fixture left behind paint ridges, drywall dust, or bent hardware, clean that up first. A bracket that rocks even a little can telegraph movement through the whole fan.
I check this before the motor comes out of the box. Tighten the bracket screws evenly, then put a hand on the mount and try to move it. It should feel planted, with no twist and no flex.
If you want a quick primer on the hardware styles you may run into, this guide to ceiling fan mounting bracket types helps when you’re comparing a standard hanger setup with a low-profile mount.
Safety tip: Shut the circuit off at the breaker and confirm the wires are dead with a voltage tester before you touch anything in the ceiling box.
What a clean bracket install looks like
You can usually spot a good mount in about ten seconds:
- The bracket sits flush: No gap, no tilt, no crushed drywall behind it.
- The screws hold firmly: They should tighten with solid resistance, not spin in place.
- The hanger is aligned: The fan body should hang naturally while you wire, without pulling to one side.
That last point matters more than people expect. If the fan starts crooked at the hanger, you end up fighting the canopy, the downrod, and sometimes the balance later.
Make the wiring orderly
Fan wiring is straightforward once you identify each conductor by function. Match ground to ground, neutral to neutral, and hot to the correct hot lead based on your fan and control setup. If your wall switch controls both fan and light separately, the wiring may differ from a single-switch install, so stick with the model-specific manual.
For homeowners who want a plain-language refresher before opening the box, this article on 120V outlet wiring gives useful background on how household circuits are arranged. It does not replace the fan instructions, but it helps the wire colors and roles make more sense.
Make clean splices. Pre-twist stranded leads neatly if needed, cap them securely, then give each connection a light tug. Loose wire nut connections cause a surprising number of callbacks, especially when the symptom shows up as intermittent power, remote glitches, or a fan that hums but does not behave consistently.
Use the temporary hanging feature
Hunter fans are easier to wire when you use the temporary hanger built into the mounting system. Let the bracket carry the weight while you make your connections. That frees up both hands, reduces strain on the wires, and lowers the odds of scraping a fresh finish.
That convenience is part of why higher-end Hunter models from Fan Connection are worth a look in visible rooms. Pre-assembled details, cleaner canopy hardware, and better overall fit make it easier to get the polished result people want. The fan should run quiet, sit straight, and look like it belongs in the room instead of just occupying the ceiling.
Here’s a helpful visual walkthrough if you want to see the rhythm of the process before doing it yourself:
Neat wires make the canopy fit
Once the connections are done, fold the wires back into the box with some intention. I like to place the ground first, then neutrals, then hots, then the receiver if the fan uses one. That stacking order usually gives the canopy enough room to slide up cleanly.
Do not cram everything into one corner and force the canopy over it. Pinched insulation, a stressed receiver, or a bowed canopy can turn a clean install into a noisy one.
If the canopy won’t sit flat, open it back up and rearrange the wires. The screws should secure the canopy, not pull it into shape.
This part of installing hunter ceiling fans rewards patience. Get the bracket firm, keep the wiring neat, and the fan has a much better chance of running quiet and true from day one.
Assembling the Blades and Canopy
This is the point where the project starts looking good.
Once the motor is mounted and wired, the rest is mostly about alignment, patience, and not dropping tiny screws from the top of the ladder. The fan can go from “jobsite object” to finished fixture quickly here, and that’s exactly why people rush it. Don’t.
Attach blades with a loose-first approach
Hunter’s install guidance for specific models recommends attaching blades with three screws and washers per blade, and leaving them partially loose at first for alignment before final tightening (Hunter step-by-step installation guide). That’s one of the oldest contractor tricks in the book because it works.

If you tighten the first screw all the way on each blade bracket, the other holes can fight you. Leave every screw started and slightly loose, then snug them down once the blade and bracket are sitting naturally.
That does two things. It saves your hands from wrestling misaligned holes, and it gives every blade a more consistent starting position.
Watch for finish damage
Wood, painted, and composite blades all scratch differently.
Lay each blade on a soft surface before you lift it. Don’t stack blade irons directly on finished blade faces. If the fan has a premium finish, fingerprints and tool slips show up immediately under room lighting. For high-end fans, this stage demands extra care. A model in the $300-and-up category usually becomes part of the room’s visual centerpiece, not just an air mover. Tiny cosmetic mistakes are more noticeable on a fan you chose for style.
Install the light kit and trim pieces carefully
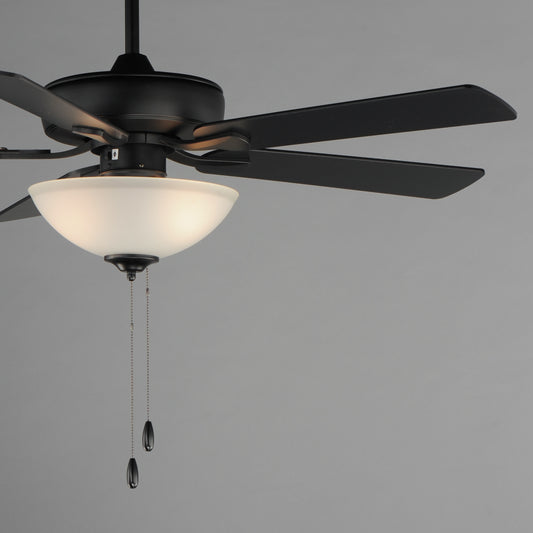
Some Hunter models use simple plug-style harnesses for the light kit, while others rely on a more conventional screw-on assembly. Either way, don’t force connections.
If the plug doesn’t seat easily, check orientation. If the glass or trim ring feels cross-threaded, back it off and start again. The final parts are often the most visible, and they’re also the easiest to crack, chip, or install crooked.
A few habits help:
- Support the part with one hand: Don’t let the wiring harness hold the weight of a light kit.
- Snug, don’t crank: Decorative screws and glass hardware do not need brute force.
- Match blade hardware carefully: One mixed-up screw can leave a blade sitting slightly off.
Finish with the canopy
The canopy is the part that hides your work, but it also reveals your standards.
Slide it up cleanly, align it properly, and fasten it without over-tightening. If the canopy binds or sits unevenly, something above it needs attention. Usually it’s a wire bundle that needs to be repositioned or a bracket screw that wasn’t seated correctly.
A clean canopy line is one of the easiest ways to tell whether a fan was installed carefully or merely “got put up.”
After the canopy is on, step off the ladder and sight the fan from across the room. This is when I look for crooked blade spacing, uneven blade pitch, and trim parts that seem slightly off-center. Problems are easier to spot from ten feet away than from twelve inches away.
If you do end up with a mild wobble later, don’t assume the blades are defective. A lot of balance issues are minor and fixable. This guide on how to balance a ceiling fan is a good follow-up once the fan is fully assembled and ready to test.
Pairing Controls and Perfecting the Balance
A fan is not finished when it spins. It’s finished when it runs smoothly, responds correctly, and disappears into the room without noise or shake.
Pair the controls before calling it done
Restore power at the breaker, then follow the fan’s instructions for pairing the remote or wall control. Do this methodically. Test the light, dimming if included, and each fan speed one at a time.
If the fan uses a receiver, pairing issues often come from setup order or switch position, not from a bad fan. Take the extra minute to read the control steps exactly as written.
For anyone sorting through control layouts before or after installation, this resource on a ceiling fan wiring diagram with remote control can help make the logic easier to follow.
Don’t accept wobble as normal
A properly installed fan should run with little to no visible wobble. “They all wobble a little” is something people say when they don’t want to go back up the ladder.
Most Hunter fans include a balancing kit with a clip and small weights. Use it. Clip one blade, test the fan, move the clip to another blade, and keep going until you find the blade position that reduces movement. Then place the weight where the instructions indicate.
Balance by observation, not guessing
Here’s the simple approach I use:
- Run the fan at a medium setting: That speed usually shows movement clearly.
- Watch the body and blade tips separately: A moving blade tip can point to balance. A moving motor housing can point to mount issues.
- Change one thing at a time: Don’t tighten screws, move weights, and reposition blades all in one round or you won’t know what fixed it.
If a fan still shakes after balancing, stop blaming the blades and inspect the bracket, box, and blade arm alignment.
A balanced fan feels different. The sound settles down, the light kit stops trembling, and the fan looks intentional instead of busy. That final tuning is what separates an acceptable install from one you’ll enjoy every day.
Troubleshooting Common Issues and When to Call an Electrician
Most post-install problems aren’t mysterious. They usually come from one skipped step, one loose fastener, or one wrong assumption.
Hunter-related install guidance notes that 70 to 80 percent of post-install humming complaints trace back to improper installation or skipping the neoprene noise isolators on the ceiling plate, and that HunterExpress models have a 95 percent DIY success rate in under 30 minutes because their pre-assembled bodies reduce common setup errors (CPO Hunter installation overview).
That matches what I see in the field. The fan itself is often fine. The install details are what need attention.
Hunter Fan Troubleshooting Guide
| Symptom | Likely Cause | DIY Solution / When to Call a Pro |
|---|---|---|
| Humming sound | Ceiling plate installed incorrectly, neoprene isolators skipped, loose screws, wire connections under tension | Turn power off, remove canopy, inspect the plate, isolators, and mounting screws. Re-seat wire bundles so the canopy is not pressing on them. Call a pro if the hum seems electrical rather than mechanical. |
| Wobble at medium or high speed | Blade imbalance, loose blade screws, bent blade arm, bracket not level | Tighten blade hardware, use the balancing kit, inspect each blade arm for alignment. Call a pro if the ceiling box or bracket seems unstable. |
| Fan won’t turn on | Breaker off, wall switch off, remote not paired, loose connection in box | Confirm breaker and switch position, replace remote batteries if needed, then inspect wiring only if you’re comfortable doing so safely. Call an electrician if the circuit behavior is inconsistent. |
| Light works but fan does not | Control setup issue, receiver connection problem, motor plug not fully seated | Re-check the control pairing sequence and internal plug connections according to the manual. Call a pro if the wiring setup includes multiple switches and you’re not certain how the circuit is configured. |
| Fan spins but scrapes or clicks | Blade interference, loose trim, misaligned light kit parts | Check for contact between blade brackets, screws, shades, and decorative parts. If the sound continues from inside the motor housing, stop and seek service help. |
| Canopy won’t sit flush | Crowded wires, receiver placement issue, bracket hardware sticking out | Lower the canopy, rearrange wires cleanly, and verify screw placement. If the bracket itself is crooked or the box is recessed oddly, a pro may need to correct the support. |
What usually works
The best troubleshooting is calm and boring.
Shut off power. Put the ladder back up. Check every fastener from the top down. A surprising number of “major” issues turn out to be one blade screw that never got fully snugged or one canopy screw pulling at the wrong angle.
Remote problems deserve a little patience too. People often assume the receiver failed when the issue is battery orientation, pairing sequence, or a wall switch that was turned off after setup.
What does not work
A few shortcuts almost always waste time:
- Ignoring a hum: Small noises tend to get louder, not better.
- Over-tightening decorative screws: That often creates rattles and warped trim instead of fixing them.
- Adding random weights to blades: Use the balancing kit methodically, not by instinct.
- Trusting a shaky box: If the support feels questionable, the problem is structural, not cosmetic.
Call an electrician if the box is not fan-rated, the wiring in the ceiling doesn’t match the fan’s instructions clearly, the breaker trips, or the fan support is attached to something you cannot verify as solid structure.
If you reach that point, don’t feel like the project failed. Knowing when to stop is part of good DIY judgment. If you need help choosing someone reliable, this guide on how to hire contractors is a practical starting point.
Beyond Installation Maximizing Your Fan's Style and Efficiency
You notice the difference a week after install. The room feels calmer, the fan disappears into the space the way a good fixture should, and the only time you hear it is when you want the air moving.
That part does not happen by accident. A Hunter fan can be dead quiet and look sharp for years, but only if you use it like a comfort tool and maintain it like a fixture you want to keep.
Use the fan to support the room, not just fill the ceiling
A ceiling fan helps the HVAC system by moving air where people live, sleep, and gather. In practice, that usually means you can stay comfortable without forcing the thermostat to do all the work.
Seasonal direction matters too. A lot of homeowners set the fan once and never touch it again. Switching direction based on the season is one of the easiest ways to get better comfort from the same fan, especially in bedrooms and larger living spaces where air tends to stratify.
Speed matters just as much as direction. Higher speed is not always better. In a bedroom, low or medium speed often feels better and sounds better. In a tall family room, a higher setting may make more sense during the hottest part of the day.
Keep it clean if you want it quiet
Dust changes more than appearance. It builds up on the blades, dulls the finish, and can contribute to extra noise over time.
I tell homeowners to wipe the blades, motor housing, and glass regularly with a soft cloth. Support each blade as you clean it so you are not twisting the blade arm. If a fan that ran smoothly at install starts sounding a little different months later, I check for dust buildup and slightly loosened screws before I assume there is a bigger problem.
A clean fan usually runs quieter and looks more expensive.
Match the fan to the room you have
The best-looking install is not always the biggest fan or the flashiest finish. It is the one that fits the room scale, ceiling height, furniture style, and sightlines.
That is where better product selection pays off. In a primary living area, a premium Hunter model with a more refined motor housing, blade finish, and integrated light kit tends to hold the room together better than an entry-level fan that only solves airflow. In a bedroom, the win is usually quieter operation, simple controls, and a light that does not feel harsh at night. On a covered patio, appearance still matters, but so does choosing a model rated for the environment.
If you are still sorting out size, finish, or placement, this guide on how to choose a ceiling fan for your room and style is a useful reference.
Spend more in the rooms people see every day
I usually suggest saving the best fan for the spaces that carry the most visual weight. The family room, kitchen sitting area, and primary bedroom are where upgraded finishes and cleaner design details earn their keep.
That is also where shoppers can see the value in higher-end options from Fan Connection. Their Hunter selections make it easier to compare statement finishes, blade shapes, and polished light-kit designs side by side, so you are not choosing from a spec sheet alone. You can picture the finished room before you buy, which helps prevent the common mistake of installing a fan that works fine but looks undersized or generic once it is up.
Installing hunter ceiling fans the right way pays off on day one and six months later. The fan runs smoothly, fits the room, and keeps doing its job without rattling, humming, or looking like an afterthought.
If you’re ready to upgrade to a premium Hunter fan or compare statement styles priced at $300 and up, browse the curated collections at Fan Connection. It’s a strong place to shop by blade count, room style, and standout models when you want a fan that performs well and looks like it belongs in the space.


