


How to Hang a Ceiling Fan with Light The Definitive DIY Guide
Thinking about hanging a new ceiling fan with a light? It might seem as simple as swapping out your old fixture, but a little prep work goes a long way. Trust me, taking a few minutes to check your ceiling's support and gather the right gear is the secret to getting a safe, wobble-free fan that looks like it was installed by a pro. This isn't just a home improvement project; it's an upgrade to your lifestyle, blending comfort, style, and a touch of DIY glory.
Your Essential Pre-Installation Checklist
Before you start unboxing that fan, let's get everything in order. This isn’t just about making the job easier; it's about making it safer. Getting your workspace ready and confirming a few key details will head off the most common headaches people run into. Think of this as the "measure twice, cut once" phase of your fan-tastic voyage.
Make Sure Your Electrical Box Is Fan-Rated
This is the most critical safety check of the entire project, and it's non-negotiable. The standard plastic electrical box that holds a simple light fixture just isn't built for the weight and constant motion of a ceiling fan. You absolutely need a box specifically rated for fan support.
- How to tell: Look for a stamp or UL listing right inside the box. It should clearly say something like "Acceptable for Fan Support" or list a weight rating, usually between 35 and 70 lbs.
- What if it's not? You have to replace it. No exceptions. You can either install a metal "pancake" box that mounts directly to a ceiling joist or use an expandable fan brace that wedges securely between two joists.
Skipping this step is asking for trouble down the road. It's the same principle pros follow for any overhead installation—careful preparation is everything. For more on that, you might find some useful tips in a guide to mounting speakers in ceiling, which covers similar foundational work.
Master the Power-Off Procedure
Working with live electricity is a real buzzkill—and not in a fun way. And no, just flipping the wall switch isn't enough. You need to cut the power at the source.
First, head to your home's main electrical panel and find the circuit breaker for the room you're working in. Flip it firmly to the "OFF" position. I always recommend putting a piece of tape over it so no one can accidentally switch it back on while you're working.
Next, and this is crucial, double-check your work. Grab a non-contact voltage tester and hold it up to the wires at the ceiling fixture. This little tool will give you 100% certainty that the power is off before your hands go anywhere near those wires.
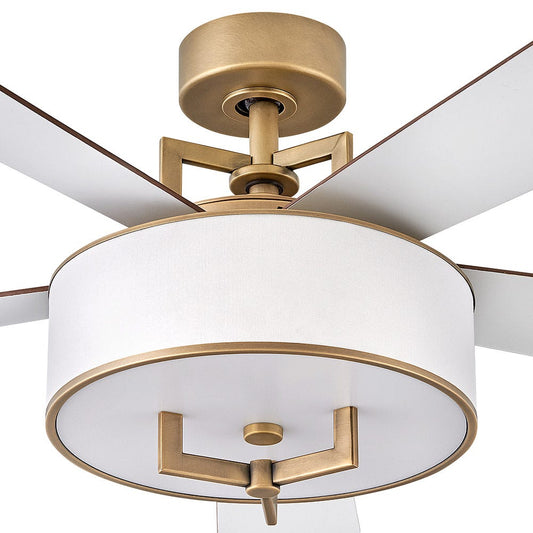
Choose the Right Fan for Your Space
The size of your room has a huge impact on what size fan you should get. If the fan is too small, it won't move enough air to make a difference. Too big, and you'll feel like you're in a wind tunnel. A beautiful statement fan like the Artemis IV Ceiling Fan ($799.95), for example, is ideal for a large living room, whereas a smaller bedroom would need a more compact model. Investing in a premium fan isn't just about looks; it's about performance and longevity that cheaper models can't match.
Key Takeaway: The golden rule for blade clearance is to maintain at least 18 inches from the blade tips to any wall and ensure the blades are 7 to 9 feet from the floor for ideal air circulation and safety.
This isn't just about comfort; it's about safety. Poor installations are a leading cause of avoidable injuries every year. With the global ceiling fan market growing, safe DIY practices are more important than ever. If you want to learn more about integrated lighting options, be sure to check out our guide on selecting a ceiling fan with a light kit.
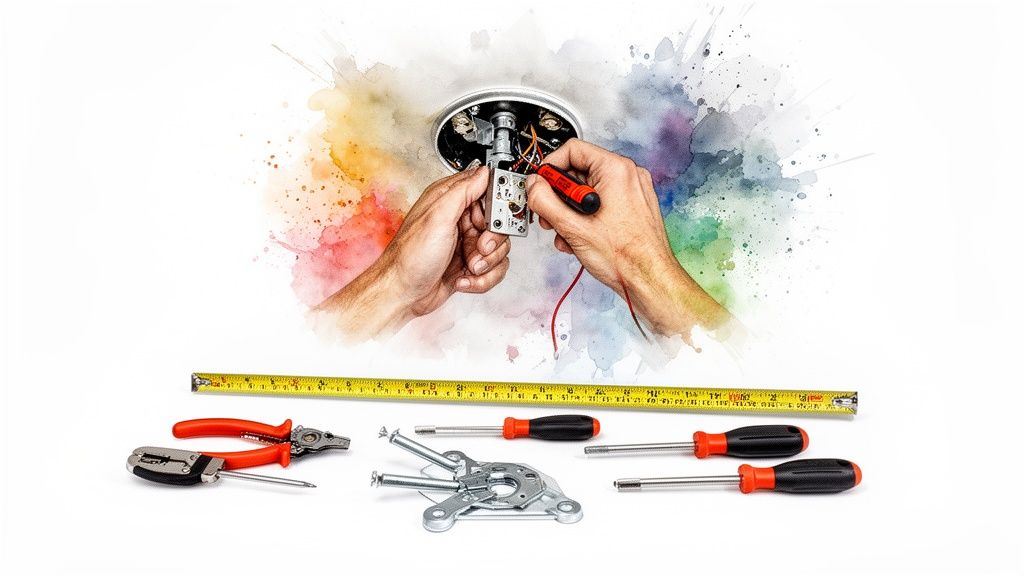
Alright, with your prep work done, it's time to get hands-on. This is where we say goodbye to the old light fixture and build a solid foundation for your new ceiling fan. Taking your time here is the secret to a secure, wobble-free fan that will run smoothly for years.
First things first, let's deal with that old fixture. After you've double-checked that the power is off with your voltage tester, carefully remove any glass shades or globes. Then, unscrew the canopy from the ceiling to get a look at the wiring and the old mounting bracket. Make sure you support the fixture’s weight with one hand so it doesn’t just dangle by the wires.
Once you can see the wiring, twist off the wire nuts and gently pull the wires apart. Now you can remove the old fixture and its mounting bracket completely, giving you a clean slate to work with.
Installing the New Mounting Bracket
Your new fan comes with a mounting bracket made specifically for it—it’s designed to handle the fan's weight and motor vibrations. Go ahead and attach this new bracket to your fan-rated electrical box using the screws that came with it.
Most brackets are built for standard flat ceilings. But if you're working with a sloped or angled ceiling, your kit might include a special angled mount. If not, you may need to pick one up separately.
Pro Tip: When you're tightening the screws for the mounting bracket, get them nice and snug, but don't go crazy. Over-tightening can strip the screw holes in the electrical box. The goal is a bracket that is completely solid with zero wiggle.
What to Do If There Is No Joist
Ideally, your electrical box is screwed right into a sturdy ceiling joist. But let's be real, that's not always the case, especially in older homes where the box might be floating between joists. If that’s what you're looking at, you absolutely must install a fan brace.
A fan brace is a metal bar that expands to fit between two joists, creating a super-strong anchor point for your fan. The process is pretty straightforward:
- Take out the old electrical box (the one that isn't rated for a fan).
- Slide the fan brace up through the hole in the ceiling and expand it until its ends dig firmly into the joists on both sides.
- Attach a new, fan-rated electrical box directly to the brace.
This is a non-negotiable safety step. The weight and constant motion of a ceiling fan can easily rip a standard box right out of the drywall, which is a serious hazard. If you want to get a better handle on the different options, you can learn more about ceiling fan mounting bracket types to figure out the best fit for your home.
Assembling the Fan on the Ground
Okay, time to shift your focus from the ceiling back down to the floor. It's so much easier (and safer!) to put the fan's main components together on a stable surface instead of fumbling with them up on a ladder. Start by carefully unpacking the motor housing.
Next, you’ll attach the downrod—that's the pipe connecting the motor to the bracket. You'll need to feed the fan's wires up through it. Here's a little trick I've learned: wrap a small piece of electrical tape around the ends of the wires to keep them bundled together as you push them through.
Once the wires are through, it’s time to secure the downrod to the motor. This usually means sliding a clevis pin through holes on the downrod and motor collar, then locking it in with a cotter pin. Pay close attention here: double-check that all the set screws on the motor collar are tightened securely against the downrod. This connection is the number one cause of wobbly fans, so making sure it's rock-solid now will save you a lot of headaches later.
With the motor assembled and the bracket firmly in place, you're ready for the next big step: wiring it all together.
A Clear Guide to Ceiling Fan Wiring
Let's be honest, wiring can feel like the final boss of a DIY project. But when it comes to hanging a ceiling fan with a light, it’s really just a simple color-matching game. Forget those intimidating diagrams for a moment. You're simply and safely connecting the power from your house to your new fan.
At its core, you're usually dealing with three main wires coming out of your ceiling:
- The Hot Wire (Black): This carries the electrical current from your wall switch to the fan.
- The Neutral Wire (White): This is what completes the circuit, returning the current back to the source.
- The Ground Wire (Green/Bare Copper): A critical safety feature that protects you from electrical shock.
Your new fan will have wires in the same colors, which makes the process pretty intuitive. It’s almost always a matter of connecting black to black, white to white, and green to green.
Before you get to the wiring, though, you have to handle the physical installation. The infographic below lays out the foundational steps you’ll take to get your fan ready for this stage.
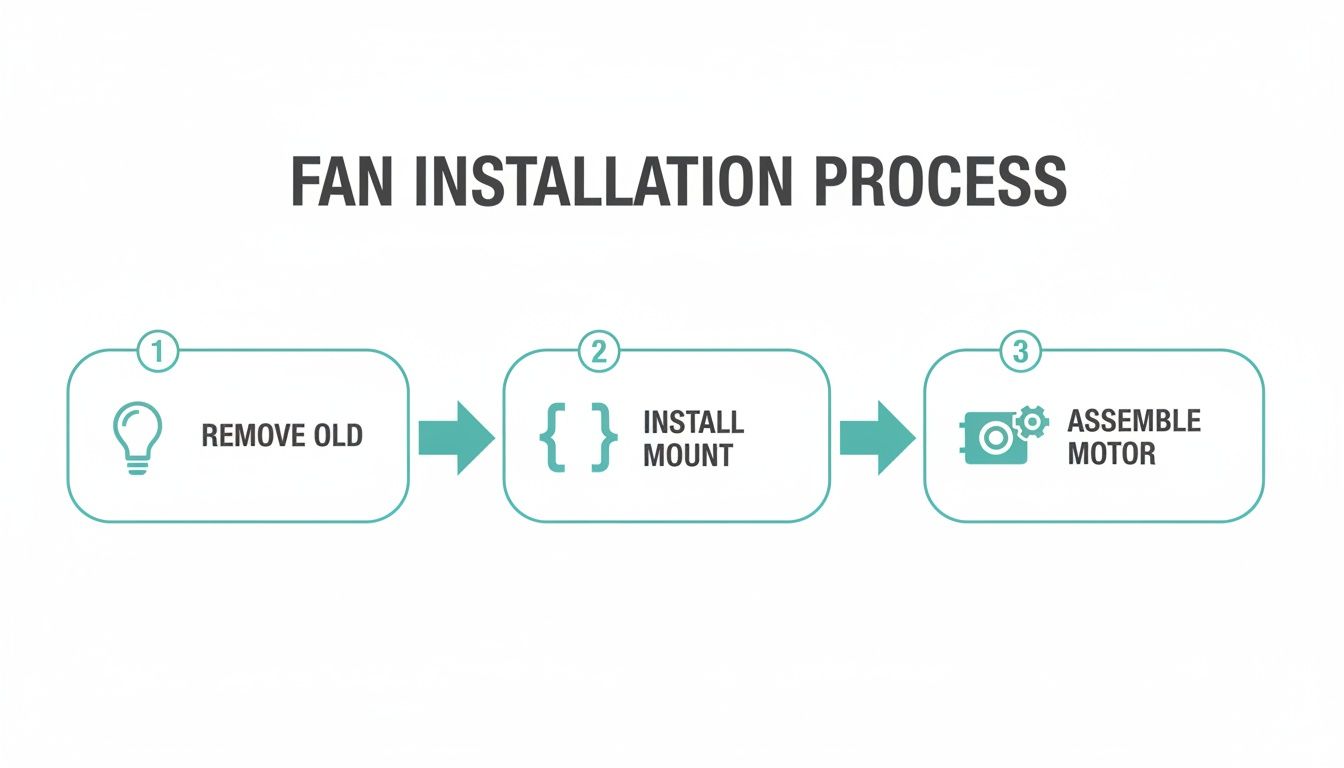
This just shows the essential prep work—taking down the old fixture, securing the new mounting bracket, and assembling the fan motor—that you need to complete before you even touch a wire nut.
Taming the Wires: Single Switch vs. Dual Switch
The most common setup you'll find is a single wall switch that controls both the fan and its light at the same time. For this, you’ll connect both the fan's black wire (for the motor) and its blue wire (which usually powers the light kit) to the single black "hot" wire coming from your ceiling. Simple and effective.
But what if you want independent control—one switch for the fan and a separate one for the light? That requires a little more. Your home needs a 3-conductor wire running from the wall switches to the ceiling. This special wire has an extra hot wire, which is typically red. In this scenario, you’ll connect the ceiling's black wire to the fan's black wire, and the ceiling's red wire to the fan's blue light wire.
Making a Secure Connection
Simply twisting wires together and hoping for the best is a major no-no. You absolutely must use the wire nuts included with your fan to create a safe connection that won’t vibrate loose over time.
- Hold the stripped ends of the wires you're connecting parallel to each other.
- Pop a wire nut over the tips and twist it clockwise.
- Keep twisting until it feels snug and no bare copper is exposed. Give each wire a gentle tug to make sure it's secure.
Crucial Tip: Never reuse old wire nuts. That little metal coil inside can wear out, leading to a weak or dangerous connection. Always use the fresh ones that come in the box.
Properly installing a ceiling fan with a light can seriously boost your home's energy efficiency. In fact, a well-hung fan can lower your reliance on air conditioning by up to 30-40% in moderate climates. This is especially true for high-efficiency models like the stunning Chateaux Ceiling Fan ($999.99), which blends powerful airflow with brilliant lighting. With the global ceiling fan market expected to hit USD 17.98 billion by 2034, it's clear these dual-function units are here to stay.
While this guide is here to empower the DIYer in you, don't hesitate to call in the pros for complex wiring or if you're just not sure about local codes. It's always better to be safe, so consider consulting qualified electricians to ensure everything is up to snuff.
And for those of you with a remote-controlled fan, the wiring involves a receiver unit that adds another layer. You can find detailed instructions for that specific setup in our helpful guide on ceiling fan wiring diagrams with a remote control.
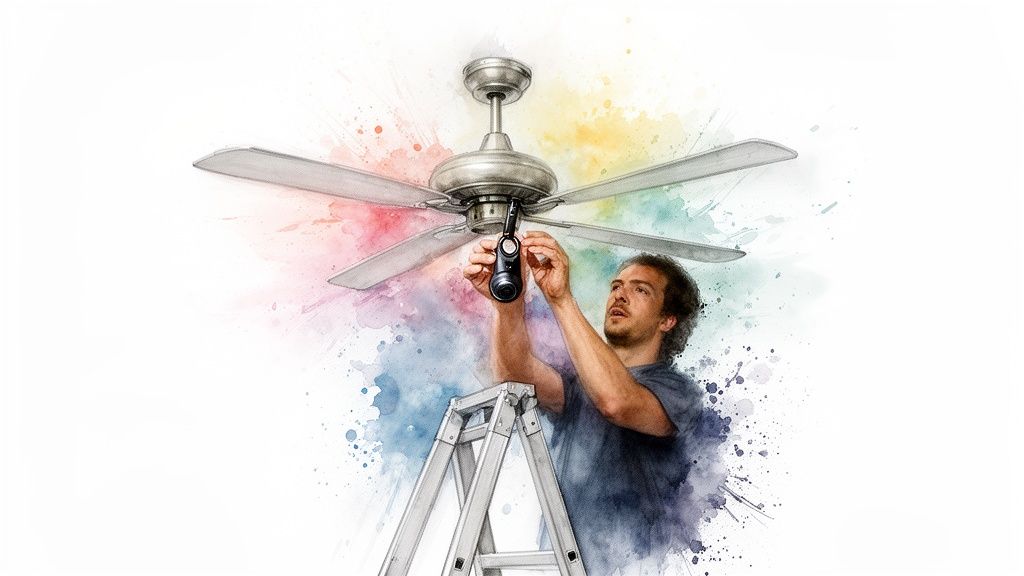
You’re on the home stretch now. With the fan motor securely in place and the wiring all buttoned up, it’s time for the fun part—making it actually look like a ceiling fan.
This is where you'll attach the fan blades and the light kit. It’s less about heavy lifting and more about paying attention to the small details.
Securing the Fan Blades for Perfect Balance
A wobbly fan is annoying, and the path to a smooth, silent spin starts right here with the blades. Most fans have you attach the blade arms (sometimes called blade irons) to the motor first, then fasten the blades to the arms.
Here's a pro tip: when you tighten the screws holding the blade arms to the motor, do it in a crisscross pattern, like you’re tightening the lug nuts on a car tire. This simple trick ensures the pressure is distributed evenly and prevents subtle warping that can throw the whole fan off balance.
When it comes to attaching the blades to the arms, it can be a little clumsy to hold the blade while trying to line up the screws. I always start all the screws by hand for one blade before I even think about grabbing a screwdriver. This guarantees everything is aligned perfectly and you won't accidentally strip a screw.
Expert Insight: It’s easy to overdo it with the screwdriver. You're aiming for a "snug fit," not a death grip. Over-tightening can crack the blade’s finish or even damage the motor housing. Just a firm, gentle twist is all you need.
With a high-end model like the gorgeous Chateaux Ceiling Fan ($999.99), you'll notice the difference. The parts are engineered with such precision that everything just fits together seamlessly. This not only makes the installation a breeze but also ensures a perfectly balanced fan from the get-go.
Connecting and Mounting the Light Kit
Blades are on? Great, let's get the lights on.
Most modern fans make this part incredibly simple. You’ll see a small wire harness—often a plastic "molex" plug—dangling from the bottom of the fan. The light kit will have the matching plug. It’s a simple click-together connection, blue wire to blue and white to white. It’s designed to be foolproof, so no need to wrestle with extra wire nuts here.
After you've clicked the wires together, carefully tuck them up into the switch housing. Next, line up the light fixture with the mounting plate on the motor and secure it with the screws that came with it. Just like with the blade arms, tighten these evenly so the fixture sits perfectly flush.
If you're curious about the different styles and connection types out there, we break it all down in our guide on choosing a light kit for a ceiling fan.
Now, all that's left is to screw in the light bulbs and attach the glass shades or globe.
Take a step back and admire what you've done. You've just conquered one of the trickiest parts of how to hang a ceiling fan with light. Now, let's move on to the final check: testing and balancing.
Testing and Balancing for Flawless Operation
This is the moment of truth. You’ve mounted the fan, wired it up, and attached the blades. Now it's time for the final, crucial step that separates a frustrating wobble from smooth, silent operation.
With your tools packed away, head back to your breaker box. Find the circuit you were working on and flip it back to the "ON" position. Your new fan now has power.
The Initial Function Test
Before we hunt down any wobbles, let's make sure everything works like it's supposed to. Using the remote, wall switch, or pull chains, give your fan a quick shakedown.
- Check the Light: Flip the light on and off. If you have a dimmer, run it through its full range to make sure it’s communicating properly with the bulbs.
- Test the Fan Speeds: Start the fan on its lowest setting and let it spin for a minute. Then, cycle through medium and high, listening for any weird grinding or humming sounds from the motor.
- Flip the Direction: Most fans have a reverse switch on the motor housing. Test it out to ensure you can switch between downdraft (summer) and updraft (winter) modes.
If everything powers up correctly, you're in the home stretch! The only thing left to tackle is the most common post-installation hiccup: a wobbly fan. Don't worry if you see a slight wobble—it’s extremely common and almost always an easy fix.
The Art of Balancing a Wobbly Fan
That little wobble might look alarming, but it's usually just a tiny weight imbalance between the blades. Your fan should have come with a small balancing kit, which typically includes a plastic clip and a few small adhesive weights. This little kit is your secret weapon.
Key Insight: Even a tiny imbalance—as little as a single gram—can cause a noticeable wobble when the fan is spinning at high speeds. The balancing kit is designed to counteract this with precision.
The process is methodical but simple. Start by clipping the plastic balancing clip onto the back edge of any blade, about halfway out from the motor. Turn the fan on high and watch the wobble.
Now, turn the fan off, wait for it to stop, and move the clip to the next blade. Do this for every single blade, one by one. You're on the hunt for the blade where the clip makes the wobble almost completely disappear. That's your problem blade!
Once you've found it, you can fine-tune the position. With the clip still on that blade, slide it in small increments along the edge—first closer to the motor, then further out—testing the fan each time. You'll find a sweet spot where the wobble is at its absolute minimum.
Finally, peel the backing off one of the adhesive weights and stick it to the top center of the blade, right in line with where you found that sweet spot with the clip. Remove the clip, fire up the fan, and enjoy your perfectly smooth, silent airflow. For an even more detailed walkthrough, you can find some great tips on how to balance a ceiling fan in our dedicated guide.
Even with a premium model like the sleek Artemis XL5 Ceiling Fan ($849.95), where precision engineering minimizes imbalances, a quick check is always a good idea. This final step is what guarantees your motor will last and gives you the peaceful, quiet room you were aiming for.
Common Installation Problems and Quick Fixes
Even the most careful installation can hit a snag. Before you get frustrated, check this table for some of the most common issues we see and how to fix them fast.
| Problem | Likely Cause | Solution |
|---|---|---|
| Fan doesn't turn on | No power to the fan. | Double-check that the breaker is on. Confirm all wire connections are secure with wire nuts. |
| Light works, but fan doesn't | A "blue wire" for the light is connected, but the "black wire" for the fan motor is loose. | Turn off power. Open the housing and ensure the black fan wire is securely connected to the house's black (hot) wire. |
| Fan makes a humming noise | Fan is connected to an incompatible dimmer switch. | Standard dimmers can damage fan motors. Replace it with a fan-rated speed control switch or a standard on/off switch if using a remote. |
| Wobble is still present after balancing | Blades are not seated correctly or screws are loose. | Turn off power. Check that all blade bracket screws are tightened evenly on the motor and that the blades are tight on the brackets. |
| Remote control isn't working | Battery is dead or the receiver dip switches don't match the remote. | Check/replace the battery. Ensure the dip switches inside the remote and the receiver unit in the fan canopy are set to the same pattern. |
Running through these quick checks can often solve the problem in minutes, getting your project back on track without needing to call in a pro.
Your Ceiling Fan Installation Questions Answered
Even with the best guide in hand, every project has its own little surprises. You're up on the ladder, screwdriver ready, and a question hits you that wasn't in the manual. Don't sweat it—that happens to the best of us.
We've put together some of the most common questions people ask when learning how to hang a ceiling fan with light. Think of this as your go-to for sorting out those last-minute details and getting the job done right.
What If My Ceiling Is Higher Than 9 Feet?
If you’re dealing with a soaring vaulted ceiling or just a room with some extra height, the standard downrod that came in the box isn't going to work. For the best airflow and safety, you want your fan blades to hang around 8 to 9 feet off the floor. This sweet spot ensures the air actually circulates through the room instead of just spinning uselessly near the ceiling.
To get it right, you'll need to buy a longer downrod. It's really important to get one made by your fan's manufacturer. This way, you know the finish will be a perfect match, and more critically, the threads and pre-drilled holes will line up for a secure, wobble-free fit. You might also need a wire extension kit to give the fan's electrical wires enough slack to reach the ceiling box safely.
Can I Install a Fan Where Only a Light Fixture Exists?
Yes, you can, but this is a big one. You must replace the existing electrical box. Seriously. That standard plastic or thin metal box holding up a lightweight fixture was never meant to handle the weight and constant vibration of a ceiling fan. Trying to hang a fan from it is a huge safety risk.
You need to switch it out for a UL-listed, fan-rated box. These are built tough, usually out of metal, and are designed to be mounted directly to a ceiling joist. If your ideal fan location falls between the joists, you'll need an expandable fan brace. It's a clever metal bar that expands to wedge tightly between two joists, giving you a rock-solid anchor for the new box. Skipping this is one of the top reasons for wobbly fans and dangerous installation failures.
My Fan Wobbles Even After Using the Balancing Kit. What Should I Do?
A wobbly fan, especially after you've gone through the whole balancing process, is enough to drive anyone crazy. But before you assume the fan is a dud, the fix is usually much simpler. More often than not, something is just a little loose.
First, kill the power at the breaker. Then, get back on your ladder and start methodically checking every single screw. Start from the top and work your way down:
- Are the screws holding the mounting bracket to the ceiling box as tight as they can be?
- Is the downrod ball properly seated in the bracket?
- Are the set screws on the motor collar cinched down firmly against the downrod?
- Is every single screw holding the blade arms to the motor snug?
Even one slightly loose connection can throw the whole thing off balance at high speeds. While you're up there, grab a tape measure and check the distance from the ceiling to the tip of each blade. If one is noticeably off, the blade arm might have gotten bent during installation and may need to be replaced.
How Do I Wire the Fan and Light to Two Separate Wall Switches?
Having separate wall switches for the fan and light is a great setup, but it all comes down to the wiring already in your walls. To pull this off, you need a 3-conductor wire running from your switch box to the ceiling. This cable has a black wire, a red wire, a white (neutral) wire, and a ground.
If you’re lucky enough to have that wiring, here’s how it connects:
- The black wire from the ceiling (from one switch) connects to the fan's black motor wire.
- The red wire from the ceiling (from the other switch) connects to the fan's blue light kit wire.
- All the white neutral wires get twisted together.
- All the ground wires get connected.
Heads Up: If you look in your ceiling box and only find one black wire, one white wire, and a ground, you have a 2-conductor wire. With that setup, you can't control the fan and light from two separate wall switches unless you run new wiring—and that's a job you should hand off to a qualified electrician.
Learning how to hang a ceiling fan with light is a satisfying project that adds real comfort and style to your home. If you take your time and pay attention to these key details, you’ll end up with a professional-looking installation you can be proud of for years.
Ready to find the perfect fan to complete your project? Explore the stunning, high-performance collections at Fan Connection and discover a model that matches your style and needs. From the sleek, modern lines of the Aviation fan to the bold statement of the Andros, your ideal fan is just a click away. Visit our full catalog today to get started


