


How to Install a Ceiling Fan Light: Your Fun Guide to a Flawless DIY in 3 Steps
Let's get this right from the start: putting up a new ceiling fan light isn't just about connecting a few wires and calling it a day. It’s a project where a little prep work goes a long, long way. Think of it as your mission briefing before the main event! Getting these first steps right is the secret to a smooth, safe installation that you’ll be proud of—and one that won't give you a headache later.
Your Pre-Installation Checklist for a Flawless Setup
Before you even touch a screwdriver, let’s run through the essentials. This is your pre-flight check, the part that separates the DIY heroes from the folks who end up with a wobbly fan and a box of leftover screws. It’s the difference between a frustrating afternoon of mistakes and a successful project that adds real value to your home.
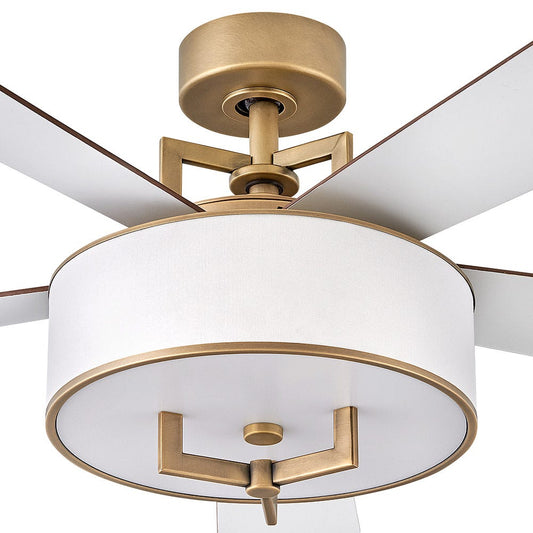
With stunning, high-end fixtures like the Fan Connection Aerovon now on the market for over $400, a perfect installation isn't just about safety—it's about protecting your investment and making that beautiful new fixture shine. For a great high-level look at the whole process, this homeowner's guide to ceiling fan and light installation is a fantastic resource to check out before you begin.
The Unseen Hero: Your Fan-Rated Electrical Box
Your first and most important check happens inside the ceiling. Here's a critical fact many people overlook: not all electrical boxes are built the same. The standard plastic or metal box designed for a simple light fixture just won't cut it for the demands of a ceiling fan. It's like asking a bicycle to do a monster truck's job.
- Weight Support: A fan can weigh 35 pounds or more. The constant motion of the spinning blades adds dynamic force that a standard box simply can’t handle.
- Safety First: Hanging a fan from a non-rated box is a serious hazard. Over time, the vibrations can cause it to work loose and fall. It's a risk you absolutely can't afford to take.
So, how do you know if your box is up to the task? Look inside it for a stamp or label that explicitly says "Acceptable for Fan Support" or something similar. If you don't see that, you must replace it with a proper fan-rated box. This isn't a suggestion—it’s non-negotiable for a safe installation.
Power Down for Safety
This is the golden rule of any electrical work: kill the power. Don’t just flip a switch. Go straight to your breaker box and shut off the circuit for the room you're working in. It’s your “do not disturb” sign for electricity.
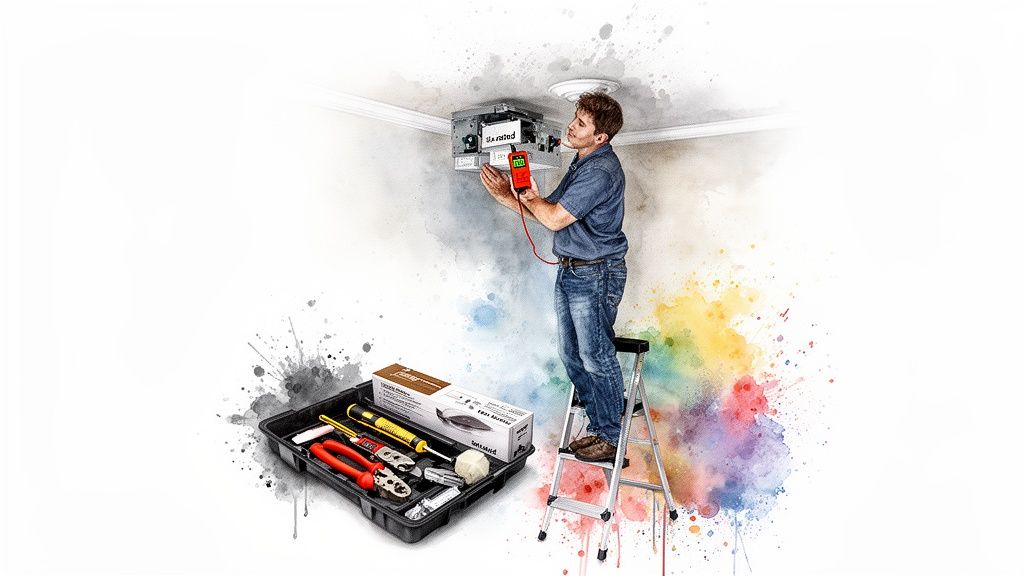
Pro Tip: Never trust the labels on your breaker panel. They can be wrong. After you flip the breaker, grab a non-contact voltage tester and double-check. Touch the tip of the tester to the existing fixture's switch and then to the wires in the ceiling box to be absolutely certain the power is off. This step takes five seconds and completely eliminates any dangerous guesswork.
Gather Your Tools and Unbox Your Fan
There’s nothing worse than being perched on a ladder only to realize you’re missing a specific screwdriver. Get your gear together before you start. Once you're set up, carefully unbox your new fan, laying all the parts out on a soft blanket or rug to avoid any scratches. It's like Christmas morning, but with more instructions.
Before you go any further, grab the manual and check the parts list against what's in the box. Make sure everything is there and nothing is damaged. Pay close attention to any glass shades or delicate components.
The fan's size is also a big deal. If you haven't already, take a look at our guide on how to choose a ceiling fan size to make sure your fan is a good fit for the room. A quick inventory check now will save you a massive headache later.
To make things even easier, here's a handy checklist of everything you'll likely need.
Essential Tools and Materials Checklist
Gather these items before you start to ensure a smooth and efficient installation process.
| Item | Purpose | Pro Tip |
|---|---|---|
| Screwdrivers | Phillips and flat-head for various screws. | A multi-bit screwdriver saves time swapping tools. |
| Pliers | For twisting wires and tightening nuts. | Needle-nose pliers are great for tight spaces. |
| Wire Strippers/Cutters | To strip insulation and cut wires to length. | A combination tool is perfect for DIYers. |
| Non-Contact Voltage Tester | To confirm the power is off. | The most important safety tool you'll own. Don't skip it. |
| Ladder | To safely reach the ceiling. | Choose a sturdy stepladder of the appropriate height. |
| Electrical Tape | To secure wire nut connections. | Wrap it clockwise, the same direction you twisted the nut. |
| Wire Nuts | To connect the fan wires to the house wiring. | Your new fan should include the correct sizes. |
| Fan-Rated Outlet Box | If you need to replace a non-rated box. | Match it to your joist setup (saddle, pancake, etc.). |
Having all these items within arm's reach will keep you in the zone and make the entire process feel a whole lot more professional.
Putting the Fan Together and Prepping for Wiring
With the power off and your prep work complete, it's time for the best part: actually building your new fan. Here's a pro tip that'll save your shoulders and a lot of frustration: assemble as much as you can on the floor before you climb the ladder. Fumbling with tiny screws and a heavy motor overhead is no fun for anyone.
This is where you build the foundation for a quiet, stable fan. Taking your time now is the secret to preventing annoying wobbles and humming sounds later on. It’s a simple truth of home improvement everywhere, from here in the US to the Asia Pacific region—which, believe it or not, is the biggest market for ceiling fans globally. That massive demand is all thanks to a need for energy-efficient cooling in new homes.
Attaching the Blades and Downrod
First things first, let's get those blades ready. Most fans have you attach each blade to a blade iron (that’s the metal bracket) before connecting the whole assembly to the motor. To avoid scratching anything, lay the motor on its side on a soft surface, like an old blanket or a piece of cardboard.
- Line Up the Holes: Just match the holes on the blade with the ones on the blade iron.
- Get 'em Snug: Pop the screws in and tighten them down until they're firm. You don't need to crank on them—that can strip the threads or crack the finish—but make sure there’s zero wiggle.
- Repeat: Do this for all the blades, and you'll have a neat stack ready to go.
With the blades prepped, grab the downrod. This is the pipe that connects the motor to the ceiling mount and determines how high or low your fan hangs. Carefully thread the fan's wires—usually a black, white, blue, and green one—up through the downrod. Then, secure the downrod to the motor collar using the included pin and setscrew. Give it a good tug to make sure it's completely tight.
Making Sense of the Wires in Your Ceiling
Set the fan body aside for a moment and turn your attention back to the ceiling. Those wires poking out of the electrical box are what will bring your fan to life, so it's critical to know what's what.
You'll almost always find three wires coming from your ceiling: one black, one white, and one bare copper or green wire. Think of them as the traffic lights for your electricity. Connecting them correctly is the key to making sure everything runs safely and smoothly.
Here’s a quick breakdown of what each color does:
- Black Wire (The "Hot"): This is the live wire. It carries the power from your wall switch to the fan.
- White Wire (The "Neutral"): This one completes the circuit, sending the current back to the breaker panel.
- Green/Bare Copper Wire (The "Ground"): This is your most important safety feature. If there’s ever a short circuit, this wire gives the electricity a safe path to the ground, preventing dangerous shocks.
When it's time to connect everything, a good set of electrical wire terminals can make your life a whole lot easier and ensure the connections are solid for years to come.
Once you’ve got the fan assembled and you know which wire is which, you're just about ready to hang it. If your fan has a remote control, the wiring will have an extra step or two. For that, you’ll want to check out our detailed guide on the topic, where we break down a complete ceiling fan wiring diagram with remote control. This is the final step before you lift the fan into place and make the final connections.
Mounting the Bracket and Connecting the Wires
Alright, this is where the action moves from the floor to the ceiling. All that prep work is about to pay off, starting with getting the mounting bracket securely in place. Think of this little piece of metal as the anchor for your entire fan—get this right, and you're setting yourself up for a safe, wobble-free installation.
Once the bracket is solid, it's time for the part that can feel a bit intimidating: the wiring. Don't sweat it. We're going to break it down so that tangle of colored wires makes perfect sense. By the end, you'll feel confident wiring up any fan, even high-end models with fancy integrated lights.
Securing the Mounting Bracket
The mounting bracket is the unsung hero of this whole operation. It’s a simple part, but it’s responsible for holding the entire weight of your fan, which can easily be 35 pounds or more. This is non-negotiable: it must be attached to a fan-rated electrical box that is anchored firmly to a ceiling joist.
First, gently feed the house wires from your ceiling box through the opening in the middle of the bracket. Line up the screw holes on the bracket with the ones on your electrical box. Now, using the screws that came with the fan box—not the fan—tighten the bracket down until it's perfectly flush with the ceiling.
Pro Tip: Before you move on, give that bracket a good, firm tug. It should have zero movement. If you feel any wiggle or shift, stop right there. The screws might be loose, or worse, the box itself isn't secure. Don't even think about hanging the fan until that bracket is rock-solid.
The Art of Connecting Wires
With the bracket in place, you can finally start connecting the electrics. This is where you'll lift the fan motor assembly up to the ceiling. Many modern fans, including several Fan Connection models, have a genius feature: a small hook on the bracket that lets you hang the motor. This frees up both your hands for wiring. If your fan has this, use it! It makes the job ten times easier and safer.
You're simply connecting the wires from your ceiling to the corresponding wires on the fan motor. The goal is to match the colors. You’ll use the little plastic caps, called wire nuts, to make sure those connections are snug and secure.
Here’s a quick visual of how the main fan parts come together before you get to the wiring part.
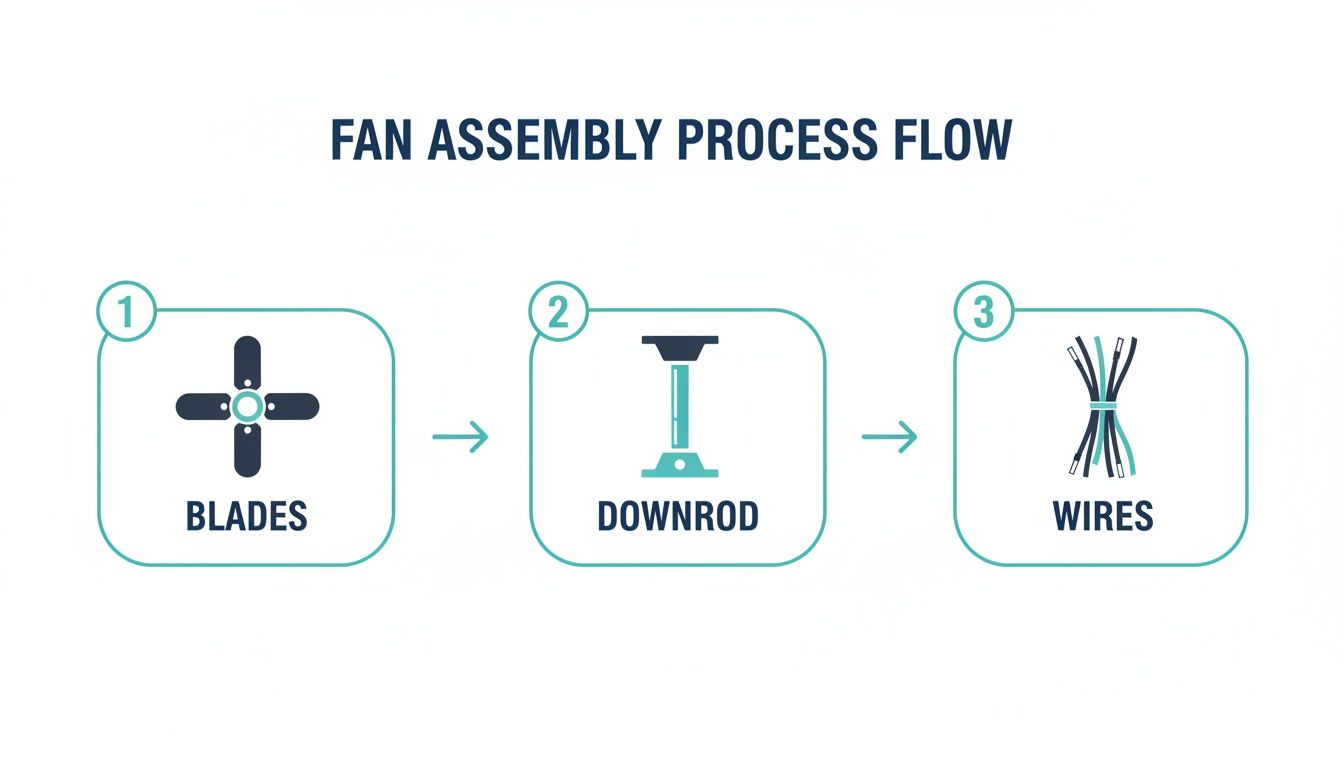
This diagram shows the core steps—attaching the blades, fitting the downrod, and getting the wires ready—that pave the way for a smooth installation up at the ceiling.
For most standard setups, the wiring combinations are straightforward:
- Ground to Ground: Twist the bare copper or green wire from the ceiling with the green wires from the fan's downrod and mounting bracket.
- Neutral to Neutral: Connect the white wire from the ceiling to the white wire from the fan.
- Hot to Hot (and Light): This is where you might see a slight difference. Connect the black wire from the ceiling to both the black wire (for the fan motor) and the blue wire (for the light). When you twist all three together, a single wall switch will power both the fan and the light.
After twisting the wires, screw a wire nut on clockwise until it’s tight. Give each connection a gentle tug to make sure no wires come loose. For a little extra peace of mind, wrap each connection with electrical tape.
A Closer Look at the Fan Connection Artiste
Let's use a real-world example like the Fan Connection Artiste. This is a premium fixture that retails for over $350 and comes with a beautiful integrated LED light. The wiring principles are identical, but that blue wire is especially important for its advanced lighting features.
When installing a model like the Artiste, you'll connect that blue wire along with the black "hot" wire to ensure the light gets power. This is the perfect setup for rooms where one switch controls everything. If you have separate wall switches—one for the fan, one for the light—the wiring gets a bit more involved, but we'll tackle that in a more advanced guide. For a deeper dive into different bracket styles, you can learn more about ceiling fan mounting bracket types here.
Once every wire is connected, carefully tuck them all up into the electrical box. Be mindful not to pinch or cram them in. This clears the way for the canopy, which will slide right up to the ceiling and hide all your handiwork for a clean, professional finish.
Hanging the Fan and Attaching the Light Kit

Alright, the bracket is rock-solid and your wiring is prepped. Now for the fun part—getting the fan up on the ceiling where it belongs. This is where the project really starts to take shape. We'll get the motor assembly hung first, then bring it to life with the light kit.
And don't worry, you won't have to juggle a heavy motor while fumbling with wires. Most modern fans have a clever design that makes this step surprisingly manageable. This is also where you'll start to appreciate investing in a quality fixture.
Getting the Fan Motor in Place
First thing's first: safely carry the assembled fan motor up the ladder. Take a look at your mounting bracket—you should see a small hook or a J-shaped slot on one side. The top of your fan’s downrod assembly has a ball joint with a groove that’s made to fit right into it.
Just lift the fan and slide that ball joint into the bracket's slot. The fan will now hang securely all on its own, freeing up both of your hands. It’s a simple feature, but it's a game-changer, turning what could be a clumsy, dangerous step into a controlled and straightforward task.
With the fan hanging securely, you can make the final wire connections you planned out earlier. Match the colors, give them a good twist, and cap them off with wire nuts. Once everything is connected, gently tuck the wiring up into the electrical box to make room for the canopy.
Installing the Canopy
The canopy is that decorative cover that hides all the business—the mounting bracket, the wiring, the ugly stuff—and gives your fan a clean, professional finish. Slide it up the downrod until it’s perfectly flush against the ceiling.
Most canopies attach to the mounting bracket with just two or three small screws. You’ll just need to line up the screw holes on the canopy with the holes on the bracket and tighten them down. Make sure it's snug against the ceiling with no gaps.
This is more than just about looks; a secure canopy is crucial for the fan's stability. I've seen it countless times—a loose canopy is often the culprit behind mysterious rattling or humming noises down the road. Give it a wiggle and make sure it’s completely firm before you move on.
Attaching and Wiring the Light Kit
Now for the grand finale: the light kit. This is what transforms your fan from a simple air-mover into a stylish, dual-purpose fixture. It’s no surprise the global ceiling fan market was valued at a whopping USD 11.23 billion in 2023—a huge part of that is the demand for integrated fan and light combos. The sheer size of this market shows just how many people are installing these exact types of fixtures. You can dive deeper into the ceiling fan market on fortunebusinessinsights.com.
Whether you have a separate light kit or one that’s built-in, the process is pretty much the same.
- Find the Wires: From the fan's switch housing, you'll see the light kit's wiring dangling—usually a blue wire for power and a white neutral wire.
- Connect Them: Use wire nuts to connect the wires by color: blue to blue and white to white. Often, this is even easier, with a simple plug-in molex connector that just clicks together.
- Secure the Kit: Attach the light kit to the fan's switch housing with the screws that came with it. Make sure it's seated properly and tightened evenly to avoid any wobble or gaps.
This is where premium models, like the Fan Connection Chateaux or the sleek Bowie, really show their quality. These fans often feature unique, architecturally designed lighting elements. While the installation principles are the same, they require a careful touch to ensure every detail is perfectly aligned. When you're spending over $300 on a fan, you want it to look perfect.
Once the light kit is secure, you can install the glass shades and light bulbs. If you're still exploring options or want a better sense of what's out there, be sure to check out our complete guide to choosing a light kit for your ceiling fan. With the lights in place, you’re just one step away from finishing the job.
Final Adjustments and Troubleshooting Common Problems
Alright, the fan is up, the light is installed, and you’re in the home stretch. Before you grab a cold one and call it a day, let’s run through the final checks to make sure everything is working perfectly. This is the fine-tuning stage where we catch any little quirks and get your fan ready for years of reliable use.
First things first, head back to your circuit breaker and flip the power back on. Now for the moment of truth.
Using the remote, wall switch, or pull chains, give your new fan a full test drive. Don't just turn it on and off; go through every single function.
- Flick the light on and off.
- Cycle through each fan speed, from low to high.
- If your fan has a reverse function, test that too.
Listen closely for any weird noises—clicking, scraping, or a loud hum. Watch for any wobbling or flickering lights. Most of the time, everything works like a charm right out of the box. But if you spot an issue, don’t sweat it. It’s almost always an easy fix.
Taming the Dreaded Fan Wobble
A wobbly fan is probably the #1 issue people run into after an installation. It can look a little scary, especially on high speed, but it’s rarely a sign of danger. It just means the blades are slightly out of balance—something you can fix in about 15 minutes with the balancing kit that came in the box.
Inside that kit, you'll find a small plastic clip and a few sticky weights. The process is pretty simple: clip the plastic piece onto the edge of one fan blade and turn the fan on. Move the clip from blade to blade, running the fan each time, until you find the spot where the wobble nearly disappears.
Once you’ve identified the problem blade, stick one of the adhesive weights on the top center of that blade, right where the clip was. That should solve it for good. For a more detailed guide, you can check out our complete guide on how to balance a ceiling fan.
Solving Common Light and Sound Issues
What if the fan spins but the light is dead? Or there's an annoying hum that just won’t quit? These are common hiccups with surprisingly simple solutions. Before you start thinking you have a dud, run through this quick checklist.
Troubleshooting Checklist
| Issue | Potential Cause | The Fix |
|---|---|---|
| Light Won't Turn On | Loose bulb or a missed connection. | Kill the power. Make sure the bulbs are screwed in tightly. Then, double-check that the blue wire connection (or the quick-connect plug for the light kit) is secure. |
| Fan Hums Loudly | Loose screws or an incompatible dimmer. | Power off. Go back and check that every screw—on the motor, canopy, and blade brackets—is tight. If it's on a dimmer, make sure the switch is rated for both a fan motor and LED bulbs. |
| Fan Won't Spin | Leftover shipping materials. | Some fans have little rubber blocks wedged into the motor to protect it during shipping. It's an easy thing to miss. Make sure all of them have been removed. |
A persistent, loud electrical hum is almost always caused by the wrong kind of dimmer switch. A standard light dimmer just can't handle a fan motor's electrical load and can eventually damage it. Always use a dimmer specifically designed for ceiling fans.
When to Make the Call to a Professional
You did it. You successfully installed a new fixture that adds comfort and value to your home. That’s a big deal. As more homeowners look for fans that are both functional and beautiful, getting the installation right is what makes these stylish fixtures truly shine.
But sometimes, a problem is bigger than a simple DIY fix. If you've tried all the troubleshooting steps and the fan still isn't working right, it's time to call in a pro. The same goes for any weird electrical issues, like other lights on the circuit flickering. A licensed electrician can diagnose the problem safely and protect both your home and your new fan.
Have a Few Questions About Your Fan Installation?
It’s totally normal. Even a project that seems straightforward on paper can throw you a curveball once you’re up on the ladder. Let’s tackle some of the most common questions that pop up when you're learning how to install a ceiling fan light. We’ll get you through these last few hurdles with confidence.
Can I Just Swap Out My Old Light Fixture for a Ceiling Fan?
Yes, absolutely! This is probably one of the most popular DIY electrical upgrades out there. But there's a huge safety check you have to do first. The electrical box in your ceiling needs to be "fan-rated."
A regular junction box meant for a simple light just can't handle the load. We're not just talking about weight—an average fan can easily top 35 pounds—but also the constant vibration and torque from the spinning motor. It adds a ton of stress.
If the box isn’t rated for fan support, you have to replace it. This isn't just a friendly tip; it's the single most important safety step of the whole project.
Uh Oh, My Wiring Colors Don’t Match the Instructions. Now What?
Don't panic—this happens all the time, especially in older homes where wiring standards were a bit of a free-for-all. If you open up the junction box and see a jumble of colors that don't match what the manual shows, the smartest thing you can do is stop right there.
Seriously, don’t guess. Grab a non-contact voltage tester or a multimeter to figure out what each wire does. You're looking for the "hot" wire (which has power when the switch is on), the "neutral" (which completes the circuit), and the "ground" (your safety wire). If you have even the slightest doubt, it’s always better to call a licensed electrician. A quick professional consult is way better than a dangerous, faulty connection.
How Do I Stop My New Fan from Wobbling?
A wobbly fan is almost always an imbalance issue, not a sign that it's about to fall out of the ceiling. The fix is usually surprisingly simple.
First, kill the power and get back on the ladder. Check that every single screw is completely tightened down. I mean all of them: the ones holding the blades to their brackets, the brackets to the motor, and the downrod to the motor housing. Give the canopy a little push to make sure it's snug against the ceiling, too.
Still got a wobble? It’s time to break out the balancing kit that came in the box. It should have a little plastic clip and some small adhesive weights.
- Start by placing the clip on the back edge of one of the fan blades.
- Turn the fan on medium and watch the wobble. Is it better or worse?
- Turn the fan off and move the clip to the next blade. Repeat until you find the blade where the clip makes the biggest difference and the wobble is nearly gone.
- You’ve found your culprit. Stick one of the adhesive weights on the top of that blade, right in the center, in line with where the clip was.
That little adjustment is usually all it takes to get years of smooth, quiet operation.
At Fan Connection, we believe a beautiful fan deserves a perfect installation. When you invest in a premium model designed to be a centerpiece, like the sleek Fan Connection Bowie (which retails for over $300), getting these final details right makes all the difference. Check out our entire collection of stylish, high-performance ceiling fans at https://www.fanandlights.com.


